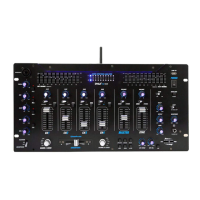
29) POWER SWITCH
Press this button to turn on the unit after all input devices are already connected to prevent
Damage to you equipment. Turn the mixer on before you turn on the amplifier and turn off
Amplifiers before you turn off the mixer.
30) EQUALIZER ON/OFF SWITCH
Allow you to select the equalizer working situation
31) LED LIGHT CONTROL
There are 3 selector to allow you to off the lights on both the knobs and the decoration line, or
only lights on the knobs, or both the decoration line and knobs LED on.
32) HEADPHONE VOLUME CONTROL
Let you to control the volume level of headphone
33) HEADPHONE JACK
Accept headphone with 1/4” plug
34) HEADPHONE CUE/PGM CONTROL
Let you to listen simultaneously or separately to the CUE material or the active program.
35) POWER SUPPLY INPUT JACK
To connect with the power cord
36 & 37) BALANCE OUTPUT CONNECTOR
Connect the mixer to a amplifier with the balanced connector
38) ZONE OUTPUT
Connect the mixer to a second receiver or amplifier powering speakers in the DJ booth or in a
remote location.
39) RECORD OUTPUT
Connect the mixer to a second receiver or amplifier powering speakers in the DJ booth or in a
remote location.
40) MASTER OUTPUT
Connect the mixer to an amplifier
41) WINDOWS
To allow the BLUETOOTH signal transmit.
42) LINE INPUT
Let you connect most high-level audio source, such as CD players, tape deck, tuner or VCR.
43) DUAL PURPOSE STEREO INPUTS
For using a turntable with a magnetic cartidge or a high level input source
44) INPUT SELECT SWITCHES
Set these switches based on what is plugged into Phono1/Line1 and Phono2/Line 3 inputs
jacks
45) MICROPHONE JACK INPUT
To connect with a microphone 1/4” Jack
46) GROUND SCREW
For turntables
47) BLUETOOTH ANTENNA
For better performance of bluetooth signal receiving
48) BLUETOOTH OUTPUT
Connect the mixer to another unit using a RCA plugs
49) INPUT SELECT SWITCHES
Set these switches based on what is plugged into Phono1/Line1 and Phono2/Line 3 inputs
jacks

 Loading...