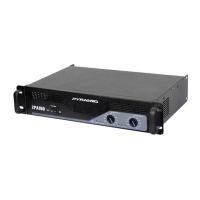
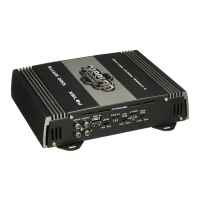
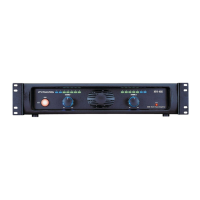
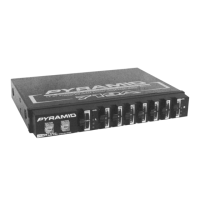
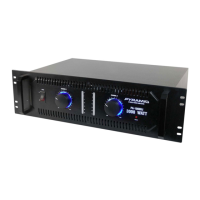
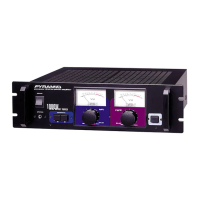
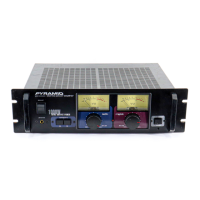
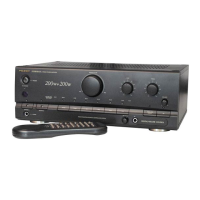
The Pyramid ARCTIC SERIES High Speed Power Amplifier is designed to provide high-quality stereo reproduction in mobile applications. Utilizing the latest electronic technology, these amplifiers are engineered for easy installation with included mounting hardware and operate on a 12-volt DC negative ground power supply. The series includes models PB-101, PB-251, PB-301, and PB-601, each offering varying power outputs and features to suit different audio system needs.
Function Description:
The amplifiers are equipped with several key functions to optimize audio performance and ensure safe operation:
- Power On LED: This indicator illuminates when the remote on system is energized, confirming that the amplifier is receiving power and is active.
- Protection LED (PB-301/PB-601): This LED lights up when the protection circuitry is engaged, disabling the amplifier due to an input overload, speaker short circuit, or extreme high-temperature conditions. This feature safeguards the amplifier from damage. To reset, the remote power should be turned off and then on again. If the shutdown is due to thermal overload, allow the amplifier to cool down. For input overload or speaker short circuit, the underlying issue must be corrected before restarting.
- Low Level Input (High Impedance): These gold-plated RCA input jacks are designed to match the output of car stereos and equalizers with line-level output. Users should connect the RCA input with the car stereo output using RCA type connector cables.
- High Level Input (Low Impedance): For car stereos lacking RCA output jacks, this input allows connection of the speaker output from the stereo system directly to the amplifier.
- Input Gain Control: This control allows users to match the output of the stereo to the amplifier. Turning the control clockwise increases volume, while turning it counter-clockwise decreases it. If distortion occurs at high stereo volumes, the gain should be turned down. This adjustment helps achieve an optimal listening level without distortion.
- Subwoofer Crossover Frequency Control (PB-301/PB-601): This feature allows adjustment of the crossover frequency from 45-400 Hz for both channels, enabling fine-tuning for subwoofer integration.
- Subwoofer Crossover On/Off Switch (PB-301/PB-601): This switch allows users to activate or deactivate the crossover function, setting the amplifier to drive a connected subwoofer.
- Power Supply Terminals (+12V, Ground, Remote):
- +12V: Connects to the +12V DC power supply wire from the battery's positive terminal.
- Ground: Connects the ground wire from the automobile's chassis or the battery's negative terminal. For optimal grounding and to prevent motor boating noise, an additional 12-gauge minimum wire should connect the negative battery terminal to the stereo unit's chassis.
- Remote: Connects to a control wire that provides a positive 12V signal for remote turn-on and turn-off of the amplifier, typically from the radio/cassette player's auto antenna lead.
- Power Fuse: This fuse protects both the amplifier and the automobile's electrical system from short circuit conditions.
- Speaker Output Terminals: These 14K gold-plated terminals are designed for high conductivity and minimum impedance loss. They face upwards for easy wiring in tight spaces. Users should strip just enough insulation from speaker wires to fit under the screw plate, preventing short circuits.
- Tri-Mode Bridging Capability (PB-601): The PB-601 amplifier can be bridged into different configurations:
- Three-channel Mode: Channels 3 & 4 can be bridged into one high-power channel for subwoofer applications, while channels 1 & 2 remain in stereo mode for satellite components.
- Two-channel Mode: Channels 1 & 2 can be bridged into one high-powered channel, and channels 3 & 4 can be bridged into a second high-powered channel. When bridging, speakers capable of handling at least 100 Watts RMS on the bridged channels should be used.
- Mute Turn On Circuit: The amplifier incorporates an anti-thump delay circuit to eliminate irritating "thump" noises often associated with cheaper amplifiers during power-on.
Important Technical Specifications:
The specifications vary by model:
- Output Power (@ 14.4 V.DC, 1 KHz):
- PB-101: 120W x 2 MAX
- PB-251: 75W x 4 MAX
- PB-301: 150W x 2 MAX
- PB-601: 150W x 4 MAX
- Bridged Mode (PB-601): 300W x 2 or 150W x 2 and 300W x 1
- Frequency Response: 10-30,000 Hz (±3 dB)
- Input Impedance: 10K Ohms (Low Level), 100 Ohms (High Level)
- Input Sensitivity: 250mV (Low Level), 2.5V (High Level)
- Power Supply Voltage: DC 14.4 Negative Ground (10.5-16V)
- Matching Speaker Impedance: 4-8 Ohms
- Maximum Current Draw:
- PB-101: 5A
- PB-251: 10A
- PB-301: 15A
- PB-601: 40A
- Dimensions (W x H x D):
- PB-101: 200 x 50 x 159 mm
- PB-251: 200 x 50 x 220 mm
- PB-301: 200 x 50 x 245 mm
- PB-601: 200 x 50 x 406 mm
- Net Weight:
- PB-101: 1.10 Kgs
- PB-251: 1.60 Kgs
- PB-301: 1.80 Kgs
- PB-601: 3.00 Kgs
Usage Features:
- Installation: The amplifier comes with all necessary mounting hardware. It should be installed in a convenient location within the vehicle that allows for sufficient airflow, is free from dust, and has no moisture, as the unit generates significant electrical energy and heat. Adequate space around the cooling fins is crucial for proper cooling. The amplifier must be securely mounted to prevent it from becoming a driving hazard.
- Input Connections:
- High Impedance Input: Connects to the car stereo output using RCA type connector cables.
- Low Impedance Input: Connects to the speaker output from the stereo system if RCA output jacks are unavailable.
- Important Note: High and low-level inputs must be used independently; do not connect more than one input at the same time. For stereos with only RIGHT and LEFT outputs, a Y-adaptor may be required for RCA connections.
- Speaker Connections: For 4-channel output mode (PB-601), speaker output terminals connect to corresponding speakers. For 2-channel output mode (PB-601), the amplifier can be bridged by pushing the bridge switch of 1-2CH and 3-4CH to the bridged position, using high-quality speakers capable of handling high power output. In this mode, only the 1-2CH and 3-4CH speakers will be activated.
- 2-Channel Stereo Output Combined with Mono Subwoofer Output Mode (PB-601): Push the Bridge/Stereo switch of 3-4CH to the bridged position. The subwoofer connects to the 3-4CH speaker terminal, while the RIGHT signal outputs from the 2-RIGHT speaker terminal and the LEFT signal outputs from the 1-LEFT speaker terminal.
- Power Connection: Ensure correct connections to the battery's positive terminal (+12V), the vehicle's chassis or battery's negative terminal (GND), and the remote turn-on lead from the radio/cassette player (REMOTE). Proper grounding is essential to prevent noise issues.
- Testing and Adjustments:
- After all connections, turn on the stereo and listen for the amplifier. If unusual noises occur, turn off the system and recheck wiring.
- Adjust the gain control to match the radio's output level. Set the radio volume to 2/3 position, then adjust gain for an average listening level.
- Turn the radio volume down and listen for background noise.
- Start the vehicle and listen for electrical noise.
- Fine-tune sensitivity to reduce background and engine noise.
- Caution: Do not turn sensitivity up beyond what is needed for clear sound at 2/3 volume. This adjustment is typically a one-time process.
Maintenance Features:
- Protection Circuitry: The built-in protection circuit automatically disables the amplifier in case of input overload, speaker short circuit, or extreme high temperatures, preventing damage. Users are advised to identify and correct the cause of the protection mode before restarting the amplifier.
- Cooling: Ensure the amplifier is installed in a location with sufficient airflow and minimal dust to allow for proper cooling, as it generates heat during operation.
- Secure Mounting: Keeping the amplifier tightly secured prevents vibration-related issues and ensures safety.
- Wiring Integrity: Periodically check speaker wire insulation and connections to prevent short circuits and maintain optimal performance.