13
unlock the trigger and hold the trigger
open. Then close the priming valve.
7. Keep the trigger held open and allow
the pump to run and watch the fluid
discharging from the gun. Allow the
fluid to discharge until pure material is
coming out. Turn the machine off.
8. To further bleed out any air, point the
gun into the material bucket or hopper
and hold the trigger open. Turn the
machine on and allow clean material
to recirculate. Watch the material to
make sure there are no air bubbles.
9. Now turn off the unit and lock the
trigger
The drain tube may now be rejoined to
the suction tube in the material bucket.
( If you are using a hopper, place the drain
tube in the hopper).
The unit is now primed and ready to install
the tip and tip guard.
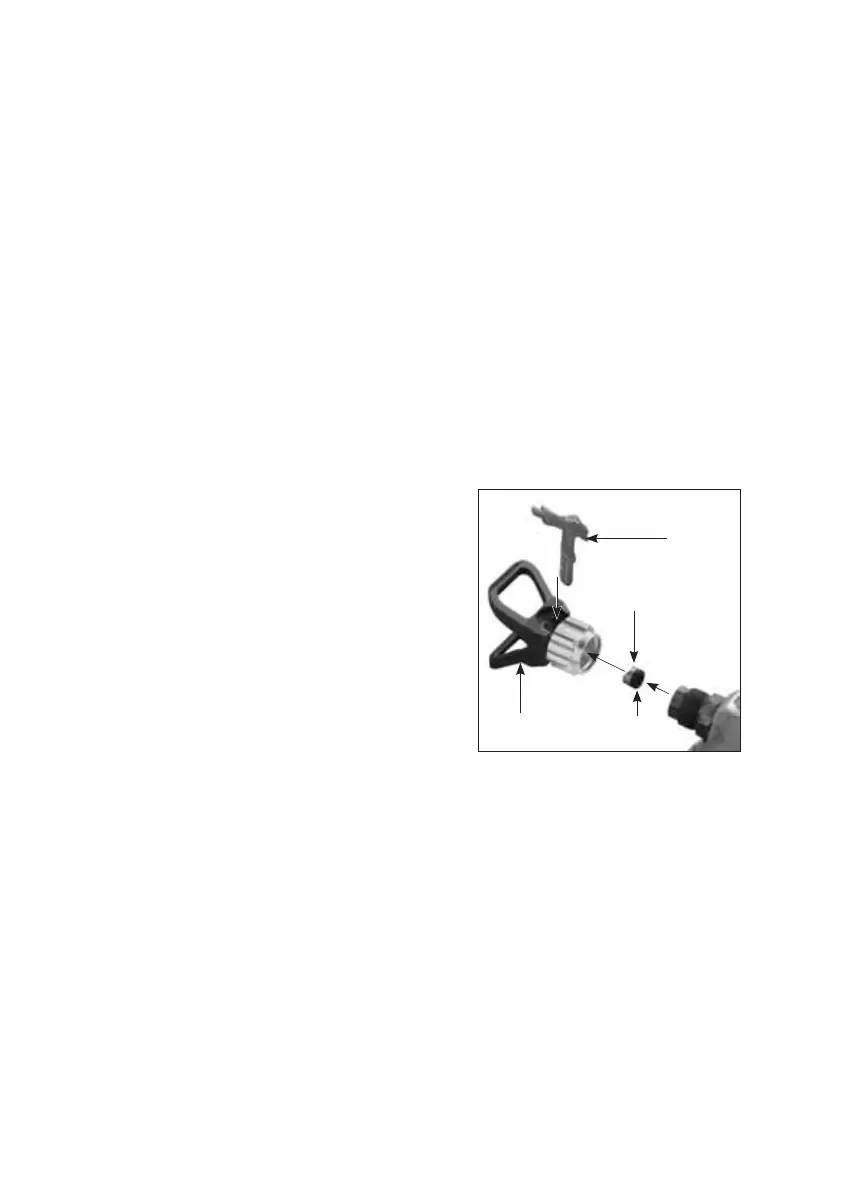
SPRAY TIP ASSEMBLY (reversible type tips)
WARNING: If the unit is pressurized, follow
the PRESSURE RELIEF PROCEDURE before
performing any adjustment with the tip.
Please see the section below “Spray Tip
Selection” to choose the right tip for your
application.
1. Double check to be sure the gun safety
latch is locked before assembling tip
and tip guard to the gun.
2. If it is not installed, ensure the seal is
snapped in place on the seat and insert
the seat into the tip guard. Make sure
that it is aligned to the circular opening
in the tip guard.
3. Thread the tip guard onto the gun
nger tight only.
4. Insert the tip into the tip guard and
ensure that it is fully home. Rotate the
tip all the way to the forward position.
(the arrow on the tip handle will point
forward). The tip can be rotated 180
degrees for clearing clogs.
5. Turn the tip guard assembly to the
desired orientation and tighten the lock
nut rmly by hand only.
WARNING: Never attempt to spray with the
tip in any position in-between either fully
forward or fully reversed. It could cause a
high pressure hazard.
You are now ready to spray.
Tip
Tip Guard
Seat
Seal