15
bounce-back of the material and a rough
nish.
ALL MODELS
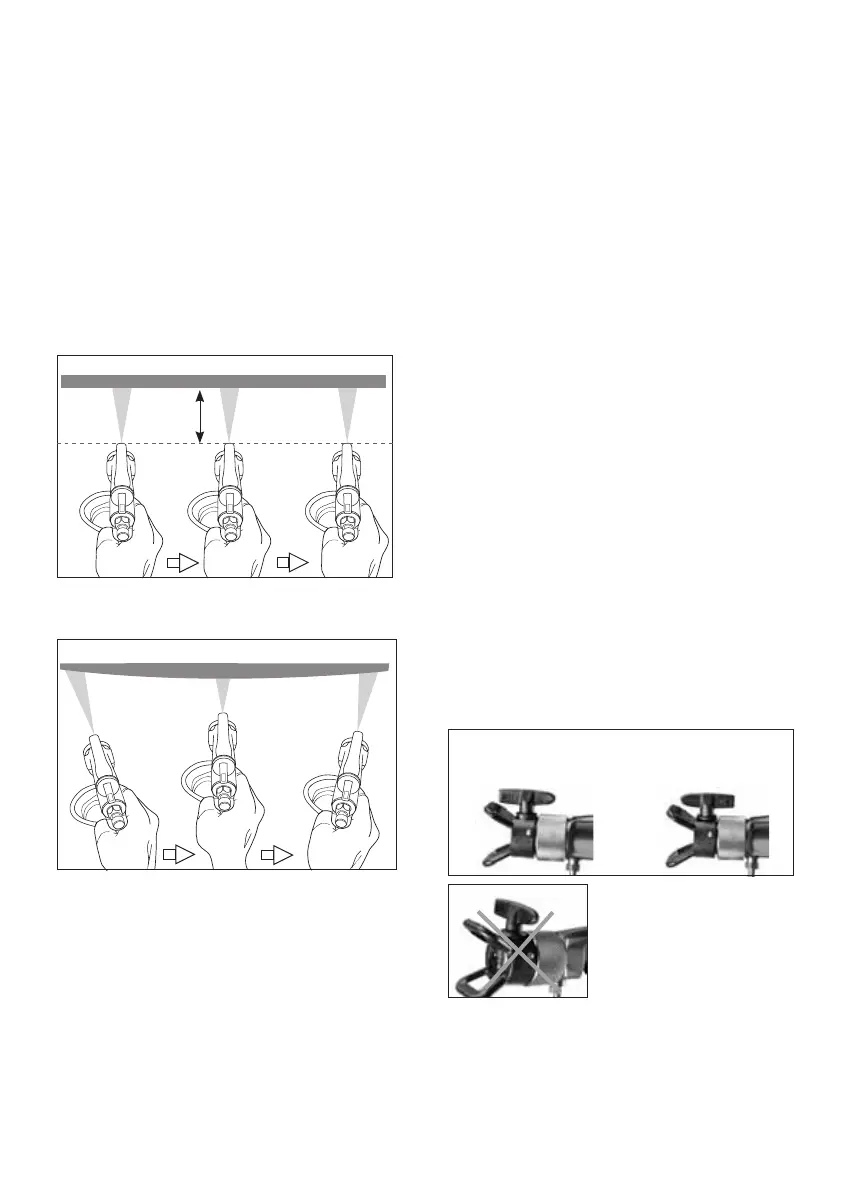
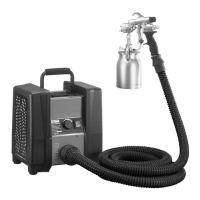
While spraying, consistently hold the gun
perpendicular, about 25-30cm (10-12
inches) away from the surface. Do not swing
the gun. Do not tilt the gun.
Trigger the gun before moving and release
the trigger after each stroke. Overlap each
previous stroke by half. Do this by aiming the
tip to the edge of the previous stroke.
Work in sections within your reach. When
painting corners, point the gun parallel to
the corner. Cut in edges and corners first.
Then paint at areas.
Do not allow the material to run out.
Remember to follow the PRESSURE RELIEF
PROCEDURE before refilling material. If
the material does run out, the pump will
suck in air. This air must be bled out before
continuing. Follow the instructions for
“Priming” above.
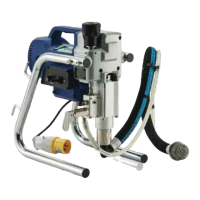
TO REMOVE CLOGS FROM SPRAY TIP
(reversible tips)
1. Lock gun safety latch and follow the
PRESSURE RELIEF PROCEDURE.
2. Turn Tip handle 180 degrees.
3. Disengage trigger lock & trigger gun
into pail.
4. If the Tip handle appears locked loosen
the retaining nut. The handle will now
turn easily.
5. Engage gun safety latch & return tip
to the spray position.
Even coat throughout
RIGHT
Approximately
10 to 12 inches
WRONG
Light Coat
Heavy Coat
Light Coat
Do not ex wrist while spraying
Forward position
(for spraying)
Reversed position
(for clearing clogs)
Never attempt to spray
with the tip in any
position other than fully
forward or fully reversed.