18
minimum position and turn the unit on.
9. With the trigger held open, slowly turn
the pressure knob clockwise to increase
the pressure just enough to let the
pump run.
10. Allow the pump to run and watch the
material discharging from the gun.
Allow the material to discharge until the
material begins to thin. This indicates
that the flushing fluid is coming up the
hose..
11. Without releasing the trigger, quickly
transfer the gun from the material
bucket to the waste bucket next to it.
WARNING: Do not release the gun trigger
during this process. If you release the trigger,
pressure will build in the line and when
you re-squeeze the trigger there will be a
splashback hazard.
12. Keep the trigger held open and allow
the pump to run and watch the fluid
discharging from the gun. Allow the
fluid to discharge until all traces of
material are gone and pure flushing
uid is coming out.
13. Without releasing the trigger, transfer
the gun to the flushing bucket and
allow the ushing uid to recirculate for
2-3 minutes to make sure that all traces
of the material are cleaned out.
14. Turn off the machine and unplug. Open
the priming valve to relieve residual
pressure.
15. Remove the suction tube out of the
ushing uid.
( If you are using a hopper,
continue flushing until the hopper is
empty.)
16. Clean the inlet strainer or hopper
strainer. Remove and clean it with a soft
brush in the appropriate solvent and
replace.
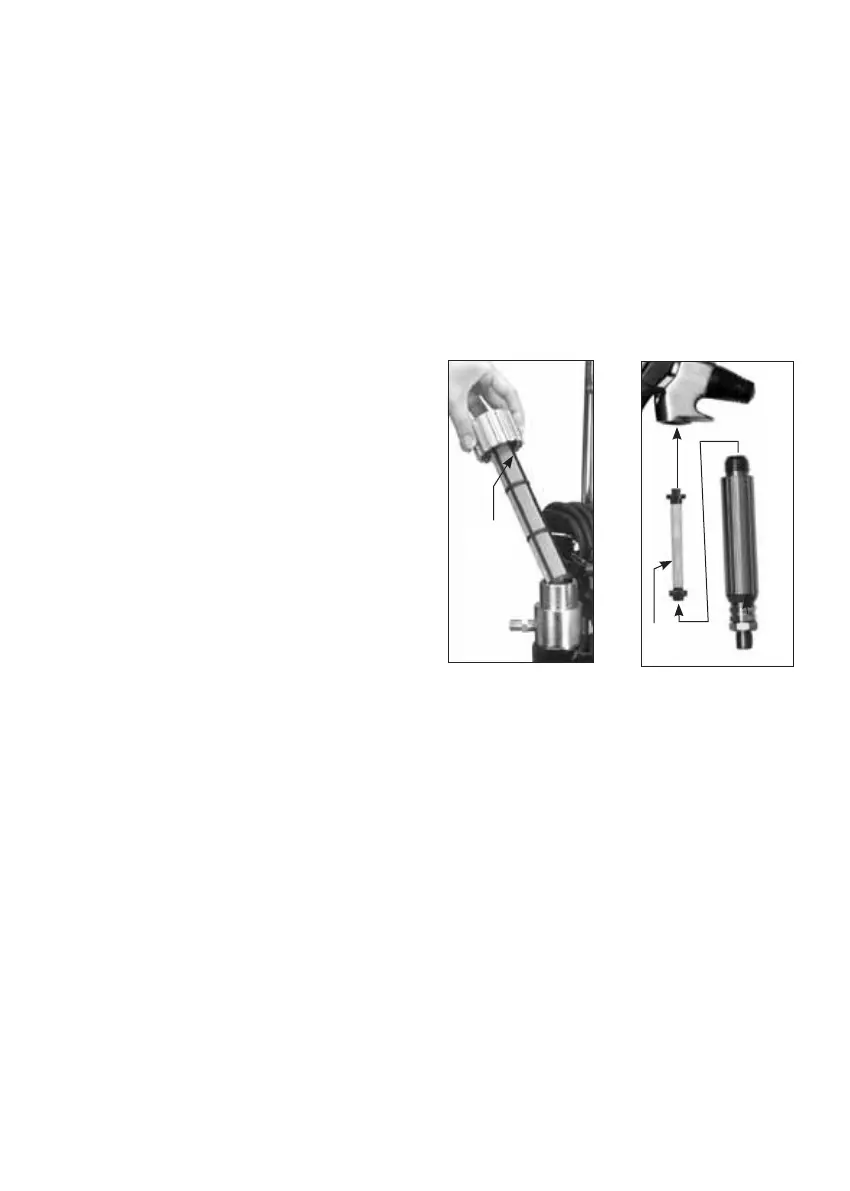
17. Clean the pump filter. Using the
supplied wrench, remove the pump
lter and clean it with a soft brush in the
appropriate solvent. Then replace and
tighten.
18. Clean the gun, tip, and gun filter.
unclip the hand guard and rotate it
out of the way. Then, using a wrench
(not supplied) loosen the nut on the
bottom of the handle and remove the
handle to remove the gun lter. Clean
the tip and filter with a soft brush in
the appropriate solvent. Apply a small
amount of light oil such as WD-40 to
the inside of the spray gun housing.
Place the filter in the spray gun and
reassemble the unit by tightening the
nut with the wrench.
19. Clean the exterior of the sprayer with a
rag soaked in the appropriate solvent.
pump
lter
gun
lter
 Loading...