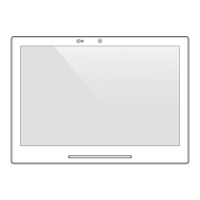
The TD-1070 is a Touch Panel PC designed for various applications, offering a blend of functionality, robust technical specifications, and user-friendly features for both installation and maintenance.
Function Description
The TD-1070 serves as a versatile Touch Panel PC, suitable for deployment in diverse environments. Its primary function is to provide an interactive display and computing platform, supporting applications that require touch input and a compact form factor. It can be installed in both landscape and portrait orientations, making it adaptable to different spatial and application requirements. The device is designed for easy installation, offering both tape mount and surface mount options, and includes features for discreet cable management.
Important Technical Specifications
The TD-1070 operates within a temperature range of 0°C to 40°C.
Power Adapter Information:
- Model: WA-30P12R
- Input: 100-240V~50-60Hz 0.9A
- Output: 12.0V 2.5A 30.0W
The power consumption in networked standby is 5.26W, with all wired and wireless network ports activated.
Connectivity and Ports:
- USB 2.0: Multiple ports for peripheral connections.
- USB Type C: For ADB (Android Debug Bridge) functionality.
- RJ45/PoE+: Supports Power over Ethernet (36-57Vdc), simplifying installation by providing both data and power through a single cable.
- Micro SDHC: For expandable storage.
- DC 12V: Dedicated power input.
- Audio Jack: For audio input/output.
Physical Features:
- MIC: Integrated microphone.
- Optical Sensors: For environmental sensing or presence detection.
- Camera: Built-in camera for various applications.
- Display: Touch-enabled display.
- Front LED & Side LED: Status indicators.
- Reset Button: For system reset.
- Kensington Lock Slot: For physical security.
Mounting Compatibility:
- The Panel PC is compatible with VESA mounting (75mm x 75mm). It is recommended to secure with M3 screws. The suggested length of the M3 screw is the thickness of the VESA mounting bracket plus 8mm (screw not included).
- M2/M3 screw Torque: <2 kgf-cm.
- Installation height: <2M.
Usage Features
Flexible Installation:
The TD-1070 offers two primary installation methods:
- Tape Mount:
- Step 1: Attach tape to the back of the bracket.
- Step 2: Install the I/O cover.
- Step 3: Fix 2* M2 screws.
- Step 4: Place the bracket on the back side of the Panel PC.
- Step 5: Fasten M3 screw*1 to secure the bracket and back cover.
- Step 6: Fix the Panel PC on the surface using tape.
- Note: Ensure the mounting surface is clean and smooth before using the tape.
- Surface Mount:
- Step 1: Install the bracket on the surface (screws not included).
- Step 2: Mount the Panel PC on the bracket.
- Step 3: Fasten M3 screw*1 to secure the bracket and back cover.
Cable Management:
The device features discrete cable outlets, facilitating clean and organized cable management for both landscape and portrait installations.
Powering On:
The device powers on automatically when DC or PoE+ is inserted, simplifying deployment.
FCC and CE Compliance:
The device complies with Part 15 of the FCC Rules and CE RF exposure guidelines, ensuring safe operation. It is recommended to place the product at least 20cm from nearby persons to maintain compliance with RF exposure guidelines.
Maintenance Features
Device Removal Procedure:
For maintenance or replacement, the TD-1070 can be carefully removed from its bracket:
- Step 1: Remove the top screw connecting the TD-1070 to the bracket.
- Step 2: With both hands supporting the top and bottom of the TD-1070, carefully tilt the top section downward 30°.
- Step 3: Gently pull the TD-1070 down to remove it from the bracket.
- Step 4: Apply a hot air gun to the tape beneath the bracket until loose (if tape mounted).
- Step 5: Slowly pull the tape and the bracket downward off the surface (if tape mounted).
- Note: Do not remove the bracket or tape from the surface forcefully, as excessive force may lead to damaged surfaces.
Surface Preparation for Tape Application (Maintenance and Installation):
Proper surface preparation is crucial for optimal tape adhesion, which is important for tape-mounted installations and subsequent maintenance.
- General Procedure: Clean bonding surfaces with a 50:50 mixture of isopropyl alcohol (IPA) and water or heptane.
- Step A: Solvent wipe.
- Step B: Wipe dry.
- Step C: Apply tape to surface.
- Step D: Roll finished joint.
- Exceptions:
- Heavy Oils: May require a degreaser or solvent-based cleaner followed by IPA/water.
- Abrasion: Abrading the surface followed by IPA/water cleaning can improve adhesion.
- Porous Surfaces: May need to be sealed to provide a unified surface.
- Unique Materials: Special preparation may be needed for glass, copper, and certain plastics or rubbers.
- Bond Strength Development:
- Firm application pressure (at least 15 psi / 100 kPa) is essential.
- Bond strength increases over time: approximately 50% after 20 minutes, 90% after 24 hours, and 100% after 72 hours at room temperature.
- Elevated temperatures (e.g., 150°F [66°C] for 1 hour) can accelerate bond strength development.
- Note: Cleaner solutions may contain volatile organic compounds (VOCs). Consult local Air Quality Regulations and follow manufacturer's precautions when handling solvents.
Battery Replacement:
- Caution: Risk of explosion if the battery is replaced by an incorrect type.
- Wait one-half hour after switching off before handling parts.
- Avoid disposing of batteries into fire or hot ovens, crushing or cutting them, or exposing them to extremely high temperatures or low air pressure, as these actions can result in an explosion or leakage of flammable liquid or gas.
Environmental Responsibility:
The product is marked for correct disposal within the EU, indicating it should not be disposed of with other household wastes. Users are encouraged to recycle the device responsibly through return and collection systems to promote the sustainable reuse of material resources and prevent harm to the environment or human health from uncontrolled waste disposal.