F
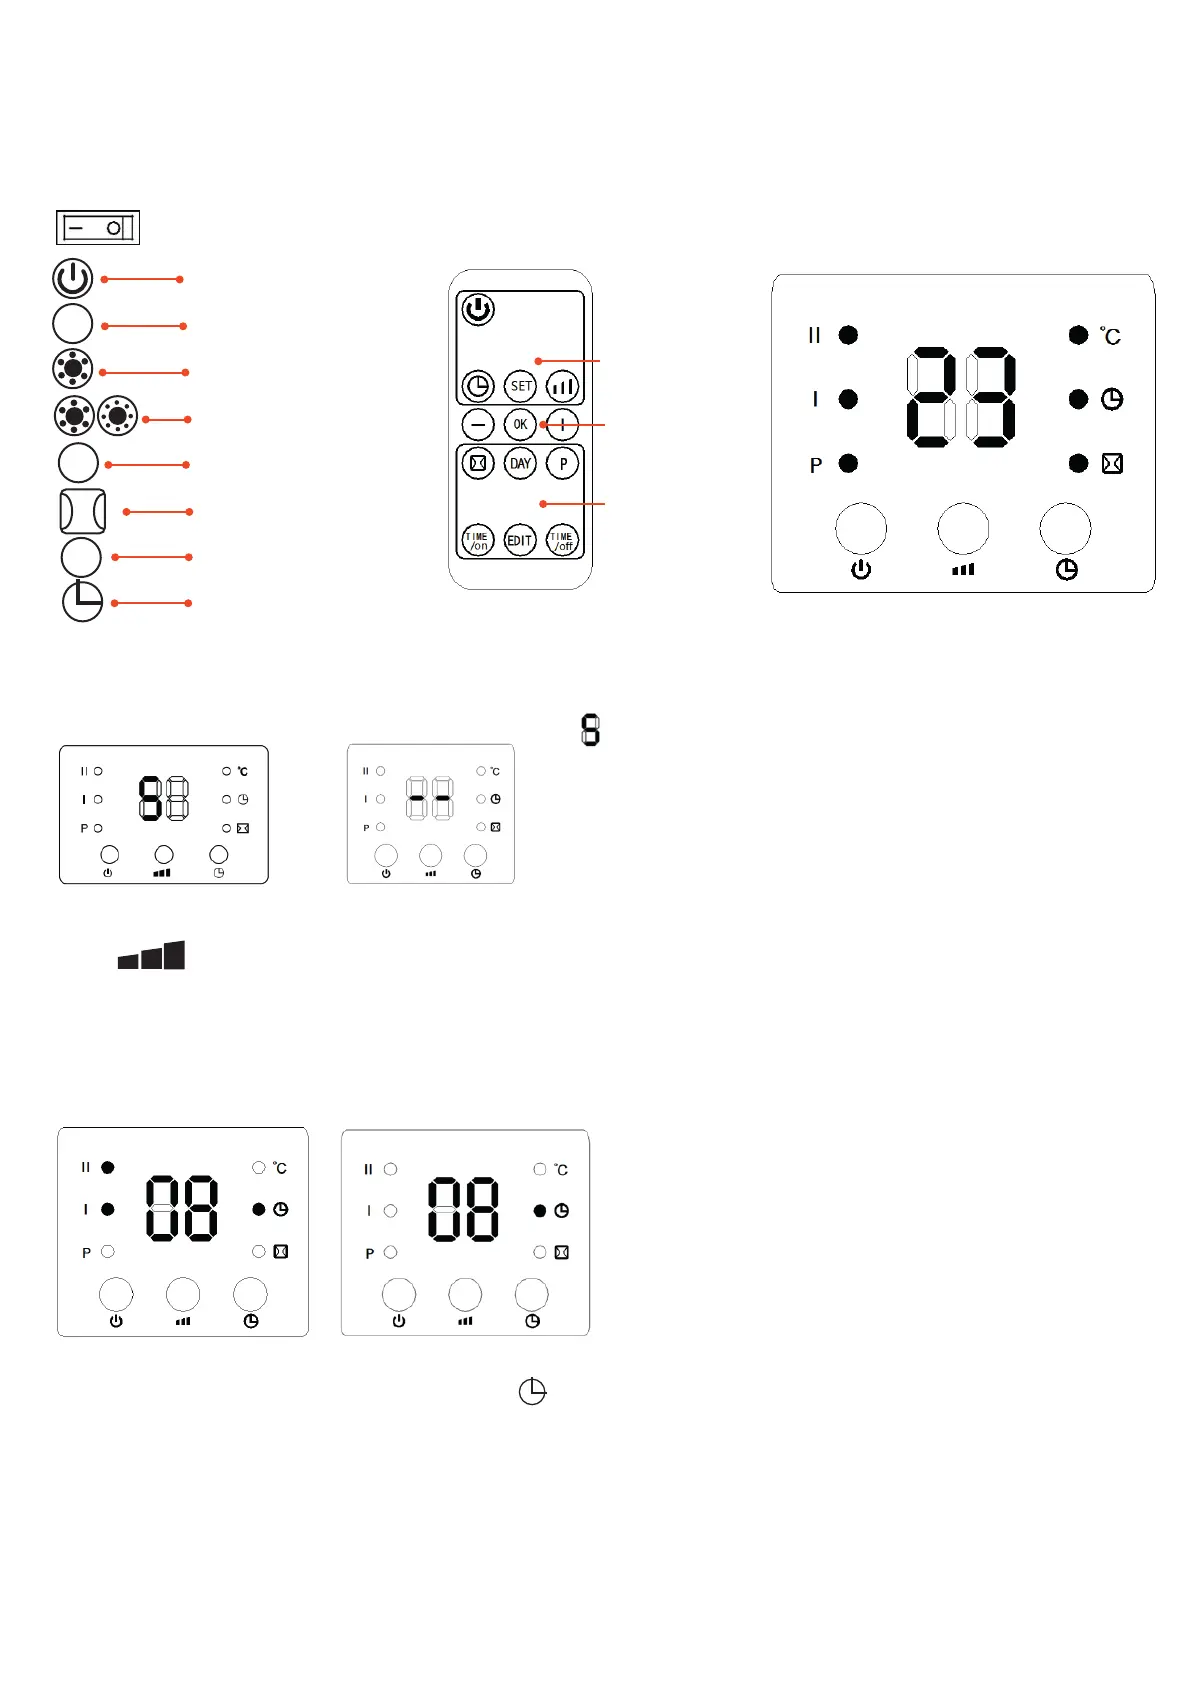
Function operation (from both the control panel and the remote control)
ON-OFF
- Press the ON-OFF switch to switch the unit ON (I) or OFF (O).
Stand-by mode
Power
Select mode
Heating at half output
Heating at full output
P programming weekly setting
Open window setting
°C temperature setting
Timer (on/off)
Part 1 Ordinary function
1. Plug in and switch on by pressing the red switch 0/I, the product will enter standby mode and the display will show “ “:(Fig. 1)
2.press” power “ key, the product enters fan mode and the display shows” ” (Fig. 2)
(Fig. 1) (Fig. 2)
3. press” “ button once, the product operates with low heating (1000W) the display shows “-- / I”. press again and it changes to high heating
(2000W) the display shows “ -- / I / II”. (Fig 3 , Fig 4)
4. Set desired switch-on time: In standby mode, press” time “ button, you can set the desired time between 00 and 24 hours. After the setting is comple-
ted, the display shows the desired switch-on time the timer lamp “ time” is on. The display automatically reduces 1 hour for every hour that passes. When
the switch-on time of the desired time is reached, the product is automatically switched on. The default set temperature is 23˚C. The picture below is an
example to set the desired switch-on time to 8 hours.(Fig. 5)
(Fig. 5) (Fig. 6)
5. set desired switch-on time: In standby mode, press the” time “ button to set the desired switch-on time to 00-12 hours. After setting, the display
shows the desired switch-on time and the “time “ indicator is lit. The screen automatically goes down 1 hour for every hour that passes. When the
appointment switch-on time is reached, the product will automatically switch on. The default set temperature is 23˚C during appointment switch-on time.
The picture below is an example to set the desired switch-on time to 8 hours: (Fig.6)
Note: If you do not set the temperature and weekly programme, the product will automatically switch off after it has worked continuously for 12 hours.
Function operation (ONLY with remote control)
1. Set the current TIME/DAY (can be set either in standby or working mode):
Press the “set” button once, the display shows “12” by default, press the “+”/ “-” button
Normal operation
Confirm temperature
setting and ErP function
Weekly time & window
open detection
 Loading...