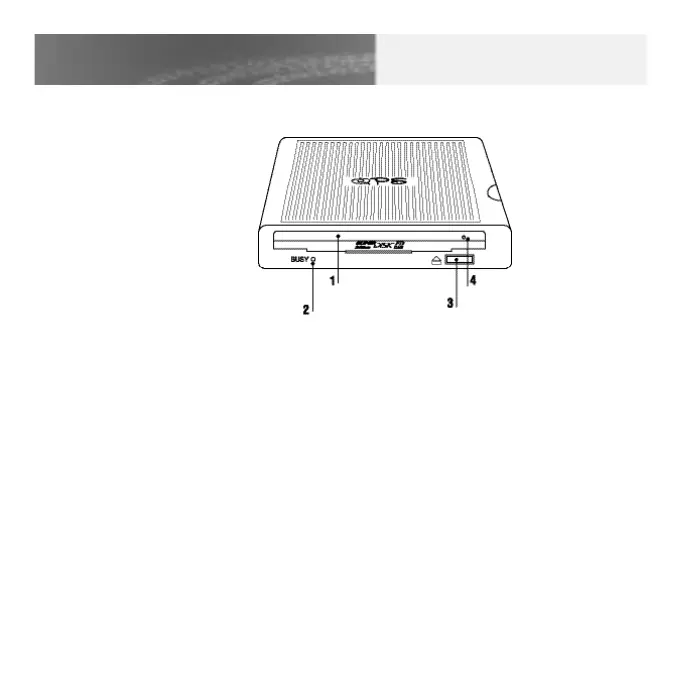
FRONT VIEW
1. Disk Slot
Insert a disk. (See Section 4.1)
2. Busy Indicator
Lights while a command from host is executed. (including read/ write operations)
3. Eject Button
Ejects a disk. For Mac you need to drag the Mounted Disk Icon to the trash
to eject the disk
4. Emergency Eject Hole
Insert an instrument such as straightened paper clip pin into this hole to manually
eject a disk. (See the lower part in Section 4.1)
Note: Please refer to Que! Super Disk 240 Installation Manual CD for complete installation version.
4
PA RTS AND FUNCT I O N S