Do you have a question about the Qualcast cgt183a and is the answer not in the manual?
Maintain a clean, well-lit work area, avoid explosive atmospheres, and keep bystanders away.
Ensure proper plug matching, avoid earthed surfaces, protect from water, and do not abuse cords.
Stay alert, use PPE, prevent unintentional starting, remove tools, maintain balance, and dress appropriately.
Use the correct tool, check operation, disconnect power, store safely, maintain tools, and keep cutting edges sharp.
Use designated chargers and battery packs, keep terminals clear of metal objects, and avoid battery liquid contact.
Have your power tool serviced by a qualified repair person using only identical replacement parts.
Locate and secure the edge guide wheel to the motor housing using the fixing screws.
Attach the safety guard to the trimmer head, ensuring it fits into grooves, and secure with the screw.
Attach the auxiliary handle to its bracket using the bolt and tighten with the adjustment wheel.
Unscrew the locking knob, move the handle bracket, and retighten the knob to secure its position.
Pull the height adjustment locking collar down, set the shaft to desired height, and release collar to lock.
Pull the rotation locking collar, turn the shaft 180° counter-clockwise, and release collar to lock.
Use the designated charger. Avoid metallic objects in connections to prevent electrical hazards.
The battery pack is UNCHARGED. Charge before first use and for batteries not used for long periods.
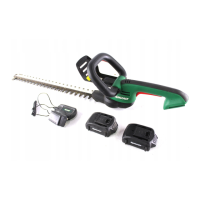
Connect charger, insert battery pack. Charging takes 3-5 hours. Do not leave on charge continuously.
Depress the latches on the sides of the battery pack to release it from the trimmer.
Depress lock off button, then on/off switch. Cutting head continues to rotate after switching off.
Always wear eye protection. Avoid leaning over the head; be aware of flying debris.
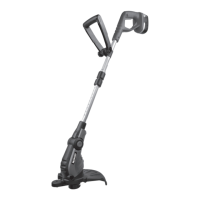
Hold tool correctly, work right to left, trim at 20°, swing side-to-side, cut long grass in stages, cut close to walls.
Rotate shaft 180°, place guide and head above surface to edge, as shown in diagram.
Line feeds automatically when switched on. 'Clattering' noise is normal. More line feeds if noise stops.
Press and release the manual line feed button, then gently pull out line until it reaches the cutter.
Press the release latch on the spool head cover and pull it straight off the cutting head assembly.
Keep cutting head cover and spool holder clean. Ensure cap is correctly fitted.
Recommended to buy spool and line complete. Fit new spool, release line, feed through eyelet, refit cover.
Insert line into spool holes, wind in direction of arrows. Leave ~100mm unwound. Use line up to 1.45mm diameter.
Remove battery before cleaning. Tool needs no lubrication. Wipe clean with dry cloth. Store in dry place.
Check battery pack assembly and charge level. Ensure battery is charged.
Check battery insertion, charger base connection, and indicator light. Verify plug and fuse.
Check cutting head condition. Ensure cutting line is not too short or head is not damaged.