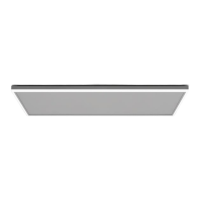
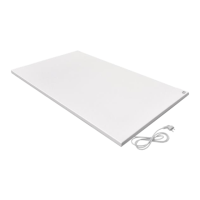
The Quality Heating QH-HL Series infrared panel with LED lighting is designed as an efficient, comfortable, and healthy heating system suitable for various household uses. It aims to reduce air circulation, contributing to a clean, quiet, and dust-free environment. The device is available in different sizes, finishes, and colors to suit diverse aesthetic and functional needs.
Function Description:
The infrared panel provides heating through radiation, and it integrates LED lighting for added functionality. The device is controlled by a remote thermostat that senses room temperature using an integrated sensor. This thermostat sends signals to the panel to turn the heating on or off, maintaining a constant room temperature. Specifically, if the room temperature is 1°C higher than the set temperature, the thermostat sends an OFF command. If the room temperature is 1°C lower than the set temperature, an ON command is sent.
The thermostat also features a separate control panel for the LED lighting, allowing users to turn the lights on/off, adjust brightness (from 5% to 100% in increments of 25%, 50%, 75%, 100% with short presses, or continuously with long presses), and change the light color by pressing and holding the light button. The thermostat display shows the set temperature, measured temperature, time, date, and mode. It includes temperature setting, temperature jump, and program functions. A key lock feature is incorporated to prevent children from unauthorized use. The thermostat also has an "open window detection" feature, which automatically switches off the heating if a sudden drop in room temperature is detected.
Important Technical Specifications:
- Heating Element: Carbon or clad steel sheet
- Heating Method: Infrared heating (radiation)
- Voltage: 220-240V/50Hz
- Surface Temperature: 130-150°C
- Frame Material: Aluminium
- Power Cord Length: 1.90m
- Available Models (Size & Power):
- HH0606L: 655x630x35 mm, 400W, 1.7A
- HH1006L: 1080x630x35 mm, 700W, 3A
- HH1206L: 1280x630x35 mm, 840W
- Thermostat Specifications:
- Battery Operated: 4x 1.5V AAA batteries (not included)
- Set Temperature Range: 0°C ~ 45°C, resolution: 1°C
- Room Temperature Range: 0°C ~ 50°C, display resolution: 0.1°C
- Accuracy of Measured Temperature: 1°C
- Working Environment Range: 1°C ~ 50°C
- Radio Frequency: 433.92MHz
- LCD Screen Functionality: Operates within a temperature range of 1°C ~ 50°C. If the LCD screen is off, only the heating panel is off; the thermostat remains usable until batteries are depleted.
Usage Features:
- Mounting: The panel must be mounted above 1.8 meters high. Installation work should be performed by a professional electrician. The power cables must be properly grounded and disconnectable during connection. The panel should not be hung by its power cord. The protective film on the front must be removed before use.
- Installation Methods:
- Concrete Ceilings: Requires drilling four 10mm holes, inserting metal expansion tubes (C), then securing the mounting brackets (B) with screws (D) into the expansion tubes. Screws must be tightened firmly for safety.
- Plasterboard Ceilings: Requires drilling four 18mm holes. Toggle plugs (E) are designed for plasterboard and wooden ceilings with a thickness between 9mm and 18mm. For thicker wooden ceilings (>18mm), metal expansion tubes (C) or M5*40mm carpentry nails can be used. Screws (D), washers (F), and toggle plugs (E) are inserted into the pre-drilled holes, and screws are tightened.
- Panel Attachment: After securing the brackets, the panel is pushed onto the hooks on the long frames and slid to ensure full insertion. Screws (G) are then tightened on both sides of the panel.
- Thermostat Pairing: To pair the thermostat with the panel, connect the power, then within 30 seconds, press the heating button on the thermostat and hold the "LOCK" and "TIME" buttons until a beep sounds. Pairing must be completed within 1 minute. A single thermostat can be linked to multiple panels.
- Temperature Control: Use the "up" and "down" buttons on the thermostat to set the target temperature.
- Time and Date Setting: Hold the "TIME" button for 3 seconds to set the year, month, date, and time.
- Safety Features: The device should not be used in small rooms if occupants cannot leave independently or are not under constant supervision. Temperature sensors or controllers should not be placed within the 130-degree radiation range of the heating plate to ensure accurate temperature sensing. The device should not be covered during use to prevent overheating and fire hazards. It is not a toy and should be kept away from children and animals.
- Placement: The thermostat should be placed in an open space, not in a drawer, bag, or under a pillow/duvet, to ensure accurate temperature readings. The temperature sensor on top of the thermostat should never be covered.
Maintenance Features:
- Cleaning: The device should be cleaned with a soft, damp, lint-free cloth. Ensure no moisture enters the housing and protect electrical components from moisture. Aggressive cleaning agents, solvents, alcohol-based, or abrasive cleaners should not be used. The housing should be wiped dry after cleaning.
- Battery Replacement: Replace the 1.5V AAA batteries in the thermostat when the battery symbol flashes, as the panel will not operate otherwise. After replacing batteries, the thermostat must be reconnected to the panel. Alkaline batteries are recommended.
- Electrical Safety: Before any maintenance, care, or repair, unplug the device from the socket, holding the plug firmly. The device must be completely cooled down. Tasks requiring opening the enclosure should only be carried out by authorized specialist businesses. Do not touch the plug with wet or damp hands.
- Storage: When not in use, store the device in a dry place, protected from moisture and heat, in an upright position, away from dust and direct sunlight. A cover can be used to protect against dust ingress. No other devices or objects should be placed on top of the unit to prevent damage. Remove batteries from the thermostat if storing for an extended period.
- Troubleshooting:
- Panel noise when connected to power: Normal phenomenon due to structural stress of the heat insulator.
- Increased panel surface: Normal phenomenon due to thermal expansion of surface material.
- Slightly warm panel surface: Normal phenomenon in low-temperature environments or if voltage is low (install a voltage regulator if needed).
- No temperature display in the app: Check WiFi connection to the panel and ensure the remote control is turned on.