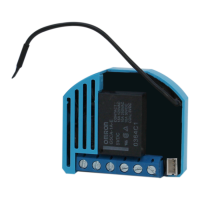
This Z-Wave module is used for switching on or off the
electrical device (e.g. light or fan). The module can be
controlled either through Z-wave network or through the
wall switch. The module is designed to be mounted inside a
“flush mounting box”, hidden behind a traditional wall
switch. Module measures power consumption of electrical
device and supports connection of digital temperature
sensor. It is designed to act as repeater in order to improve
range and stability of Z-wave network.
Supported switches
Module supports mono-stable switches (push button)
and bi-stable switches. The module is factory set to
operate with bi-stable switches.
Installation
To prevent electrical shock and/or equipment damage,
disconnect electrical power at the main fuse or circuit
breaker before installation or any servicing.
Make sure, that no voltage is present in the
installation.
Prevent the disconnecting device from being switched
on accidentally.
Connect the module according to electrical diagram.
Locate the antenna far from metal elements (as far as
possible).
Do not shorten the antenna.
Danger of electrocution!
Module installation requires a great degree of skill and
may be performed only by a qualified and licensed
electrician.
Even when the module is turned off, voltage may be
present on its terminals.
Note!
Do not connect the module to loads exceeding
recommended values. Connect the module only in
accordance to the below diagrams. Improper connections
may be dangerous.
Electrical installation must be protected by directly
associated over current protection fuse 10A, gG or
Time lag T, rated breaking capacity 1500A (ESKA
522.727) must be used according to wiring diagram to
achieve appropriate overload protection of the module.
Electrical diagram 230VAC
Notes for the diagram:
WARNING: Service button S must NOT be used when
module is connected to 110-230V power supply.
Durability of the module depends on applied load. For
resistive load (light bulbs,..) and 10A current consumption
of each individual electrical device, the durability exceeds
100.000 switches of each individual electrical device.
Package contents
Flush 1 relay
Module Inclusion (Adding to Z-wave network)
Connect module to power supply (with
temperature sensor connected - if purchased*),
enable add/remove mode on main controller
auto-inclusion (works for about 5 seconds after
connected to power supply) or
press push button I1 three times within 3s (3 times
change switch state within 3 seconds) or
press service button S (only applicable for 24 V SELV
supply voltage) for more than 2 second.
NOTE 1: For auto-inclusion procedure, first set main
controller into inclusion mode and then connect module to
power supply.
NOTE 2: When connecting temperature sensor to module
that has already been included, you have to exclude
module first. Switch off power supply, connect the sensor
and re-include the module.
Module Exclusion/Reset (Removing from
Z-Wave network)
Connect module to power supply
bring module within maximum 1 meter (3 feet) of the
main controller,
enable add/remove mode on main controller
press push button I1 five times within 3s (5 times
change switch state within 3 seconds) in the first 60
seconds after the module is connected to the power
supply or
press service button S (only applicable for 24 V SELV
supply voltage) for more than 6 second.
By this function all parameters of the module are set to
default values and own ID is deleted.
If push button I1 is pressed three times within 3s (or service
button S is pressed more than 2 and less than 6 seconds)
module is excluded, but configuration parameters are not
set to default values.
NOTE: If the module is included with parameters 100 or
101 with values different to default and module reset is
done, wait at least 30s before next inclusion.
Associations
Association enables Flush 1 relay module to transfer
commands inside Z-Wave network directly (without main
controller) to other Z-Wave modules.
Associated Groups:
Root device:
Group 1: Lifeline group (reserved for communication with
the main controller), 1 node allowed.
Group 2: basic on/off (triggered at change of the output Q
state and reflecting its state) up to 16 nodes.
Group 3: basic on/off (triggered at change of the input I2
state and reflecting its state) up to 16 nodes.
Group 4: Notification report (triggered at change of the
input I2 state and reflecting its state) up to 16 nodes.
Group 5: Binary sensor (triggered at change of the input I2
state and reflecting its state) up to 16 nodes.
Group 6: basic on/off (triggered at change of the input I3
state and reflecting its state) up to 16 nodes.
Group 7: notification report (triggered at change of the input
I3 state and reflecting its state) up to 16 nodes.
Group 8: binary sensor report (triggered at change of the
input I3 state and reflecting its state) up to 16 nodes.
Group 9: multilevel sensor report (triggered at change of
temperature sensor) up to 16 nodes.
Endpoint 1:
Group 1: Lifeline group, 0 nodes allowed.
Group 2: basic on/off (triggered at change of the output
state and reflecting its state) up to 16 nodes.
Endpoint 2:
Group 1: Lifeline group, 0 nodes allowed.
Group 2: basic on/off (triggered at change of the input I2
state and reflecting its state) up to 16 nodes.
Group 3: Notification Report (triggered at change of the
input I2 state and reflecting its state) up to 16 nodes.
Group 4: Binary Sensor Report (triggered at change of the
input I2 state and reflecting its state) up to 16 nodes.
Endpoint 3:
Group 1: Lifeline group, 0 nodes allowed.
Group 2: basic on/off (triggered at change of the input I3,
state and reflecting its state) up to 16 nodes.
Group 3: Notification Report (triggered at change of the
input I3 state and reflecting its state) up to 16 nodes.
Group 4: Binary Sensor Report (triggered at change of the
input I3 state and reflecting its state) up to 16 nodes.
End point 4:
Group 1: Lifeline group, 0 nodes allowed.
Group 2: multilevel sensor report (triggered at change of
temperature sensor) up to 16 nodes.
Configuration parameters
Parameter no. 1 – Input 1 switch type
Available config. parameters (data type is 1 Byte DEC):
default value 1
0 - mono-stable switch type (push button)
1 - bi-stable switch type
Parameter no. 2 – Input 2 contact type
Available config.parameters (data type is 1 Byte DEC):
default value 0
0 - NO (normally open) input type
1 - NC (normally close) input type
Parameter no. 3 – Input 3 contact type
Available config.parameters (data type is 1 Byte DEC):
default value 0
0 - NO (normally open) input type
1 - NC (normally close) input type
Parameter no. 10 - Activate / deactivate functions ALL
ON/ALL OFF
Available config.parameters (data type is 2 Byte DEC):
default value 255
255 - ALL ON active, ALL OFF active
0 - ALL ON is not active ALL OFF is not active
1 - ALL ON is not active ALL OFF active
2 - ALL ON active ALL OFF is not active
Flush 1 relay module responds to commands ALL ON / ALL
OFF that may be sent by the main controller or by other
controller belonging to the system.
Parameter no. 11 - Automatic turning off output after
set time
When relay is ON it goes automatically OFF after time
defined by this parameter. Timer is reset to zero each time
the module receive ON command regardless from where it
comes (push button, associated module, controller,..).
Available configuration parameters (data type is 2 Byte
DEC):
default value 0
0 - Auto OFF disabled
1 - 32535 = 1second (0,01s) - 32535 seconds
(325,35s) Auto OFF enabled with define time, step is
1s or 10ms according to parameter nr.15.
Parameter no. 12 - Automatic turning on output after
set time
When relay is OFF it goes automatically ON after time
defined by this parameter. Timer is reset to zero each time
the module receive OFF command regardless from where
it comes (push button, associated module, controller,..).
Available configuration parameters (data type is 2 Byte
DEC):
default value 0
0 - Auto ON disabled
1 - 32535 = 1second (0,01s) - 32536 seconds
(325,35s) Auto ON enabled with define time, step is
1s or 10ms according to parameter nr.15.
Parameter no. 15 - Automatic turning off / on seconds
or milliseconds selection
Available config.parameters (data type is 1 Byte DEC):
default value 0
0 - seconds selected
1 - milliseconds selected
NOTE: Parameter is the same for turning OFF or ON.
Parameter no. 30 - Saving the state of the relay after a
power failure
Available config.parameters (data type is 1 Byte DEC):
default value 0
0 - Flush 1 relay module saves its state before power
failure (it returns to the last position saved before a
power failure)
1 - Flush 1 relay module does not save the
state after a power failure, it returns to "off" position.
Parameter no. 40 – Power reporting in Watts on power
change
Set value means percentage, set value from 0 – 100 = 0% -
100%. Available configuration parameters (data type is 1
Byte DEC):