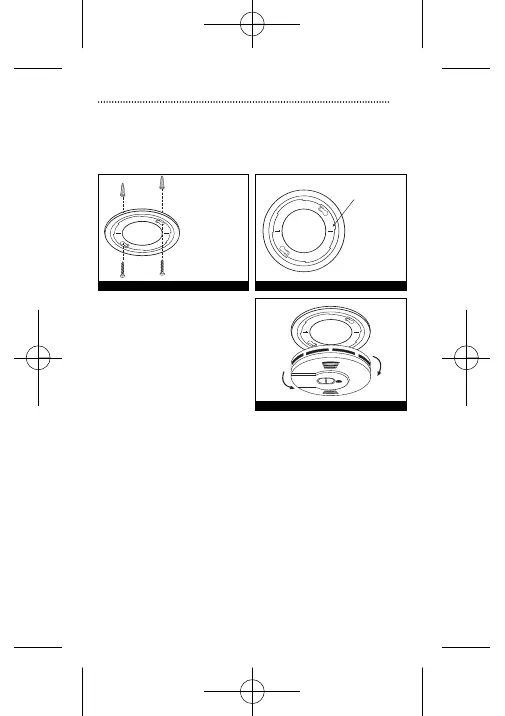
2. After selecting the proper smoke alarm location as described previously, attach the
mounting bracket to the ceiling as shown in Image 2B. For wall mounting see
Image 2A and Figure 4. Place the mounting plate on the wall; be sure the “A” line
is horizontal (parallel to the floor). Use the screws and cavity fixings provided to
secure the mounting bracket (use 3/16” drill bit for wall plugs).
3. This alarm has batteries permanently sealed inside the alarm so no battery
installation or maintenance is necessary.
ACTIVATING THE ALARM
This model is equipped with a feature that automatically activates the alarm
when the alarm is mounted to the mounting bracket for the first time. Once
activated, the batteries will supply power to the alarm for the life of the
alarm (10 years). Be sure that the mounting bracket is mounted correctly
before installing the alarm on the mounting bracket.
INSTALLATION INSTRUCTIONS
CAUTION: THIS UNIT IS SEALED (INCLUDING THE BATTERIES). THE
COVER IS NOT REMOVABLE!
FIGURE 5
When wall
mounting, the
“A” line should
be horizontal.
1. To ensure aesthetic alignment of the
alarm with the hallway or wall, the
“A” line on the mounting bracket
should be parallel with the hallway
when ceiling mounting or horizontal
when wall mounting.
 Loading...