Materials Needed:
2 - 4’ x 8’ sheets of ¾” Plywood (smooth one
side).
Construction Adhesive (to glue the two plywood
sheets together).
12 (or so) 1 ¼” long sheet rock screws
(to screw plywood sheets together).
6 - 3/8-16 x 1” Tee Nuts (for Leveling Feet).
6 - Leveling Feet - 1” diameter foot with
3/8-16 thread x 1”.
4 - #14 x 2” Flat Head Wood Screws
(to attach CompuTrainer to platform).
18 sq. feet of Industrial Floor Tile, appropriate
adhesive and application trowel. (Linoleum is an
acceptable option).
Tools Needed:
Power Saw
Hand Drill
Drill bit for the Tee Nut
1/8” Drill bit
Phillips and Regular blade screwdrivers
Flooring Adhesive & application trowel
1 ½” Hole Saw (Optional)
Jig Saw (Optional)
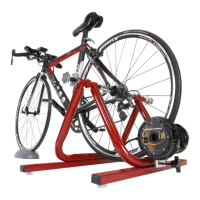
Make your CompuTrainer an immovable installation while protecting your flooring from sweat by mounting your
CompuTrainer to a Race Platform. This will eliminate trainer “walk” when you are up out of the saddle as well as
providing a surface that is easily cleaned. This plan allows running any cables off the bike and below the platform. By
building the Handlebar Controller Mount you will only be attaching the cadence sensor to the bike to speed bike swapping,
or using the cadence Puck to eliminate attaching anything to the bike.
Actual hole locations for the DIN Cable will vary depending upon your bike length and handlebar location, so mock the
bike on the platform before marking hole locations.
¡
¡
¡
¡
¡
¡
68” to 82”
adjust depending on overall bike length
Cut this end (towards the
front wheel) any shape
you wish, maybe with
rounded corners, or at 45º
angle, or long and narrow
similar to the plan used
for MultiRider Centers - or
just leave it square.
32”
Leveling Feet (LF)
locations (under platform)
should be determined
after final shape is set.
¡
¡
Placement of all holes
should be determined
after trainer and bike
are temporarily placed
on the platform and the
DIN Cable mocked into
place for length.
DIN Cable goes down
through this 1½” hole to
connect to Handlebar
Controller
á
â
ß
à
¡
Part# R984-041-00A
05/2014
Platform Details
Detailed Assembly Instructions on Reverse Side
Rear
Front
¡
¡
DIN Cable comes
back up through this
1½” hole to connect to
Handlebar Controller.
(LF)
(LF)
(LF)
(LF)
(LF)
(LF)
Race Platform Plans
Overhead View
Side View