12
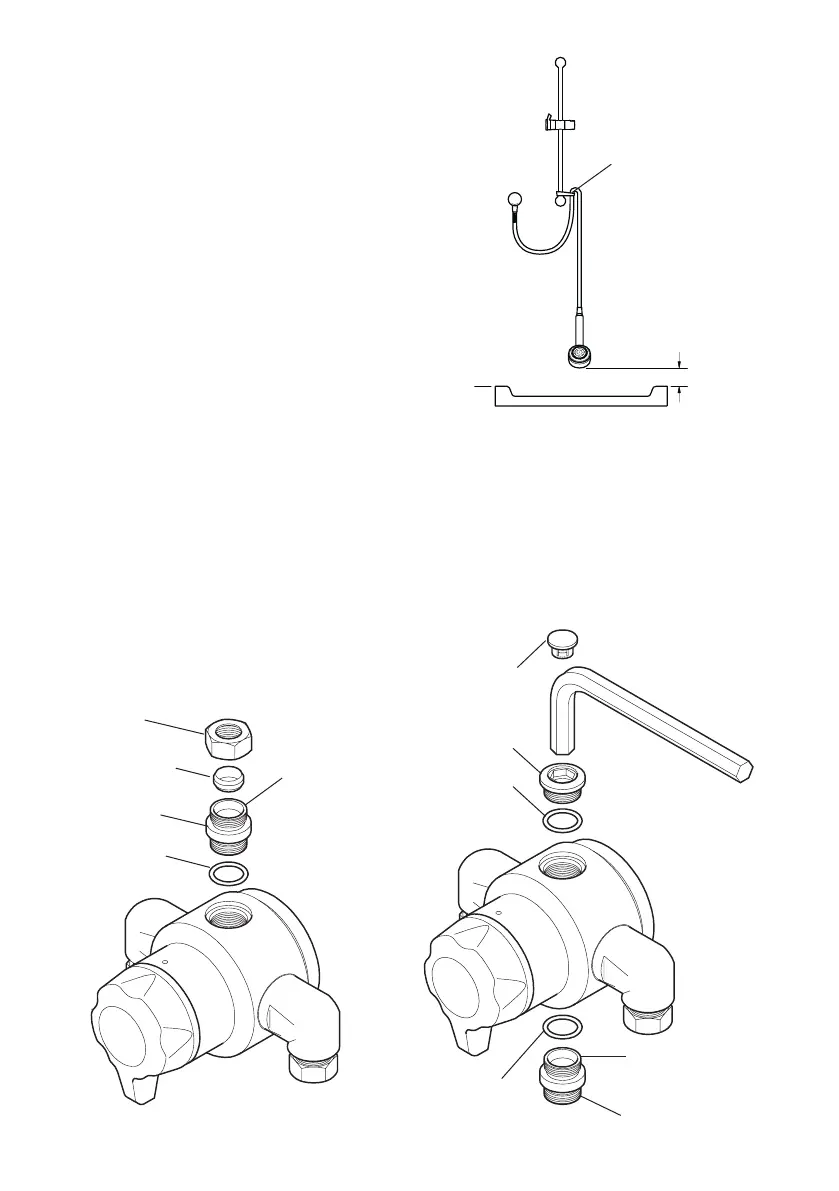
25 mm
Spill Over
Level
Hose Retaining Ring
11. Decide on a suitable position for the
Mixing Valve. The position of the
Mixing Valve and the Shower Fittings
must provide a minimum gap of
25 mm between the spill-over level of
the shower tray/bath and the handset.
This is to prevent back-siphonage. For
further information on the installation
of your shower ttings, refer to the
Fittings Installation and User Guide.
Note! Only use shower fittings
recommended by the manufacturer
or supplier.
Reverse Outlet Connector
If the Shower Outlet needs to be reversed (e.g. bottom outlet to top outlet):
1. Remove the Blanking Cap (if tted).
2. Using a 1/2” hexagonal key remove the Sealing Plug from the top and the Outlet
Connector from the bottom of the Thermostatic Mixing Valve.
3. Swap around and ret, if changing from at connector to compression make
sure that the ‘O’ Seal is changed around.
4. Ret in reverse order.
Coned End
Coned End
Flat End
Blanking Cap
Sealing Plug
‘O’ Seal
Outlet
Connector
Olive
Compression
Nut
‘O’ Seal
‘O’ Seal
 Loading...