round of scanning, the device will automatically stop the search and start playing the
first stored station.
*This device can store up to 20 AM stations, 30 FM stations, and 60 SW stations, for
a total of 110 radio stations.
Note: The number of stored radio stations may vary based on the local signal
strength and environment.
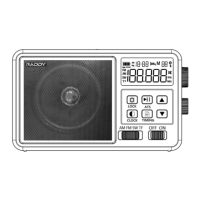
6.4: Manuelle Stationsspeichermethode:
In the radio broadcast mode, after using the methods described in 6.3.1 & 6.3.2 to
search for your desired station frequency, do the following: Light press [ ] to
enter the station storage mode. The LCD will display the station address as " M **,"
with the "**" station address number flashing. At this point, press [▲ or ▼] to
select the station address number. Press [ ] again to confirm your selection, and
the "**" station address will stop flashing. After 5 seconds, the " M**" station
address display will exit, indicating that the manual station storage operation is
complete.
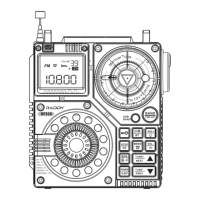
6.5: Methode zum Entfernen eines Radiosenders
In the radio broadcast mode, after storing radio stations using the methods described
in sections 6.3.3 and 6.4, light press [▲&▼] to select station numbers. Each light
press of [▲ or ▼] will change to the next stored radio station.
Note: If the LCD displays 'M **----,' it means there are no preset radio stations.
7: BT Playback:
7.1 Der Bluetooth-Pairing-Name für dieses Produkt lautet: RF206.
7.2 Drücken Sie im eingeschalteten Arbeitsmodus leicht [ ], um in den Modus
„ BE“ zu wechseln. Das Symbol „ BE“ blinkt und zeigt damit an, dass es auf die
Verbindung mit einem Bluetooth-Gerät wartet. Sobald die Verbindung erfolgreich
hergestellt wurde, hört das Symbol „ BE“ auf zu blinken.
7.3 Drücken Sie leicht [▲], um zum nächsten Lied zu springen, drücken Sie leicht
[▼], um zum vorherigen Lied zurückzukehren, und drücken Sie leicht [ ], um
zwischen Pause und Wiedergabe umzuschalten. Für die entsprechende Steuerung
können Sie auch Ihr Mobilgerät nutzen.
8: Verwendung der TF-Karte/USB-Kartenwiedergabe
Setzen Sie die TF-Karte richtig ein. Stecken Sie die USB-Wiedergabekarte richtig
ein.
8.1: Drehen Sie den Schalter [ ] aufdie TF-Position, drücken Sie leicht [ ],
um in den „TF“-Kartenmodus/USB-Modus zu wechseln, und die Musik wird
automatisch abgespielt. Drücken Sie leicht [ ], um anzuhalten/abzuspielen.
8.2: Durch leichtes Drücken von [▲] springen Sie zum nächsten Lied, durch leichtes
Drücken von [▼] kehren Sie zum vorherigen Lied zurück, durch langes Drücken
von [▲] spulen Sie schnell vor und durch langes Drücken von [▼] spulen Sie
schnell zurück
8.3: Unterstützt maximal 256 GB.
8.4: Unterstützt die Formate MP3, WMA, WAV, APE und FLAC für die Musikwiedergabe.
9: Zeiteinstellungen
In the power-on or power-off mode, long press [ ] for 2 seconds to initiate the
runtime setting. The hours "**" will start flashing as a prompt. Light press or long
press [▲, ▼] to adjust the hour time upwards or downwards. Then, light press
[ ] to move to the minute time, which will also start flashing. Light press or long
press [▲, ▼] to adjust the minute time upwards or downwards. Light press [ ]
 Loading...