15
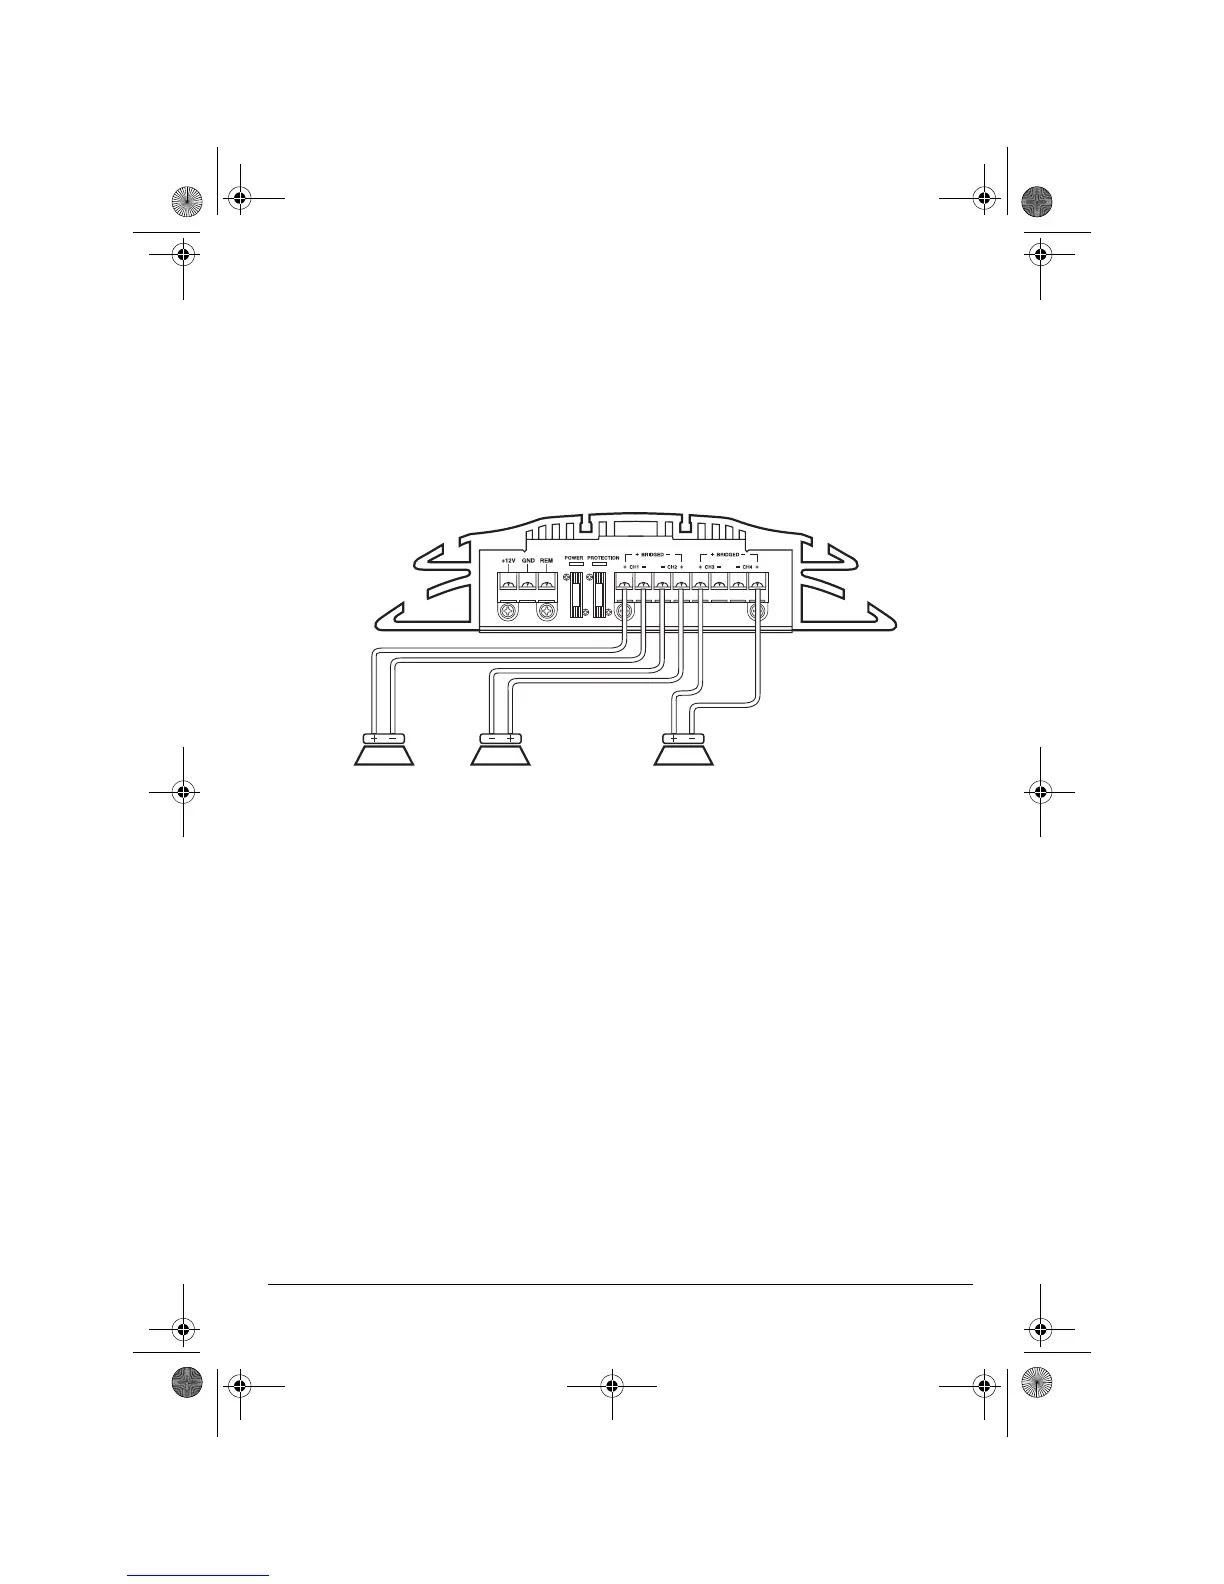
Connecting Inputs
3. Repeat Steps 1–2 to connect the front
right speaker’s positive (+) and negative
(–) wires to the amplifier’s
CH2 (+)
and
CH2 (–)
terminals.
4. Use a screwdriver to connect the sub-
woofer’s positive (+) wire to the ampli-
fier’s
CH3 (+)
or
CH4 (+)
terminal.
5. Repeat Step 4 to connect the sub-
woofer’s negative (–) wire to the ampli-
fier’s negative (–) terminal for the same
channel you connected in Step 4. For
example, if you connected the sub-
woofer’s positive (+) wire to the ampli-
fier’s
CH3 (+)
terminal, connect the
subwoofer’s negative (–) wire to the
amplifier’s
CH3 (–)
terminal.
Connecting Two Unbridged Speakers and One Bridged Subwoofer
Note:
CH4 (+)
is used as a negative (–) termi-
nal for a bridged connection.
1. Use a screwdriver to connect the left
front speaker’s positive (+) wire to the
amplifier’s
CH1 (+)
terminal.
2. Use a screwdriver to connect the left
front speaker’s negative (–) wire to the
amplifier’s
CH1 (–)
terminal.
3. Repeat Steps 1–2 to connect the right
front speaker’s positive (+) and negative
(–) wires to the amplifier’s
CH2 (+)
and
CH2 (–)
terminals.
4. Use a screwdriver to connect the sub-
woofer’s positive (+) wire to the ampli-
fier’s
CH3 (+)
terminal.
5. Repeat Step 4 to connect the sub-
woofer’s negative (–) wire to the ampli-
fier’s
CH4 (+)
terminal.
6. Make sure the
BRG/ST
switch on the
right
side of the amplifier is set to
ST
,
then set the
BRG/ST
switch on the
left
side of the amplifier to
BRG
.
Subwoofer
CH2 Front
Right Speaker
CH1 Front
Left Speaker
12-2017.fm Page 15 Tuesday, May 9, 2000 10:02 AM
 Loading...