Turning The QRAE 3 Off
Press and hold [MODE]. A 5-second countdown to shut-
off begins. Continue pressing on the key for the entire
shutoff process. Otherwise, the shutoff operation is
canceled and the QRAE 3 continues normal operation.
When the countdown ends and the screen displays “Unit
Off!” release your finger from the [MODE] key. The
QRAE 3 is now off.
Testing The Alarm
Under normal-operation mode and non-alarm condi-
tions, the buzzer, vibration alarm, LED, and backlight
can be tested anytime by pressing [Y/+] once. If any
alarm does not respond, check the Alarm Settings in
Programming Mode to make sure all alarms are
enabled. If any alarms are enabled but are not
functional, do not use the instrument.
Calibration
Make sure all sensors have warmed up before
attempting any calibration. If a sensor’s reading
shows “- -” on the display, the sensor is not ready.
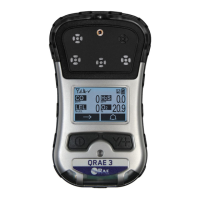
The QRAE 3 diffusion model requires a calibration
adapter. Set it over the sensors, tighten the knob to
secure it, and connect a hose from a calibration gas
regulator. The pumped model requires a T
calibration tube. Attach that to the instrument’s
external filter and to the calibration gas regulator.
Calibrate the QRAE 3 using a fixed-flow regulator (flow
rate between 0.5 and 1.0 liters per minute):
1. To begin calibration, connect the zero air or
calibration gas cylinder, flow regulator, and
calibration adapter to the QRAE 3.
2. Enter Programming Mode by pressing and holding
[MODE] and [Y/+] simultaneously until the password
screen appears. (A password is not necessary in
Advanced mode.)
3. Input the 4-digit password. (The default password is
“0000.” If you do not know the password, select
“Done.”) Then follow the instructions for individual
or multiple bump, zero and span calibration.
Important! After a bump test or calibration, remove
the calibration adapter or T connection to ensure
correct readings.
Zero & Fresh Air Calibration
The QRAE 3 should be zero-calibrated in clean air
with 20.9% oxygen or with a cylinder of clean zero air.
In Programming Mode, press [MODE] to select “Multi
Zero.” Press [Y/+] to select it. Then press [Y/+] to start
a Fresh Air calibration for the listed sensors. All are
fresh-air calibrated at once. During calibration, the
screen says, “Calibrating.” When done, each sensor is
shown, accompanied by the word “Pass.”
To zero calibrate individual sensors:
1. Select “Single Sensor Zero” and select a sensor.
2. Press [Y/+] to select a sensor to zero calibrate.
3. Start the flow of the zero gas, if used, and press [Y/+].
4. The screen says, “Calibrating” and counts down.
5. When done, it says, “Zero Calibration Passed” (the
reading should be 0 or very close to it for toxic gas
sensors, and 20.9% Vol. for an oxygen sensor).
Shut off the flow of zero air (if used) and remove the
calibration adapter or T connector.
P/N: M02-4002-000 Rev D 201412
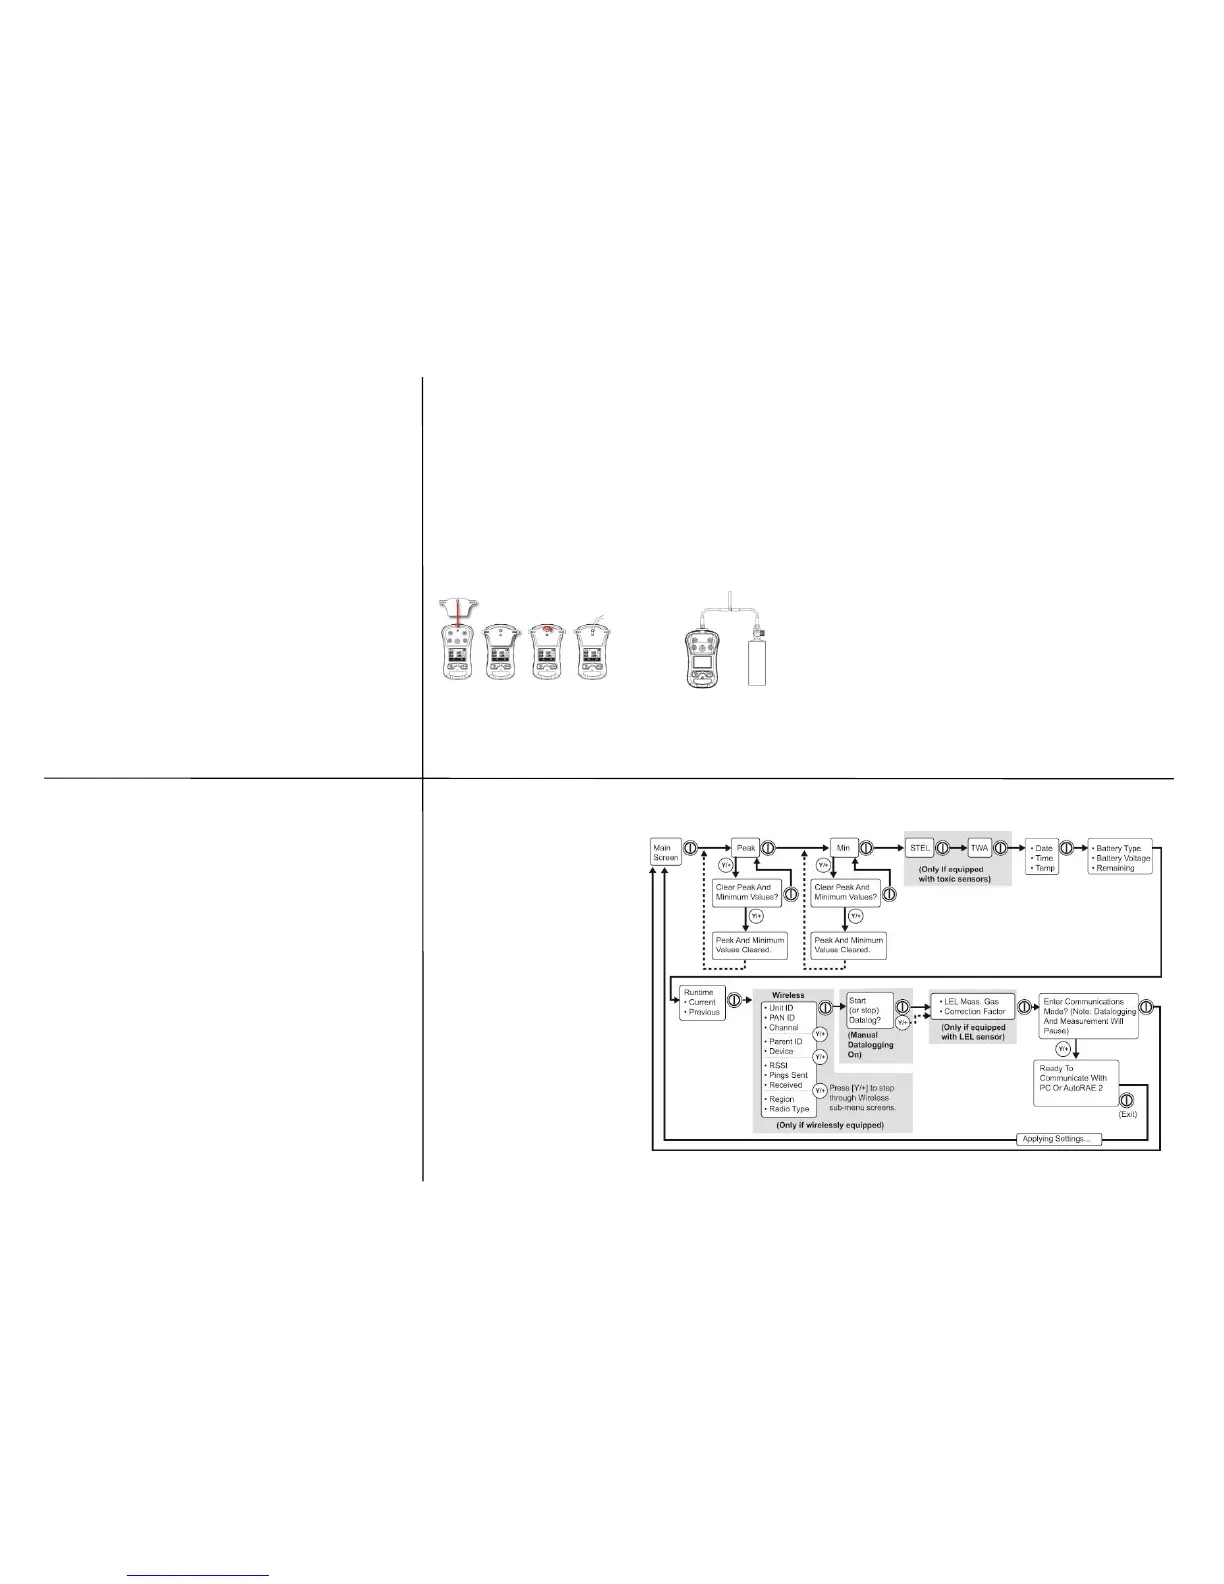
Basic Menu
Navigation
Pressing [MODE]
repeatedly allows you to
step through the screens as
shown here.
Note: The gray box around
Datalogging indicates the
datalog functions when
datalogging is in Manual
mode. When datalogging is
in Automatic mode, this
screen does not appear.
Refer to the User’s Guide
for information on select-
ing Automatic or Manual
datalogging.
Install the calibration
adapter on the QRAE 3
diffusion model
Attach the T calibration
tube on the QRAE 3
pumped model before
calibration
 Loading...
