N-Series 3D Printer
/ Quick Start Guide
B Hardware Installation (continued)
The printer will go through a start-up
sequence. When the touch screen displays
"Home", the printer is ready.
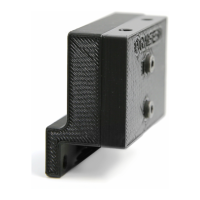
10
Slide the starter box out of the base of the
printer.
Remove the power cable from the starter
box and plug the machine into a wall
outlet.
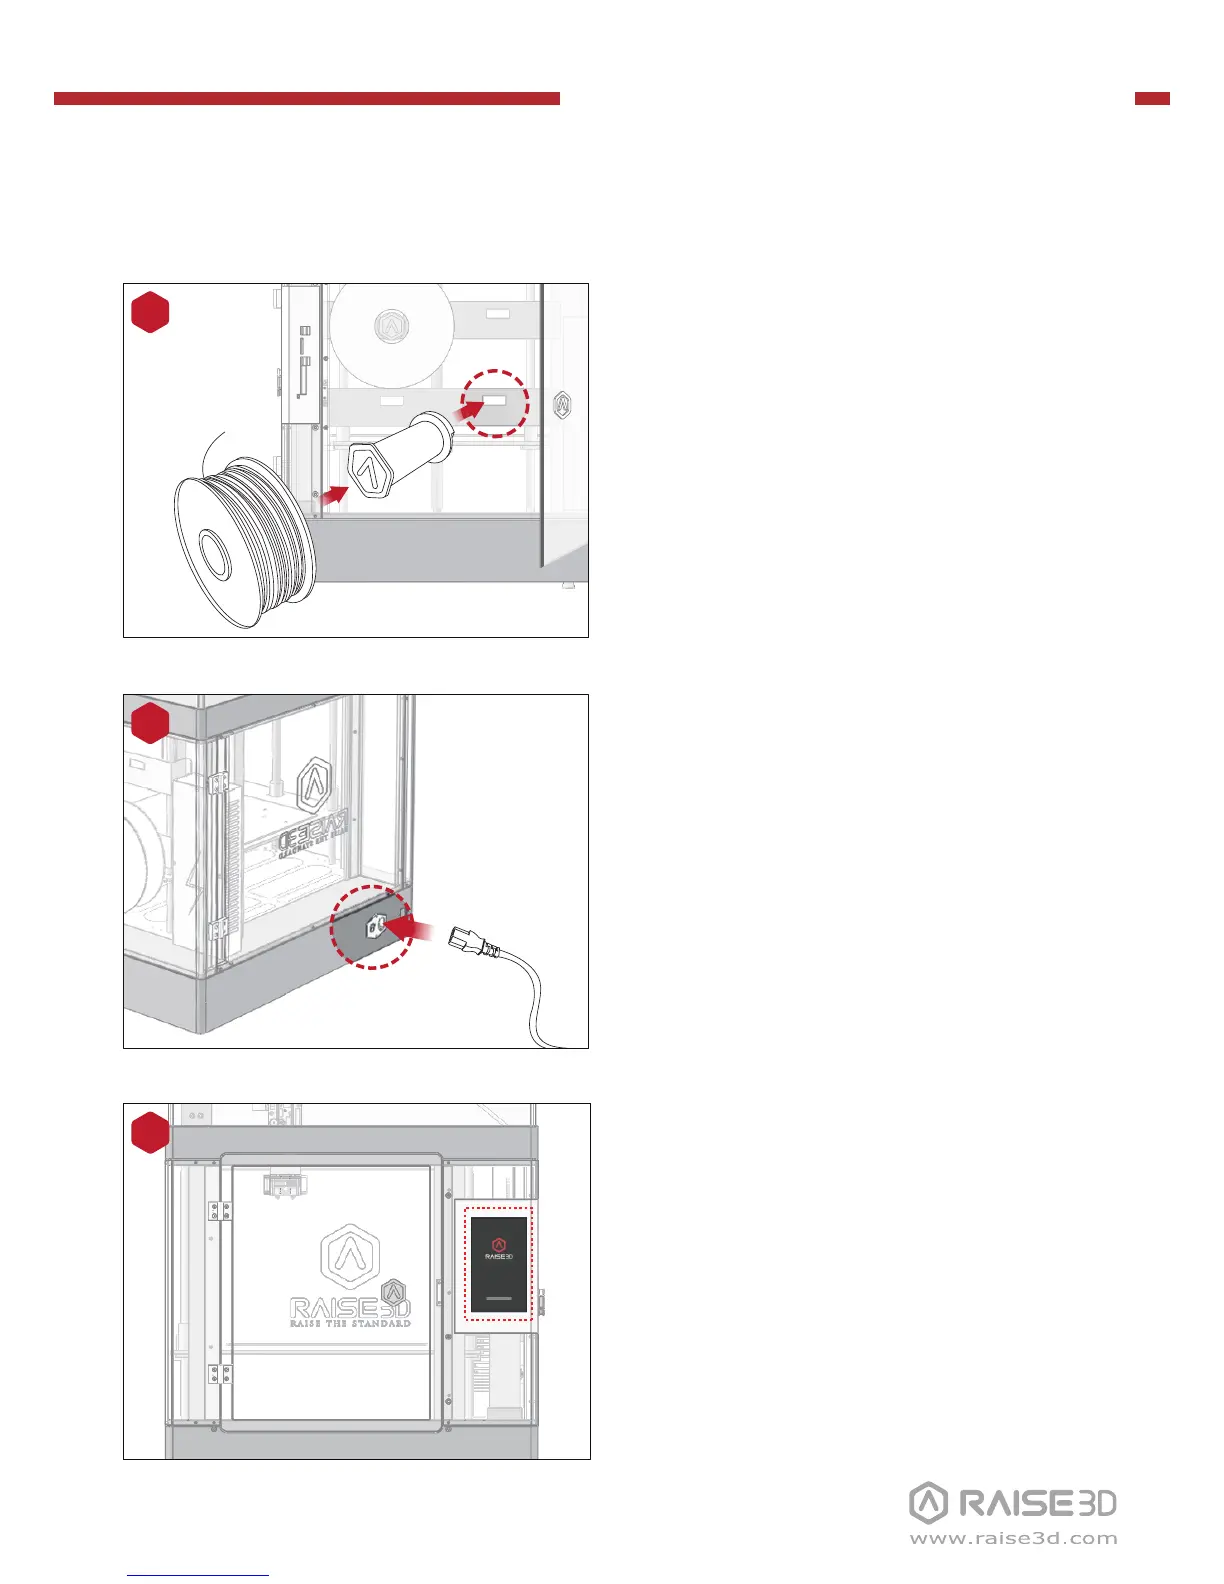
9
Install the filament holder in the mounting
hole on the side of the printer and place a
spool of filament on the holder.
NOTE: The filament should load clockwise.
A B
C D
8
Mounting
holes