N-Series 3D Printer
/ Quick Start Guide
F Start First Print (continued)
6
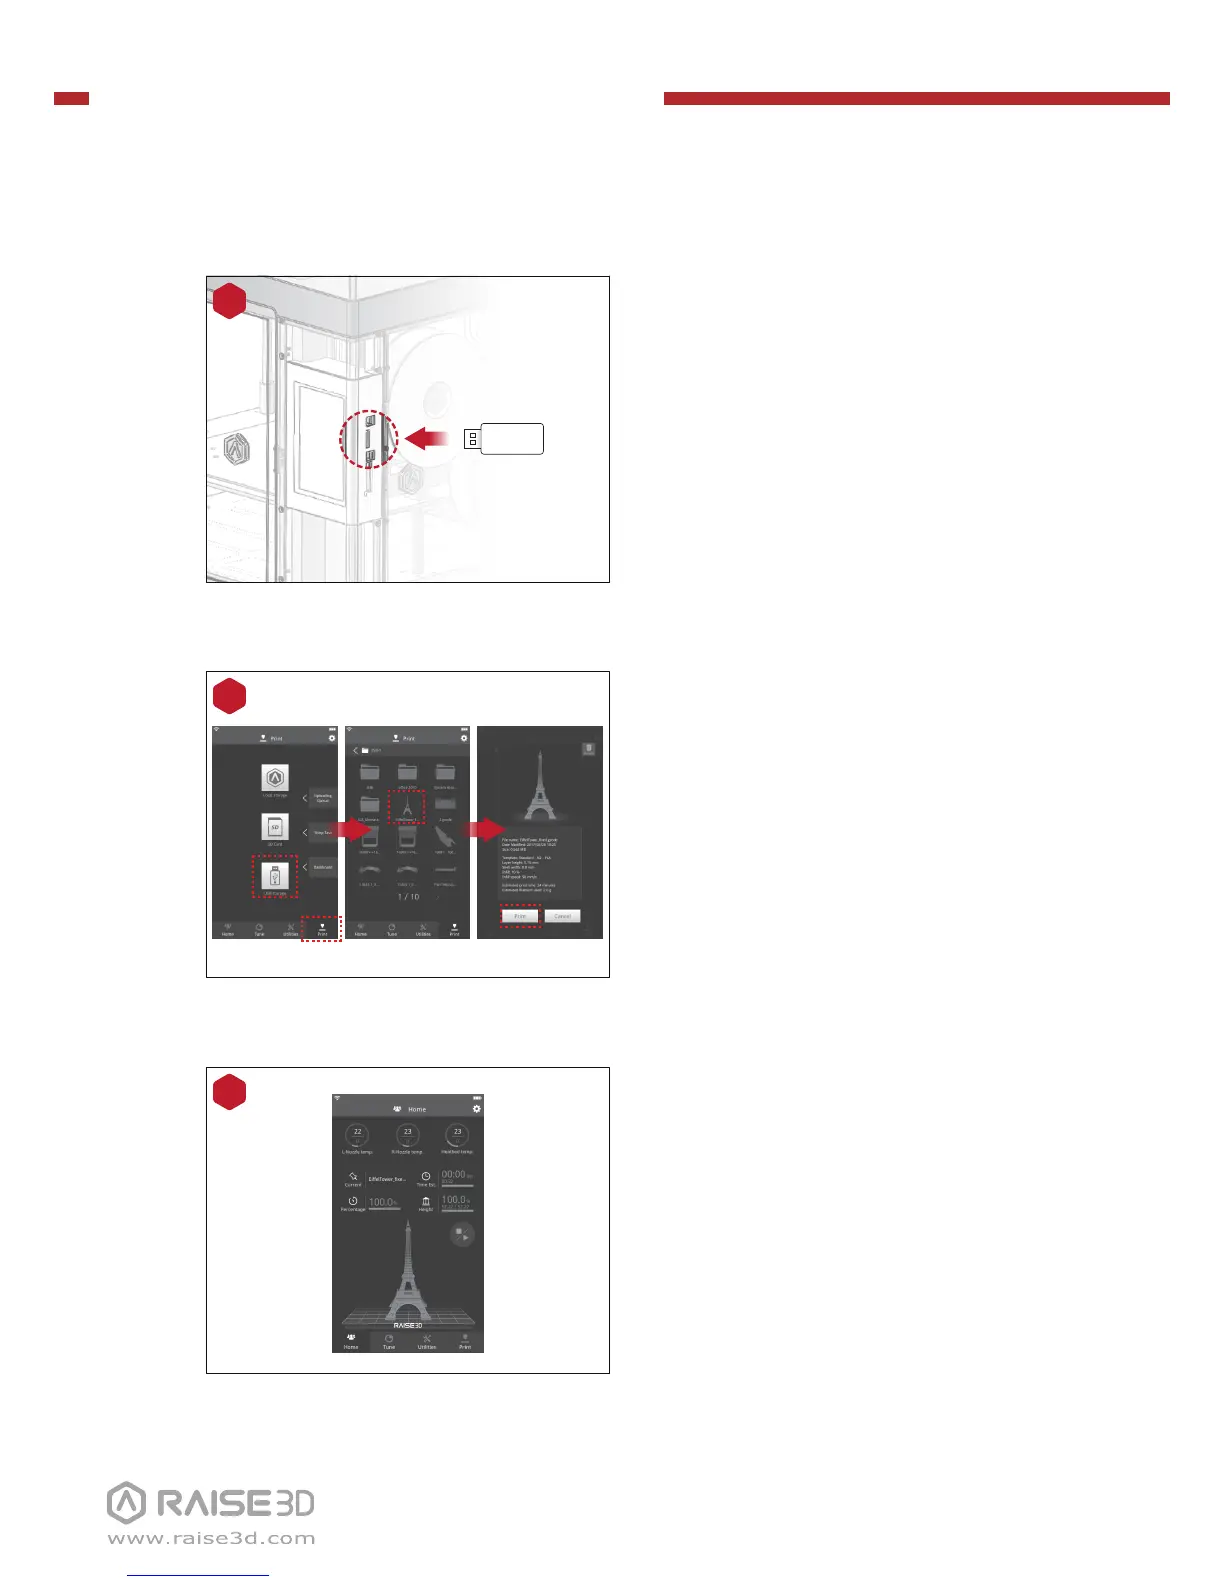
During printing, you can check
status, printing time remaining and
other parameters from the touch-
screen in the “Home” interface.
NOTE: The image on the touch screen is
only showing when the file is sliced by
ideaMaker and the .data file is loaded.
Select “Print” menu, choose “USB
Storage” in the file storage path.
Select the file to check the printing
parameters and settings, then press
“Print” to start printing test file.
5
4
USB Storage
The USB storage included with the
printer comes loaded with already
sliced models. They are a good place
to start for your first print.
Insert the USB storage into the USB
slot on the side of touchscreen.