EasyManua.ls Logo

Rapid video mounts RVM-75FM150 - User Manual

Rapid video mounts RVM-75FM150
12 pages
Print Icon
To Next Page IconTo Next Page
Loading...
P 1
RVM-75FM150
Low Profile Full Motion TV Mount
IN STRUCTION MANUAL
MANUAL DE INSTRUCCIONES
MANUEL D’INSTRUCTIONS
V1
Max Screen Size: 80”
CAUTION: THE MAXIMUM LOADING WEIGHT
IS 150 LBS. USE WITH PRODUCTS HEAVIER THAN
THE MAXIMUM WEIGHT INDICATED MAY RESULT IN
INSTABILITY AND POSSIBLE PERSONAL INJURY.
!
Question and Answer IconNeed help?

Do you have a question about the Rapid video mounts RVM-75FM150 and is the answer not in the manual?

Summary

Product Information and Warnings

Disclaimer and Warnings

General disclaimer and important warnings regarding product use and safety.

Tools Required

List of tools necessary for the installation process.

Symbols Guide

Explanation of symbols used throughout the manual.

Hardware and Components

Hardware Product Numbers

Identification of all hardware parts with their respective numbers.

Product Component Parts

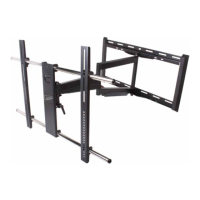
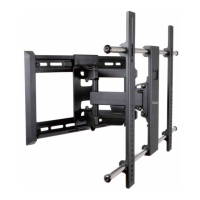
Identification of the main physical components of the mount.

Corner Mounting Information

Corner Installation Guidance

Information and diagrams for mounting the TV mount in a corner.

Monitor Plate Installation

Step 1 A: Flat Back Panel Connection

Connects the universal monitor plate to a flat-back TV.

Step 1 B: Curved Back Panel Connection

Connects the universal monitor plate to a curved-back TV.

Monitor Plate Securing

Step 2 A: Center Universal Monitor Plate

Ensures the monitor plate is horizontally centered on the TV back.

Step 2 B: Secure Vertical Rails

Adjusts and secures the vertical rails on the monitor plate.

Arm Assembly Preparation

Step 2 C: Remove Arm Assembly

Detaches the arm assembly from the wall plate before proceeding.

Wall Plate Mounting - Wood Studs

Step 3 A: Wood Stud Installation

Guides the process of mounting the wall plate into wood studs.

Wall Plate Mounting - Concrete

Step 3 B: Solid Concrete Installation

Guides the process of mounting the wall plate into solid concrete.

Attaching Assemblies

Step 4: Attach Arm Assembly

Secures the arm assembly to the wall bracket.

Step 5: Attach Monitor Bracket to Arm

Connects the monitor bracket to the arm assembly.

Final Adjustments

Secure Monitor Plate to Arm

Fastens the monitor plate to the arm assembly using nuts and washers.

Adjust Tilt Tension and Level

Fine-tunes the tilt tension and checks the level after installation.

Warranty and Support

Warranty Information

Details the product's warranty coverage and terms.

Customer Support Contact

Provides contact information for customer assistance.

Rapid video mounts RVM-75FM150 Specifications

General IconGeneral
BrandRapid video mounts
ModelRVM-75FM150
CategoryTV Mount
LanguageEnglish

Related product manuals