Check the charge status of the jump starter’s
battery by pressing the on/off button. The
number of LEDs that light up at the same
time indicates the charge status:
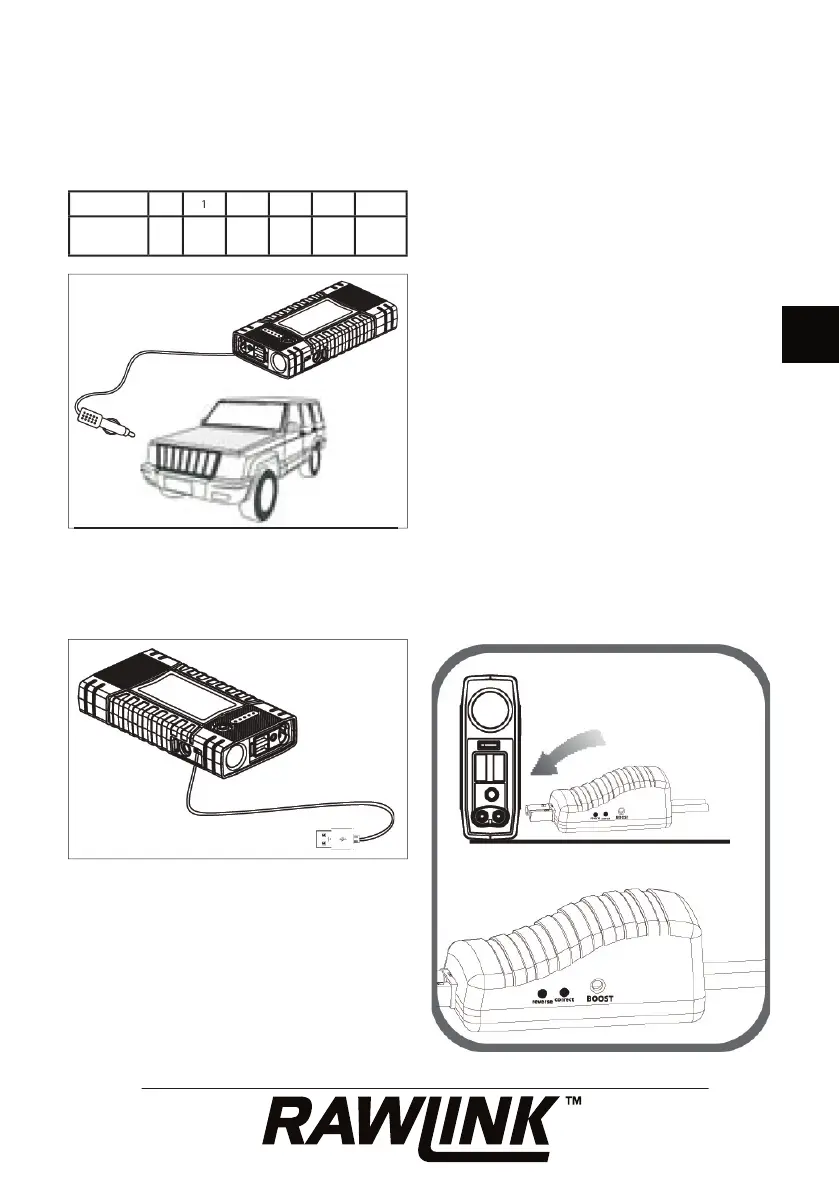
Insert the plug from the 12 V charging cable
into the 12 V input on the jump starter,
and plug the 12 V charging cable into the
cigarette lighter socket in a car.
You can also charge the jump starter by
connecting it to a USB power supply using
the micro USB cable provided and the micro
The LEDs fl ash alternately during charging,
and the number of LEDs that then light up at
the same time indicates the battery’s charge
status. The LEDs then start fl ashing again.
Each LED on the battery indicator represents
20% of the battery’s total capacity.
Example: If 3 LEDs light up at the same time,
the jump starter battery has approx. 60%
When all the battery indicator LEDs go out,
the battery is fully charged, or charging
has been interrupted. Disconnect the jump
starter from the power supply after charging
The jump starter must only be charged at an
ambient temperature of 0-40 °C.
Insert the plug from the intelligent starter
cable into the socket on the jump starter.
Check that the plug is securely connected.
Connect the red battery clamp to the car
battery’s positive (+) terminal.
Connect the black battery clamp to the car
battery’s negative (-) terminal.
Check the status of the LEDs on the side of
the intelligent starter cable’s plug, and follow