SPX-10 Hydraulic Installation Guide for Verado systems 3
Connecting the hydraulic lines
Before you start
Before you start installing the hydraulic lines, read this information, to gain an overall
understanding of the system and prevent any problems due to incorrect hydraulic
connections.
Summary of hydraulic connections
.
Important
It is important to ensure that you correctly differentiate between the low
pressure return hose connected to ‘T’ and the high pressure connections
connected to R’ and ‘L’, at the rear of the Mercury helm.
Do NOT disconnect or modify the high pressure hose from ‘P’ on the Mercury
helm to the Mercury hydraulic pump (lower hose).
Do NOT connect the high pressure connector R, on the Mercury helm to the
Raymarine Type 1 pump low pressure connector, also identified as R.
Circuit Mercury Helm
connector
Raymarine Type 1
Pump connector
High pressure (R)
RB
High pressure (L)
LA
Low pressure
TR
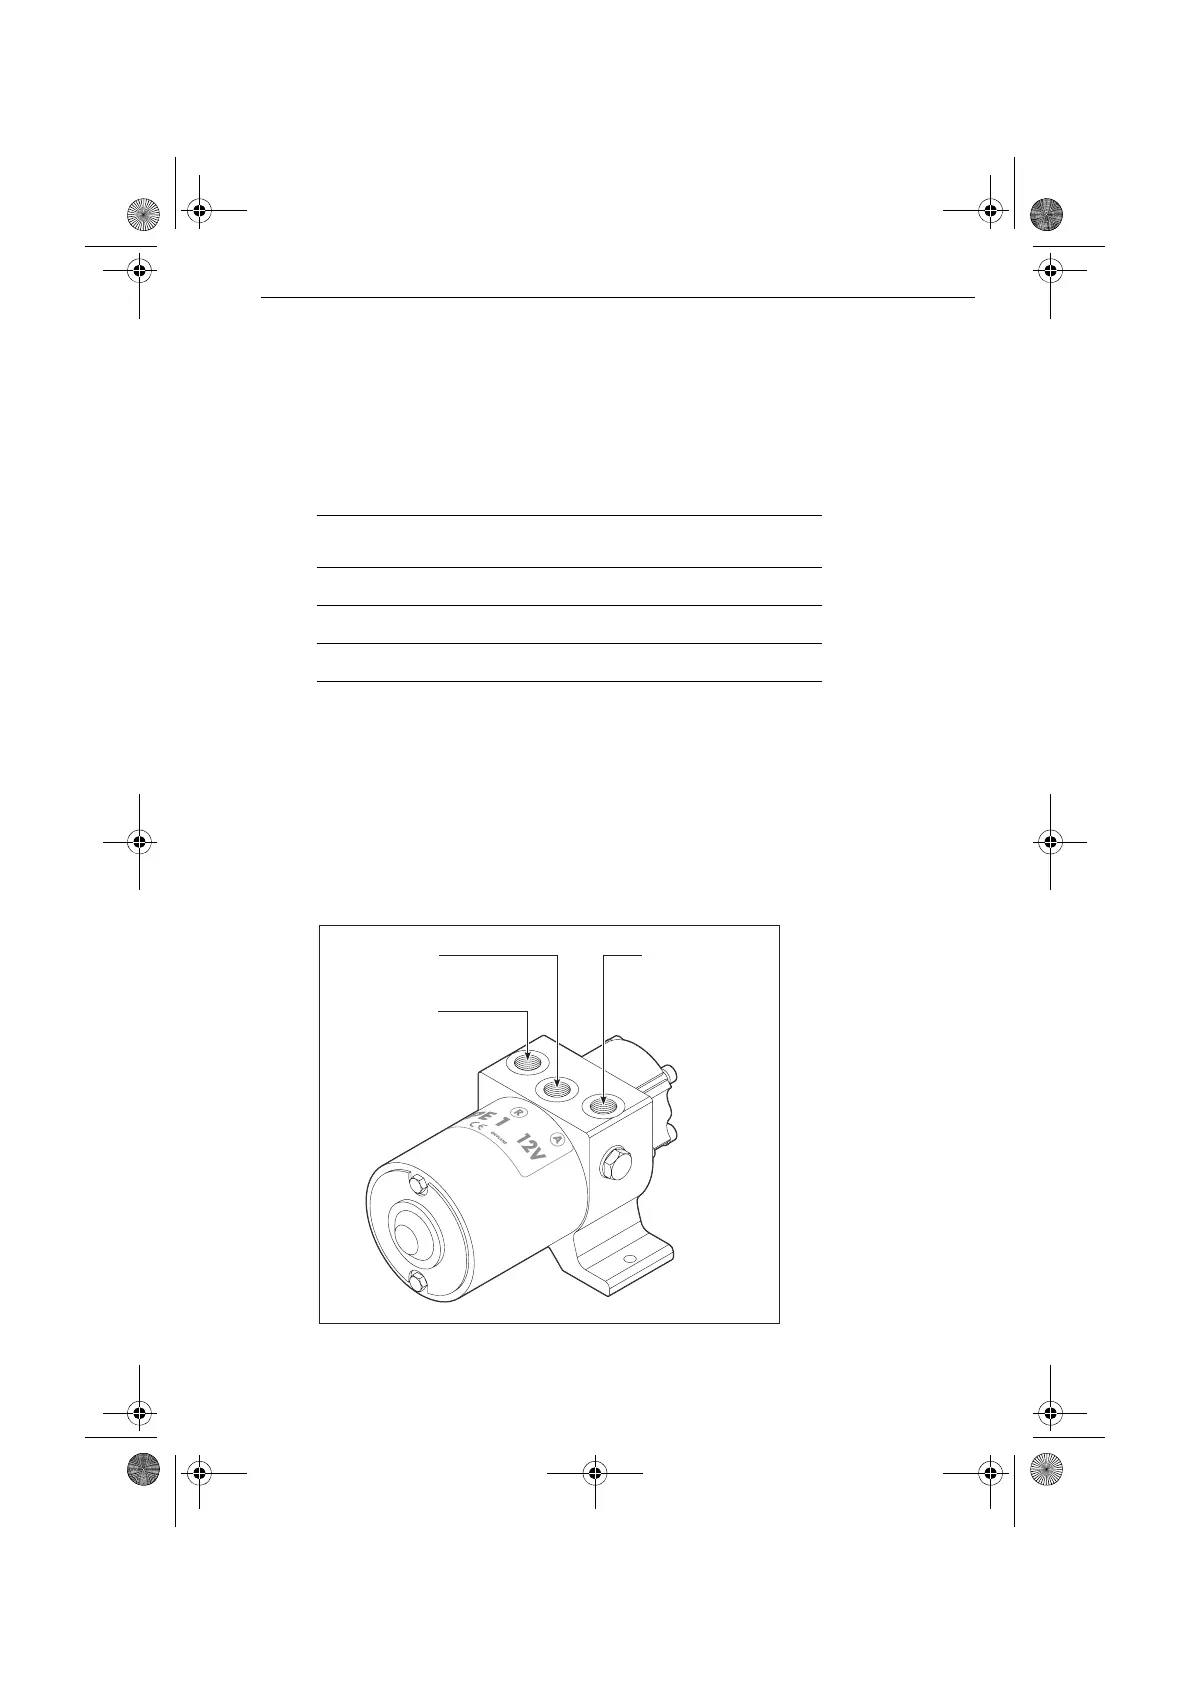
D10729-1
Connector B
(HIGH pressure)
Connector R
(LOW pressure)
Connector A
(HIGH pressure)
87077_1.book Page 3 Monday, November 26, 2007 2:24 PM
 Loading...