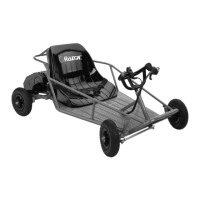
DUNE BUGGY
CONTROL MODULE
INSTALLATION INSTRUCTIONS
Need Help? Visit our website at www.razor.com or call toll-free at 866-467-2967 Monday - Friday 8:00am - 5:00pm Pacific Time.
1
CAUTION: To avoid potential shock or other injury, turn power switch OFF and discon-
nect charger before attempting these procedures. Failure to follow these steps in the correct
order may cause irreparable damage.
Figure 1 Figure 2
Step 1
Using a Phillips head screwdriver, remove the four
Phillips screws at the back of the battery cover at
the rear of the product.
Using a 4mm Allen wrench, remove two 4mm
hex bolts on the right side of the battery cover.
Step 2
Tools Required: (Not included)
A. Phillips head screwdriver
B. 4mm Allen wrench
Figure 3 Figure 4
Remove two 4mm hex bolts on the left side of
the battery cover and one Phillips screw located
on the middle left side of the battery cover. When
removing the battery cover, be careful not to pull
the wires connected to the power switch and
charger port.
Carefully cut the zip ties holding the wires to-
gether. Disconnect the five white plastic connec-
tors attached to the control module by depress-
ing the tab and remove the wires connected
to the power switch at the back of the battery
cover.
Step 3 Step 4
NOTE: If you received a control module AND throttle, make sure to replace BOTH parts on your unit.