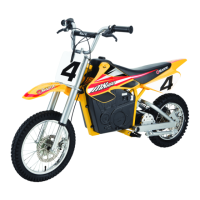
Attaching the Front Forks – MX350
2 Insert the spacer sleeves
on the top and bottom of the
frame.
3 Slide the fork into position
and insert the steering bolt.
The bolt must go through the
washer and spacer sleeve and
between the steering bearings
inside the frame.
1 Remove steering bolt, spacer
sleeves, washers and nut from
front fork assembly.
Loosen top fork crown bolts.
Steering Bolt
Spacer Sleeve
Washer
Nut
Top Fork Crown
with Pinch Clamps
Fork
Lower Fork Crown
with Pinch Clamps
Spacer Sleeve
Washer
3
ASSEMBLY AND SET-UP
WARNING:
Failing to properly adjust and
tighten the nuts and bolts that
affix the forks can cause you to
lose control and fall.
Charging the Battery
Your electric motorbike may not have a fully charged battery; therefore it is a good idea to charge the
battery prior to use.
• Initial charge time: 12 hours • Run time: up to 40 minutes
• Recharge time: up to 8 hours, • Average battery life: 250 charge/discharge cycles
depending on the level of depletion
1 Plug the charger port into the
port on the electric motorbike.
The charger works with the
power switch in either the on or
off position.
2 Plug the charger plug into a
wall outlet.
WARNING:
Always disconnect your electric
motorbike from the charger before
cleaning with liquid.
Note: If your charger does not
look like the one illustrated,
your unit has been supplied
with an alternative charger.
The specifications and charging
procedure would not change.
The charger has a small window
with one LED or two LEDs to
indicate the charge status. Refer
to the illustration on the charger
unit for the actual “charging” and
“charged” status indications for
your model charger.
Chargers have built-in over-charge
protection to prevent battery from
being over-charged.
Be sure to properly align the
groove on the charger input
plug with the corresponding
socket on the case; otherwise,
no charging action will occur.
Charger
Plug
Charger
Port
4 Install washer and nut onto
steering bolt. Tighten until snug,
then back off slightly to allow
the steering to rotate freely
with no binding or end-play.
Tighten the top fork crown bolts.
Top Fork Crown Bolt
 Loading...