4
ASSEMBLY AND SET-UP
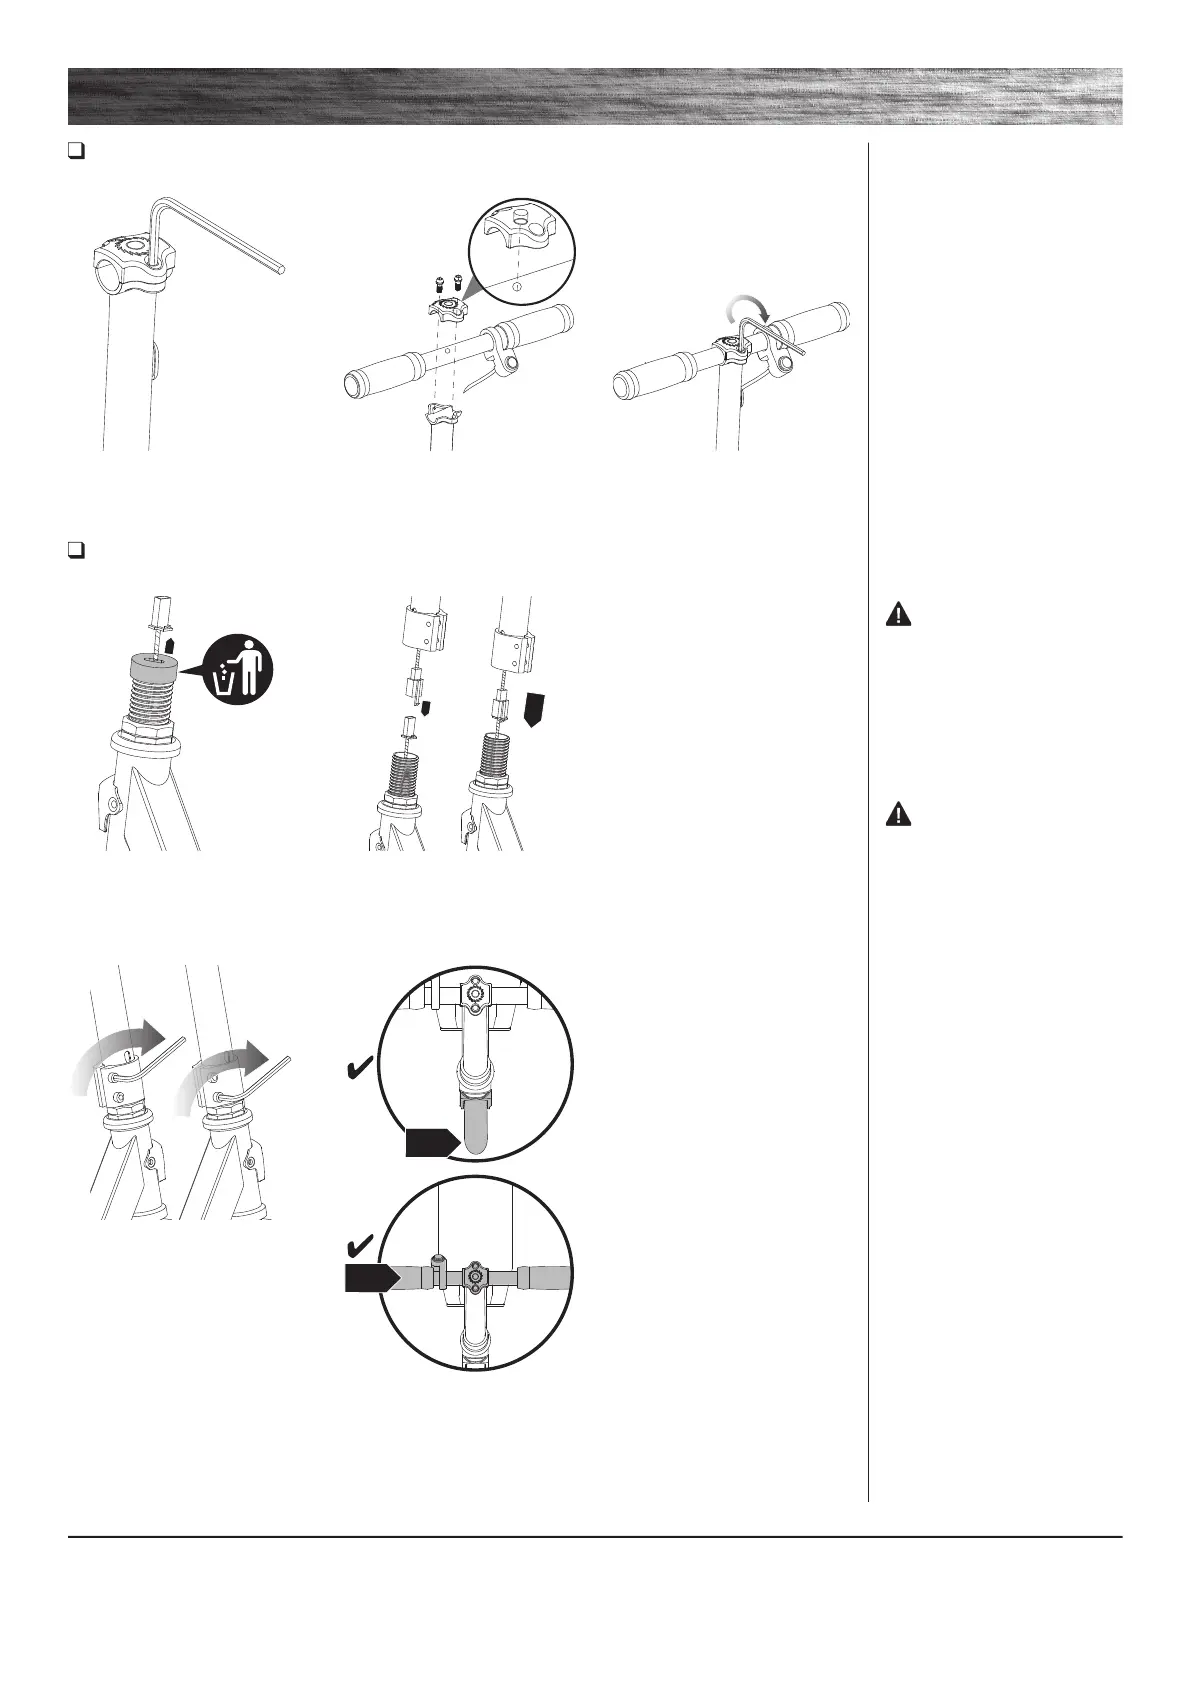
Attaching the Handlebars
Tool Required: 5 mm Allen Wrench
Attaching the T-bar
Tool Required: 5 mm Allen Wrench
1 Using the 5 mm Allen wrench
loosen the handlebar clamp.
1 Before inserting the T-bar onto
the fork, pull the connector through
and remove the rubber protector.
2 Connect the connector on the
T-bar to the connection on the
down tube and insert the T-bar
onto the fork.
2 Insert the handlebar with the
throttle facing the rider.
3 With the front wheel pointed
straight ahead and the
handlebars square to the front
wheel and the Razor logo facing
the front, tighten the clamp as
shown. Tighten securely.
3 Using the 5 mm Allen wrench
tighten the handlebar clamp.
WARNING: Failure to
properly tighten the collar clamp
may allow the handlebars to
dislodge while riding and may
cause you to lose control and fall.
When correctly tightened, the
handlebars will not rotate out of
alignment with the front wheel
under normal circumstances.
WARNING: Do not
attempt to thread the handle bar
into the front fork thread. Tighten
clamp securely.
Note: The cable and wire assembly
must be tucked inside the fork
before inserting the t-bar. Sharp
bends or twisting of the cables can
cause malfunction.