12 13866.881.1799
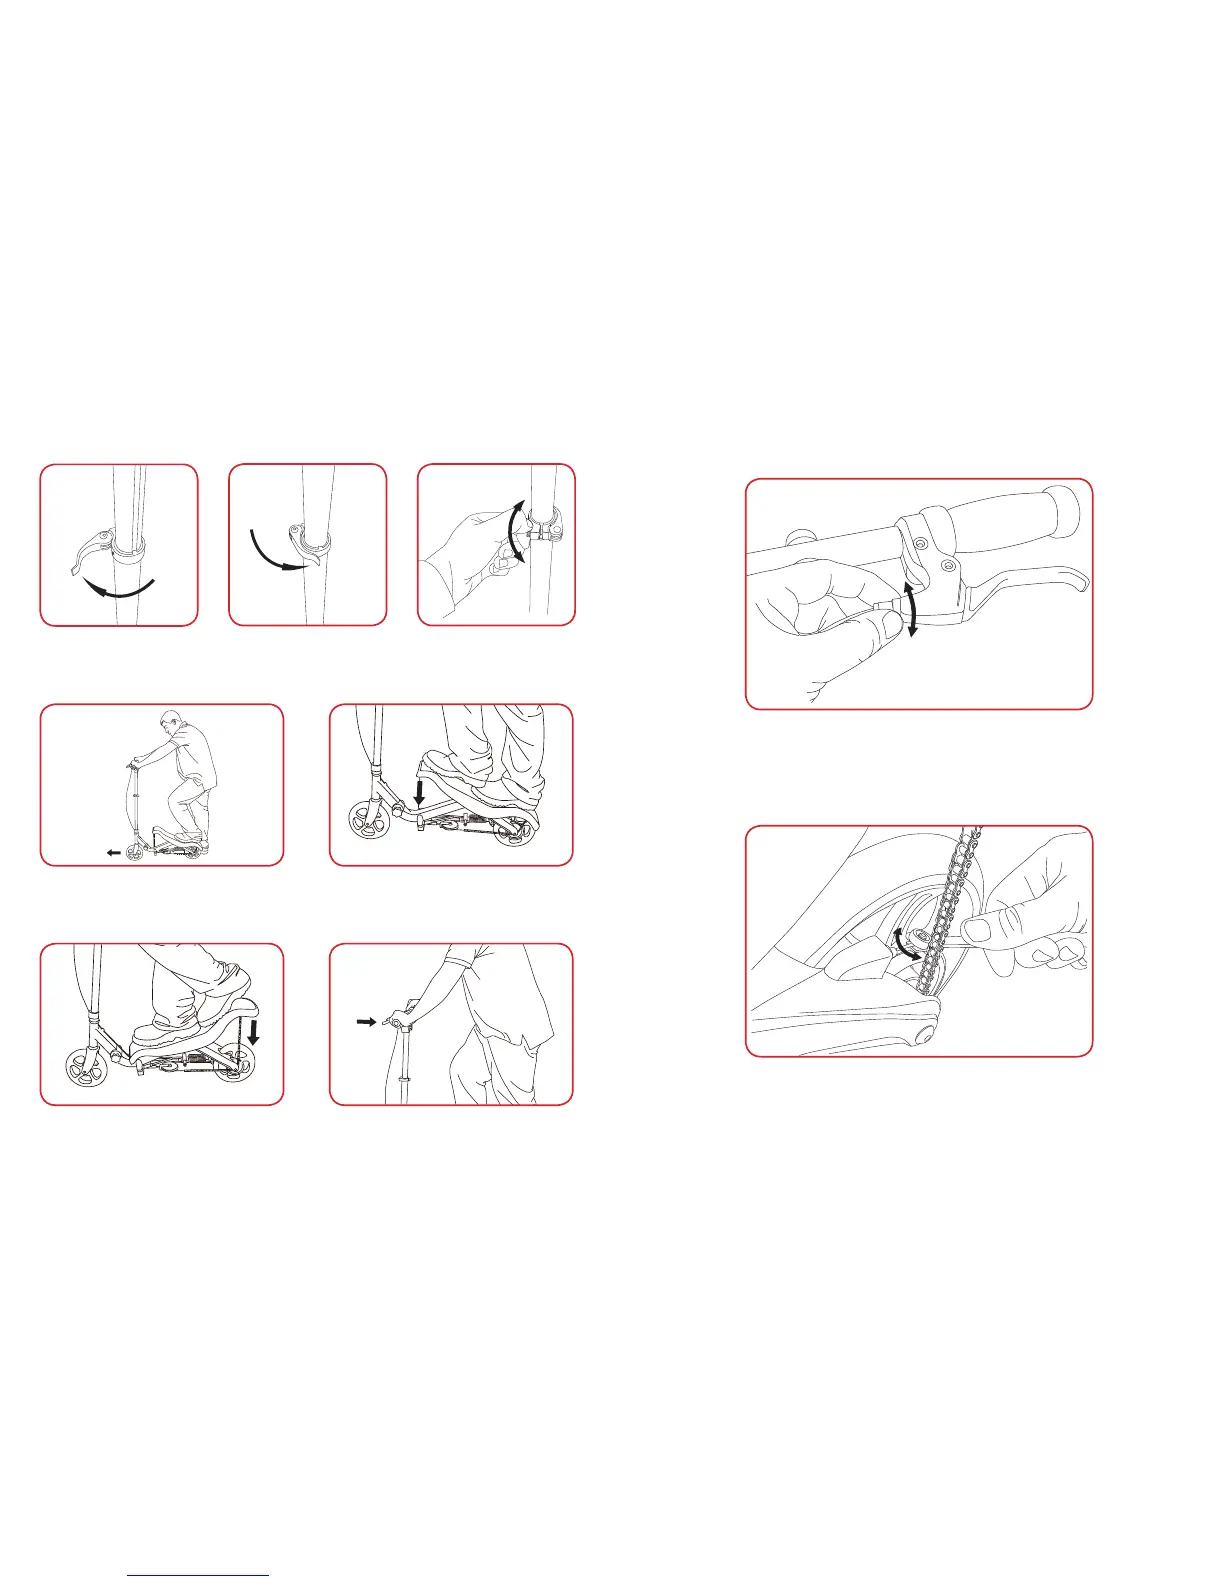
BRAKE ADJUSTMENTS
HEIGHT ADJUSTMENT & RIDE TECHNIQUE
1. For minor brake adjustment, use this method. First rotate the
brake adjuster jam nut counter-clockwise to release cable. Next,
rotate brake cable adjuster clockwise to increase cable length,
or counter-clockwise to shorten cable length. Lastly, tighten
brake adjuster jam nut to lock brake cable at desired length.
2. For extended brake adjustment, use this method. First, loosen
rear brake cable nut using an 8 mm wrench (not included). Next,
pull cable end toward rear of scooter to shorten cable length, or
push cable end toward front of scooter to increase cable length.
Lastly, tighten rear brake cable nut once desired length is found.
1. Release height-adjuster
clamp to allow free up and
down motion for handlebars.
1. To start riding, rst make sure rockboard is in
the down position in the rear, place one foot
over rear tire and push forward with the other.
3. Once the front has been completely pushed
down, use rear leg and body weight to push the
back of the rockboard down. Repeat steps 2 & 3.
2. Slide handlebars to desired height
and secure height-adjuster clamp,
making sure handlebars do not
move up or down.
3. If adjuster clamp requires
calibration, spin nut clockwise
to tighten and counter-
clockwise to loosen.
2. Once a desired speed has been reached, lean
forward with body weight and front leg to push
the front of the rockboard down.
4. To brake while riding, slowly squeeze brake
handle on left handlebar, make sure not to
squeeze too hard.
WARNING: Brake pad & components will get hot from continuous use! Do not touch after braking!