Set the Time and Date
You must set the correct date and time before it can be displayed and
recorded on your tapes. The built-in clock cell must be charged as
described on the next page.
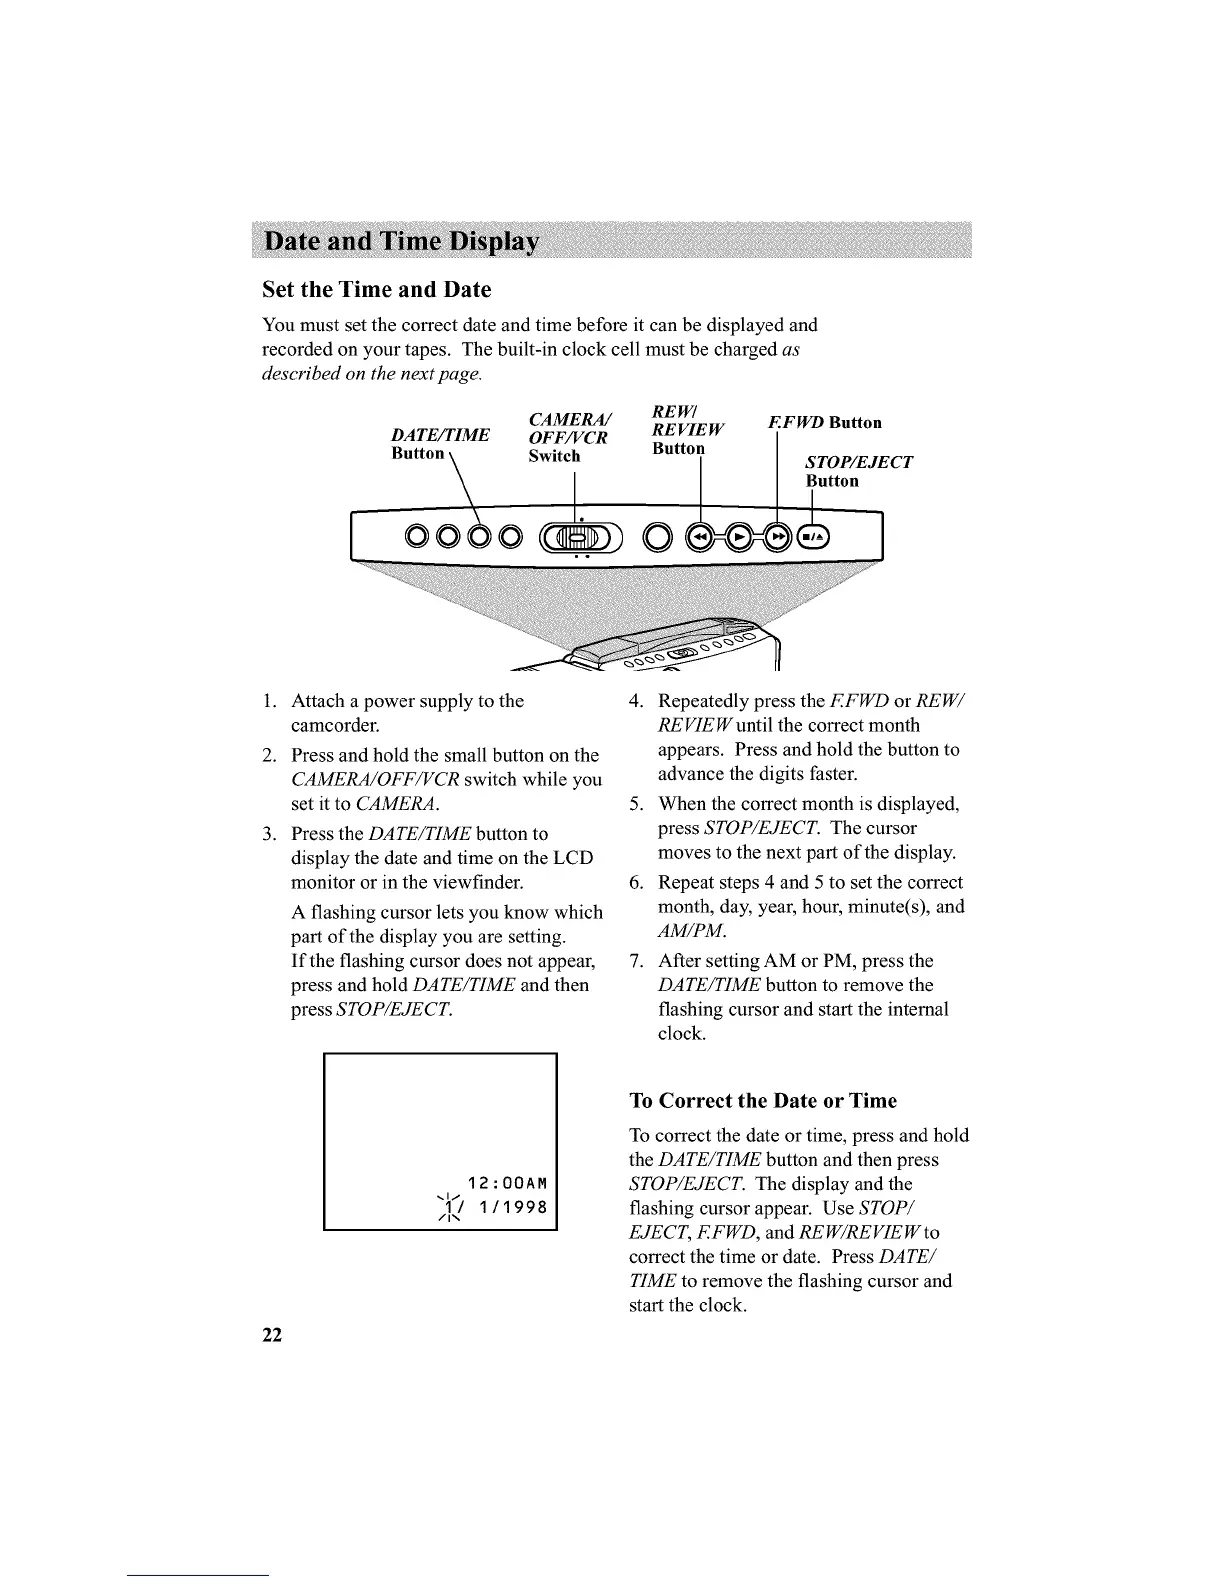
CAMERA/ RE W/
DATE/TIME OFF/VCR REVIEW
Button \ Switch Button
oooo\ 0
EFWD Button
STOP/EJECT
Button
1.
2.
.
Attach a power supply to the
camcorder.
Press and hold the small button on the
CAMERA/OFF/VCR switch while you
set it to CAMERA.
Press the DATE/TIME button to
display the date and time on the LCD
monitor or in the viewfinder.
A flashing cursor lets you know which
part of the display you are setting.
If the flashing cursor does not appear,
press and hold DATE/TIME and then
press STOP/EJECT.
4. Repeatedly press the EFWD or REW/
REVIEW until the correct month
appears. Press and hold the button to
advance the digits faster.
5. When the correct month is displayed,
press STOP/EJECT. The cursor
moves to the next part of the display.
6. Repeat steps 4 and 5 to set the correct
month, day, year, hour, minute(s), and
AM/PM_
.
After setting AM or PM, press the
DATE/TIME button to remove the
flashing cursor and start the internal
clock.
22
12 : OOAM
"I'/ 1/1998
/i _,
To Correct the Date or Time
To correct the date or time, press and hold
the DATE/TIME button and then press
STOP/EJECT. The display and the
flashing cursor appear. Use STOP/
EJECT, EFWD, and RE W/RE VIE W to
correct the time or date. Press DATE/
TIME to remove the flashing cursor and
start the clock.