5
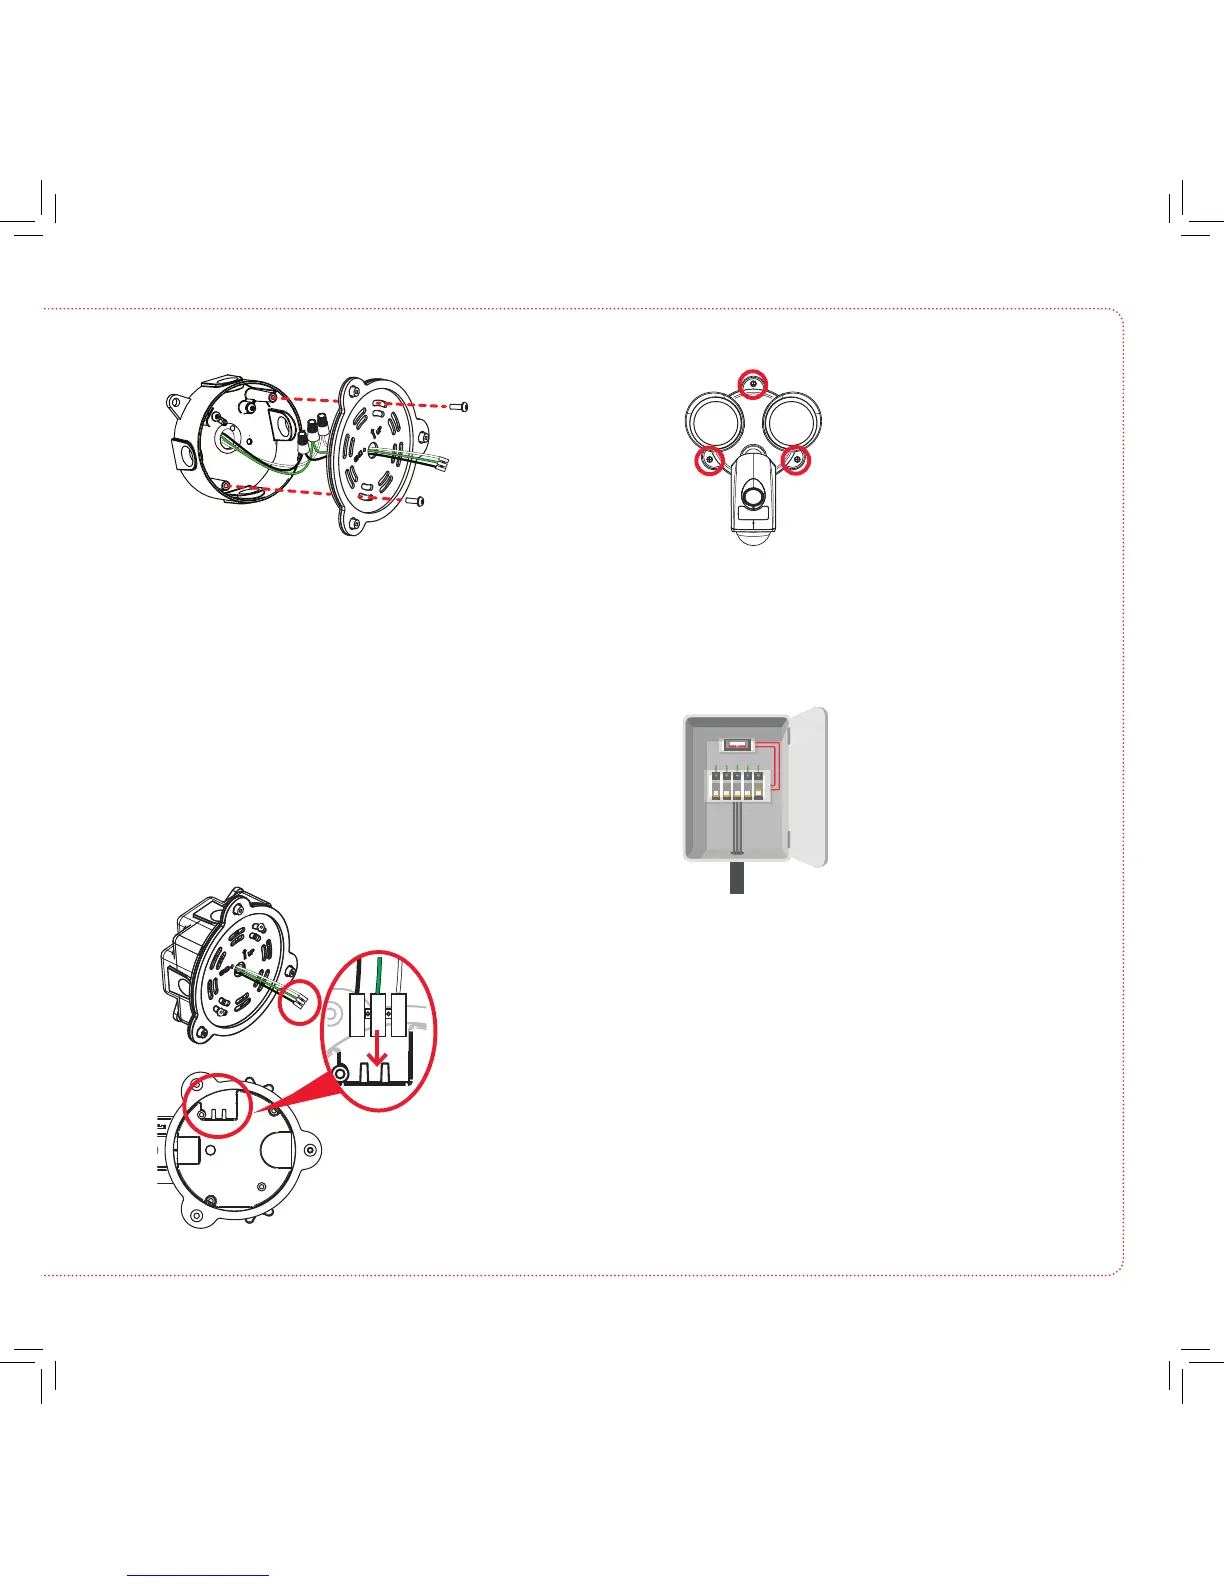
Mount the oodlight camera to the
base and junction box.
5
Place each twisted wirenut in the junction
box. Then align the oodlight camera base
on the junction box so that it’s oriented
correctly.
Place 2 #8x1-1/2in screws through the base
and into the the mounting holes on the
junction box. Screw the base rmly in place.
Turn on power to your oodlight’s
circuit
6
Conrm the oodlight camera has
power
7
Turn the breaker that controls
the circuit for your oodlight
back on.
At rst power up, the oodlights come on.
Once the oodlight camera is ready for setup,
the oodlights turn off and the indicator on the
front of the camera ashes blue and red.
Note: If you’ve installed the oodlight camera
on a switchable outlet, make sure you turn the
switch on and leave it on for the oodlight
camera to function 24/7.
Plug the 3-wire connector
back into the oodlight
camera base
as shown.
Make sure it’s
completely
seated before
proceeding.
Place the oodlight
camera over the base so
that the base’s mounting
tabs t into the camera’s
slots. Find the 3 base
screws you removed in
step 3. Put the base screws
back into their slots and
tighten completely.
Floodlight camera, front
Base screws