Do you have a question about the RCA J26H700 and is the answer not in the manual?
Warnings about electric shock risks, fire hazards, and avoiding moisture for safe operation.
Details on product registration, warranty, and recording model/serial numbers for service.
Reminder for installers about proper grounding as per the National Electric Code.
Cautions on product modification, servicing, exposure to liquids, and correct power cord usage.
Guidelines for cleaning the TV's exterior using a lint-free cloth and avoiding harsh agents.
Information on the main plug as a disconnecting device and essential safety points for product use.
FCC compliance details for digital devices and user responsibilities regarding modifications.
Guidelines for safe operation, cleaning, ventilation, placement, and handling of cords/accessories.
Instructions on plug safety, cord protection, and correct grounding of antenna systems for safety.
Advice on servicing, unplugging during storms, and proper disposal of mercury-containing lamps.
Advice on power surges, overheating, cable placement, lighting, remote, and parts check before connecting.
Identification and function of buttons and indicators on the front panel of the J22H760 model.
Description of all input/output ports on the rear panel of the J22H760 model.
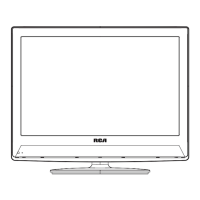
Identification and function of buttons and indicators on the front panel of the J26H700 model.
Description of all input/output ports on the rear panel of the J26H700 model.
Identification and function of buttons and indicators on the front panel of the J32H700 model.
Description of all input/output ports on the rear panel of the J32H700 model.
Identification and function of buttons and indicators on the front panel of the J42H750 model.
Description of all input/output ports on the rear panel of the J42H750 model.
Guidelines for choosing and installing VESA standard wall mounts for specific TV sizes.
Advice on selecting suitable locations for installing VESA standard TV mounts.
Warning about using screws that are too long, which can damage TV components.
Guidelines for choosing and installing VESA standard wall mounts for 22-inch TV models.
Advice on selecting suitable locations for installing VESA standard TV mounts.
Warning about using screws that are too long, which can damage TV components.
Instructions for connecting antennas to the TV for different dwelling types.
How to connect to a wall antenna socket for apartments.
How to connect to a wall jack for outdoor antennas in houses.
Advice on using a signal amplifier or contacting a dealer for antenna issues.
Instructions for connecting antennas to the TV for different dwelling types.
How to connect to a wall antenna socket for apartments.
How to connect to a wall jack for outdoor antennas in houses.
Advice on using a signal amplifier or contacting a dealer for antenna issues.
Instructions for connecting a VCR to the TV using antenna or RCA cables.
Steps to connect a VCR via antenna cable for signal reception.
Steps to connect a VCR using RCA audio/video cables.
Instructions for connecting a VCR to the TV using antenna or RCA cables.
Steps to connect a VCR via antenna cable for signal reception.
Steps to connect a VCR using RCA audio/video cables.
Instructions for connecting a DVD player using HDMI or Component cables.
Steps to connect a DVD player via HDMI cable for video and audio.
Steps to connect a DVD player via Component cables for video and audio.
Instructions for connecting a High Definition Set-Top Box (HDSTB) using D-Sub 15 pin cables.
Connecting HDSTB to TV via D-Sub cable for larger screen sizes.
Connecting HDSTB to TV via D-Sub cable for 22-inch screen size.
Connecting digital set-top boxes using HDMI to DVI cables.
Connecting HDSTB to larger screen sizes via HDMI to DVI cable.
Connecting HDSTB to 22-inch screen size via HDMI to DVI cable.
Connecting HDSTB to TV using Component cables.
Connecting HDSTB to TV using HDMI cable.
Connecting external A/V sources like camcorders or game consoles.
Connecting A/V sources to larger screen sizes.
Connecting A/V sources to 22-inch screen size.
Connecting external audio equipment using digital audio output.
Connecting audio equipment to larger screen sizes.
Connecting audio equipment to 22-inch screen size.
Instructions for connecting pillow speakers, including pin-outs and switch settings.
Pre-connection checks for pillow speaker compatibility and switch settings.
How to use the TV with single button and digital pillow speakers.
Instructions for connecting a PC to the TV using D-Sub 15 pin cables.
Connecting PC to larger screen sizes via D-Sub cable.
Connecting PC to 22-inch screen size via D-Sub cable.
Connecting a PC to the TV using HDMI or DVI cables.
Connecting PC to larger screen sizes via HDMI to DVI cable.
Connecting PC to 22-inch screen size via HDMI to DVI cable.
Table detailing supported resolutions and frequencies for PC and HDMI inputs.
Instructions for connecting USB devices and selecting USB input.
Instructions for connecting headphones and adjusting volume on 22-inch models.
Description of the R130K1 remote's buttons and basic operational functions.
Description of the R130K2 remote's buttons for advanced customization and setup.
Steps for correctly inserting batteries into the remote control.
Explanation of the USB Cloner device's connectors, switch, LED, and button.
Table listing error conditions indicated by the USB Cloner's LED flashes.
Steps to copy TV settings to a USB Cloner for 22-inch models.
Steps to copy TV settings to a USB Cloner for 26/32-inch models.
Steps to copy TV settings to a USB Cloner for 42-inch models.
Steps to transfer TV settings from a USB Cloner to the television.
Instructions for plugging in the TV, turning it on, and initial channel scanning.
How to select channels, adjust volume, and use the mute function.
How to change the input source for various external devices.
How to set the On-Screen Display (OSD) language.
Overview of the commercial interface and enabling it for advanced settings.
Options for channel tuning, source, power-on channel, and hold.
Configuration for channel banner display and OSD timeout.
Setting which inputs are available via the input button and channel list.
Adjusting initial, minimum, and maximum volume, and volume hold.
Configuring pillow speaker behavior like CH Hold and Power Off.
Configuring auto power on/off functions and power always on.
Disabling front panel keys and managing RCU types.
Resetting all commercial interface menu data to factory defaults.
How to navigate and access different menus (Video, Audio, TV, Setup) via the OSD.
Automatically finding and storing available channels via Antenna or Cable.
Manually storing or removing channels from the channel list using Channel Skip.
How to select and adjust Picture Modes (Cinema, Vivid, User, etc.) for preferred display.
Manually adjusting Brightness, Contrast, Saturation, HUE, and Sharpness.
Adjusting the brightness curve of the display (Dark, Middle, Bright).
Adjusting color temperature (Cool, Standard, Warm, User) for viewing preference.
Restoring all picture settings to their original factory presets.
Accessing advanced video features like DNR, CTI, Flesh Tone, etc.
Reducing noise and film grain in the picture (Off, Low, Medium, Strong, Auto).
Sharpening color borders by reducing transition time between colors.
Enhancing the display of sky and flesh colors for a more pleasing image.
Adjusting Average Picture Level (APL) to counteract dark areas and improve overall picture brightness.
Setting the screen to blue when no video signal is present.
Adjusting the brightness level of the backlight for room lighting conditions.
Choosing screen size formats (Normal, Letterbox, Panorama, Auto) based on video input.
Using Sound Mode presets to adjust audio to listening preferences.
Manually adjusting individual audio settings like Balance, Bass, and Treble.
Enabling surround sound for an enhanced audio experience.
Selecting equalizer modes (Rock, Pop, Live, etc.) for personalized audio profiles.
Activating digital audio output (Off, Dolby Digital, PCM) for compatible devices.
Receiving MTS stereo and SAP programs, with automatic mono switching.
Selecting available audio languages for digital broadcast signals.
Setting the TV's time zone for the local viewing area.
Receiving and setting the current time automatically from a digital broadcast signal.
Manually setting the clock's date and time if auto synchronization is incorrect.
Scheduling automatic TV power-on and power-off times.
Setting a timer to automatically switch the TV to standby after a preset time.
Enabling and selecting analog closed caption display options (CC1-CC4, TEXT1-TEXT4).
Enabling and selecting digital closed caption display services (Service1-Service6).
Customizing the appearance of DTV captions (Font Size, Color, Opacity, etc.).
Returning all menu selections to their original factory preset values.
Accessing parental controls using the default or a new password.
Creating and confirming a new password for parental controls.
Enabling or disabling the parental blocking scheme for program ratings.
Monitoring and blocking types of programs viewed on TV based on US rating systems.
Explanations of TV-MA, TV-14, TV-PG, TV-G, TV-Y7, TV-Y ratings.
Explanations of content sub-categories like D, L, S, V, FV.
Monitoring and blocking movie ratings (G, PG, PG-13, R, NC-17, X) broadcasted on TV.
Monitoring and blocking Canadian English TV program ratings (C, C8+, G, PG, 14+, 18+).
Monitoring and blocking Canadian French TV program ratings (G, 8 ans+, 13 ans+, 16 ans+, 18 ans+).
Managing downloadable rating information and Open V-Chip options for digital signals.
Blocking unrated channels, ratings, and other viewing sources.
Resetting all current parental block settings to their defaults.
Configuring the TV for PC input, including automatic screen adjustments.
Automatically adjusting screen position, clock, phase, and scale for PC input.
Manually fine-tuning screen position, phase, and clock for PC input.
Viewing photos from a USB device by selecting the Picture function.
Listening to music files from a USB device by selecting the Music function.
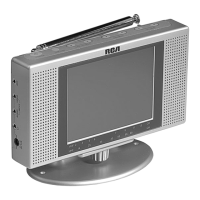
Technical specifications for the J22H760 model, including dimensions, weight, and ports.
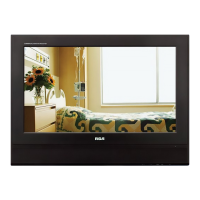
Technical specifications for the J26H700 model, including dimensions, weight, and ports.
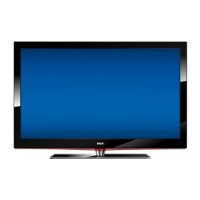
Technical specifications for the J32H700 model, including dimensions, weight, and ports.
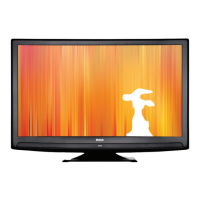
Technical specifications for the J42H750 model, including dimensions, weight, and ports.
Solutions for common problems like no picture, remote issues, poor color, and unusual sounds.
Details of the warranty period, coverage, and limitations for the display.
Information on the 2-year warranty period and how to prove the purchase date.
Explanation of pixel defect specifications and compliance with standards.
List of conditions and damages not covered by the limited warranty.
How to get warranty service, contact RCA, and register the product.
Guidelines for safely cleaning the TV and ventilation slots.
Risks associated with improper support or installation of flat panel displays.
Recommendations for safe installation, use, and preventing children from climbing or pulling displays.
Crucial safety steps and considerations for wall mounting a flat panel display.
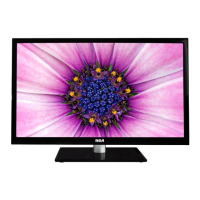
| Screen Size | 26 inches |
|---|---|
| Resolution | 1366 x 768 |
| Display Type | LCD |
| HDMI Ports | 2 |
| USB Ports | 1 |
| Aspect Ratio | 16:9 |
| Refresh Rate | 60 Hz |
| Sound Output | 10 W |
| Power Consumption | 45W |
| Inputs | HDMI, USB, Composite |