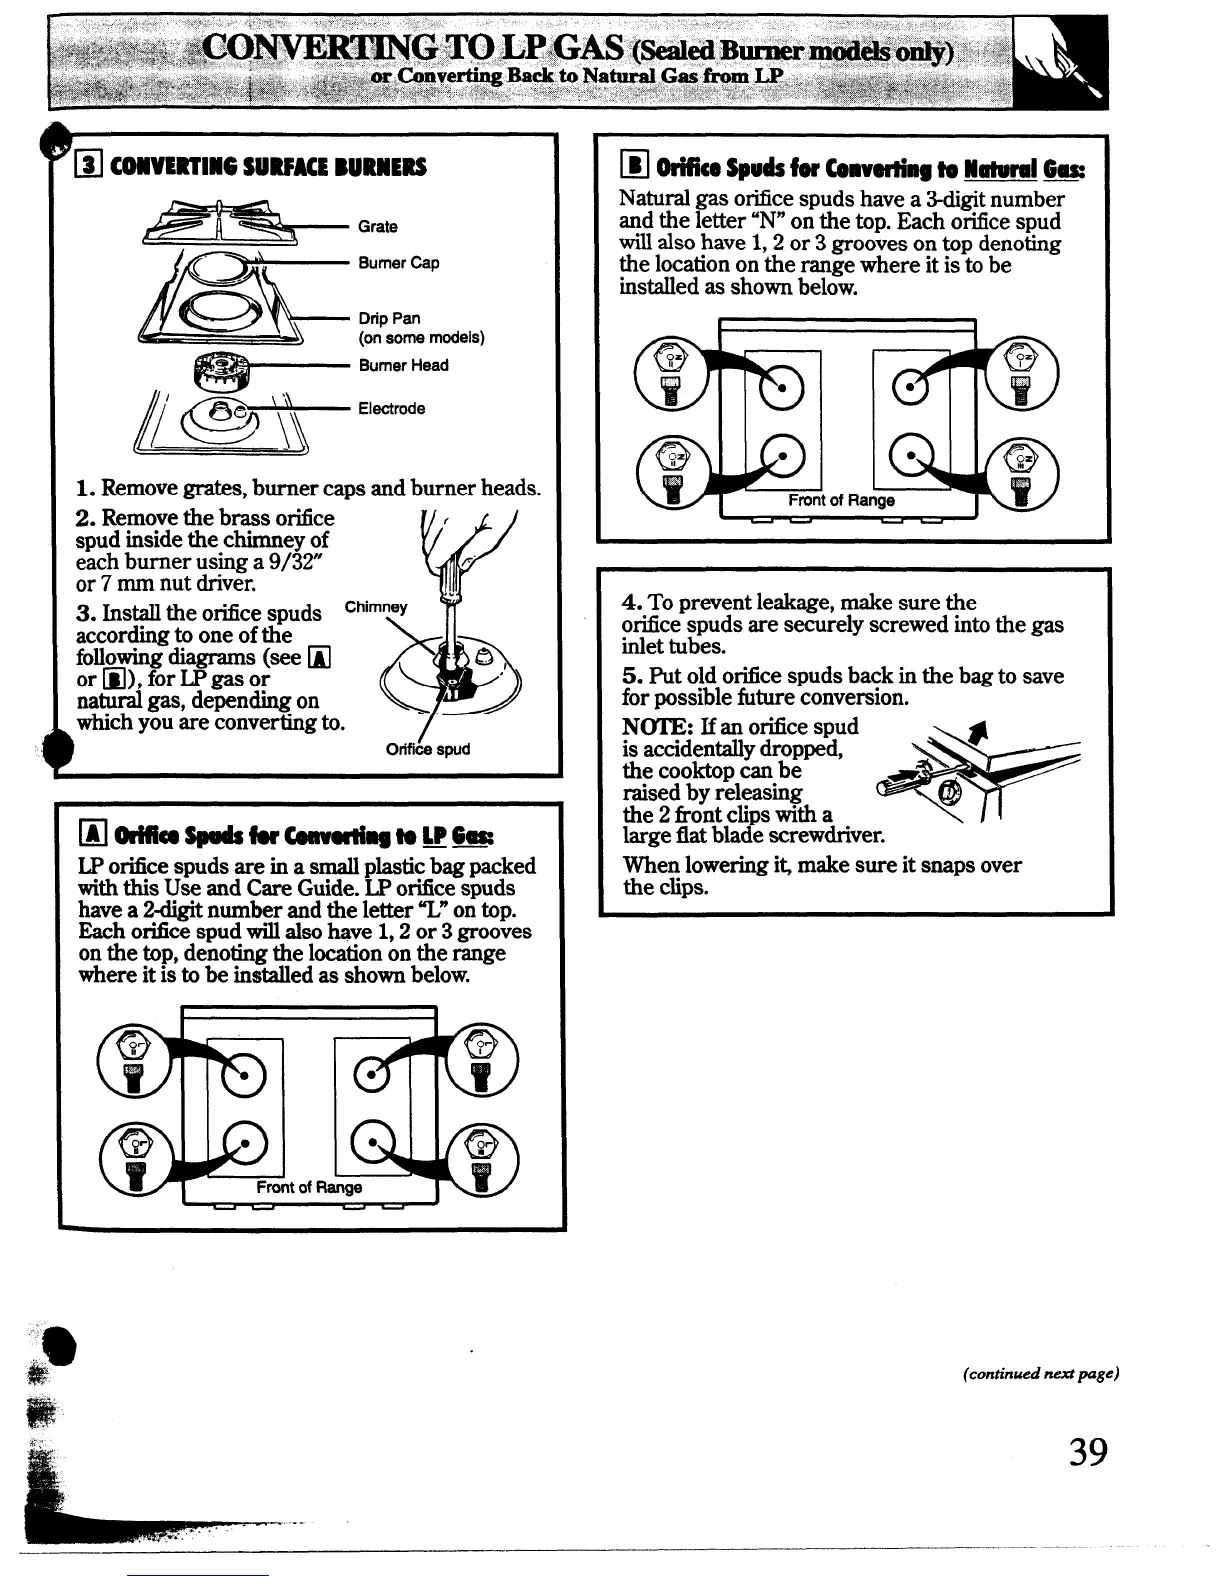
‘@ CONVERTINGSURFACEBURNERS
Grate
(
,%
Burner Cap
Q
Drip Pan
(on some models)
~$;:y
1. Remove grates, burner caps and burner heads.
2. Remove the brass orifice
spud inside the chimney of
each burner using a 9/32”
or 7 mm nut driver.
3. Install the ofice spuds Cfimney
according to one ofthe
followingdiagrams (see
❑
or @J),for LP gas or
natural gas, depending on
which you are converting to. ‘
)
❑ GR’ific0sp9dsfu
COnvdmgto LP6-
LPotice spuds are in a small plastic bag packed
with this Use and Care Guide. LP orifice spuds
have
a 2-digit number and the letter “L”on top.
Each orifice spud will also have 1,2 or 3 grooves
on the top, denoting the location on the range
where it is to be installed as shown below.
~ Hce Spuds for Convetiing to Hatural Gas
Natural
gas orifice spuds have a 3-digit number
and the letter ‘N” on the top. Each orifice spud
will also have 1,2 or 3 grooves on top denoting
the location on the range where it is to be
installed as shown below.
4. To prevent leakage, make sure the
orifice spuds are securely screwed into the gas
inlet tubes.
5. Put old orifice spuds back in the bag to save
for possible future conversion.
N(Yl?13:If an orifice spud
is accidentally dropped,
the cooktop can be
raised by releasing
the 2 ikont clips with a
*
large flat blade screwdriver.
~c~~ring i~ make sure it snaps over
.
(continued next page)
+t;
39
—
—
—-
—...—..
 Loading...