4!?bW10C0HVERTA STAiUMRD TWIN
BURNER RAH6E FORUSEWmi 1P 6AS OR
HATURAL w
This range
leaves the factory set for use with natural
gas. Ifyou convert to LP gas, keep these instructions
and orifices in case you want to convert back to
natural gas.
‘Theconversion should be done by a qualiiied
techtici~ or installer.
,
\
TOOLS REQUIREW
Adjustable wrench
1/2” open-end wrench
Flat blade screwdriver (small)
Nut drivers: 7mm, 5/16” or a small adjustable
(depending on the size of the spuds)
❑ ~~m RANGE FOR COUVERSION
(1) TWII ~gas supply at the waII.
(2) Turn off the electrical power to the range.
Ifrangehas not yet been comected to gas supply,
or ifflexible comection was made, range maybe
pulled out fi-omthe wallto make conversion easier.
(
~..
I
‘“””
-e
.-,
.
“.
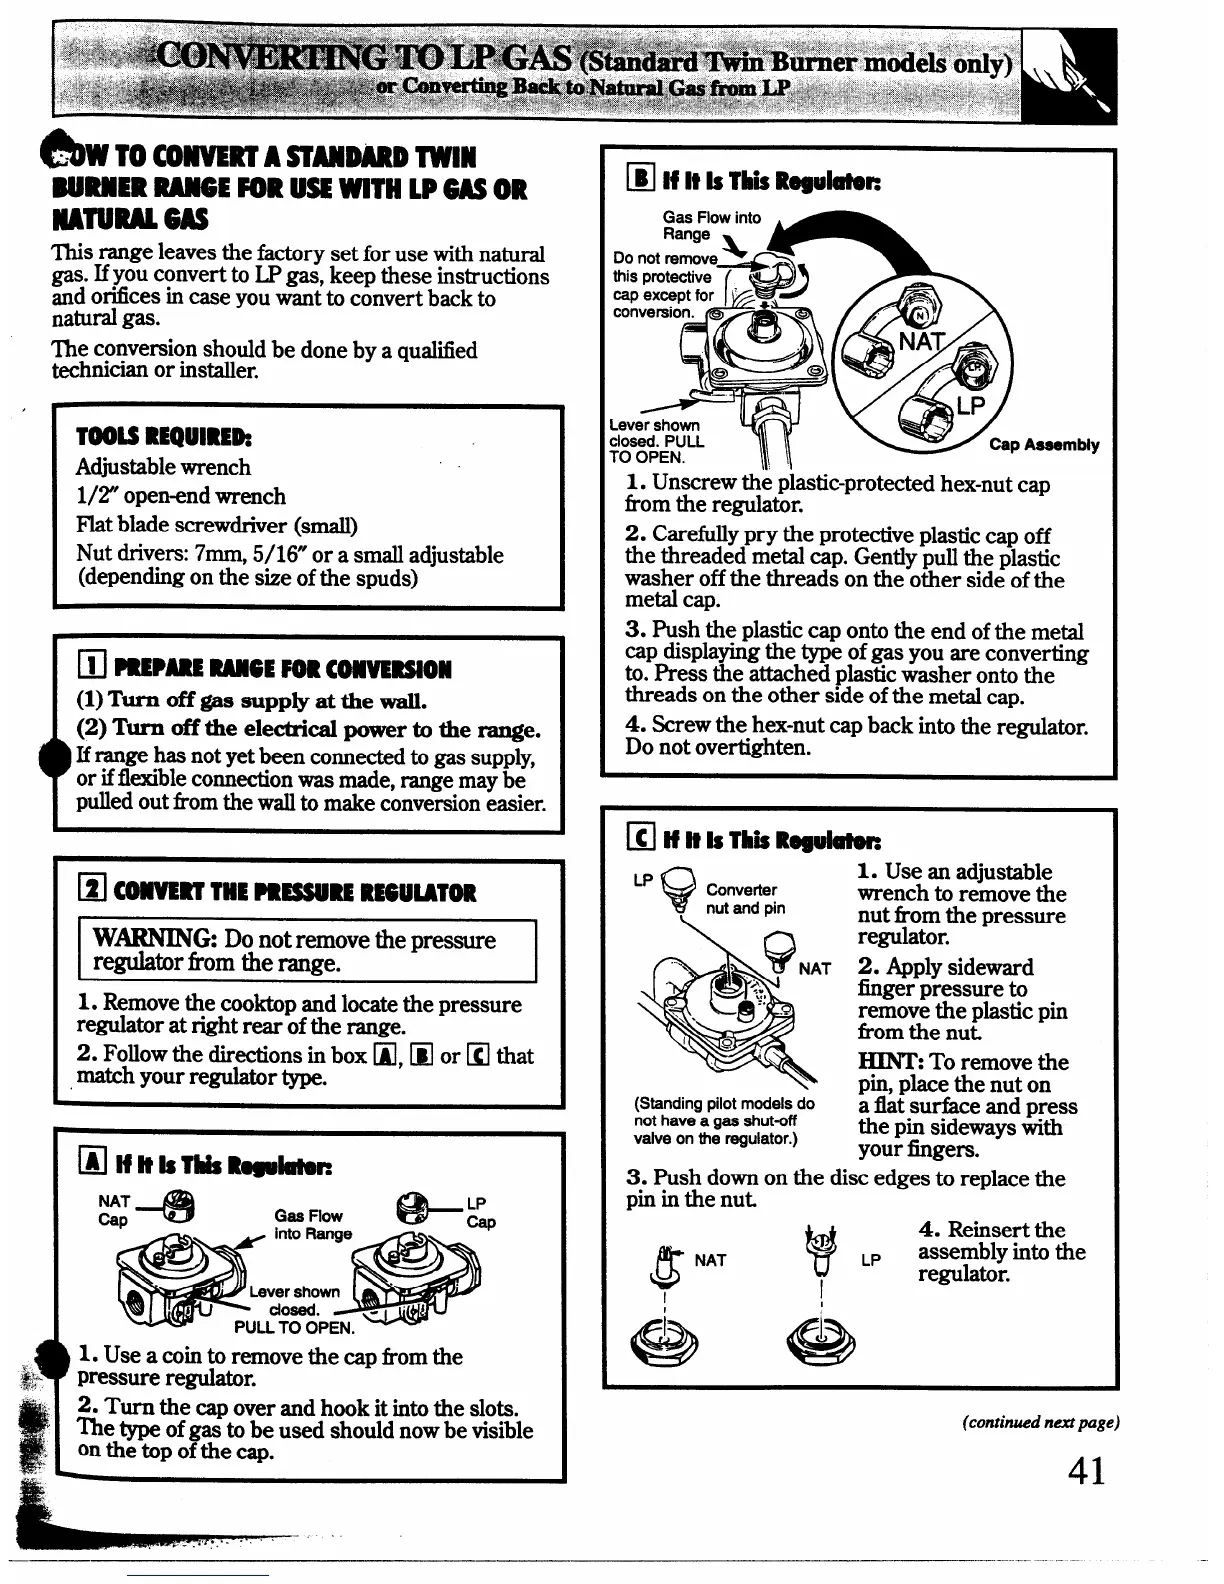
❑ c~ THE PRESSURERE6ULATOR
I
W~G Do not remove the pressure
regulator fi-omtie range.
I
1. Remove the cooktop and locate the pressure
regulator at @ht rear of the range.
2. Followthe dire@ons in box
❑, ❑ or ❑ that
.match your regulator type.
@hfWTbkRogubtm
)
1. Use a coin to remove the cap from the
pressure regulator.
z. Turn the cap over and hook it into the slots.
The type ofgas to be used should now be visible
on the top ofthe cap.
❑ If It b Thii Raguhtm
Aesembly
1. Unscrew the plastic-protected hex-nut cap
horn the regulator.
2. Carefully pry the protective plastic cap off
the threaded metal cap. Gently pull the plastic
washer off the threads on the other side of the
metal cap.
3. Push the plastic cap onto the end of the metal
cap displaying the type of gas you are converting
to. Press the attached plastic washer onto the
threads on the other side of the metal cap.
4. Screw the hex-nut cap back into the regulator.
Do not overtighten.
❑ ~ it h TIIb Regulm
1. Use an adjustable
wrench to remove the
nut from the pressure
regulator.
2. Apply sideward
finger pressure to
remove the plastic pin
from the nut
HIN’R To remove the
pin, place the nut on
(Standing pilot models do
a flat surfhce and press
not have a gee ehut-off
the
pin sideways with
valve on the regulator.)
your fingers.
3. Push down on the disc edges to replace the
pin in the nut
w
4. Reinsert the
G
.
NAT
assembly into the
I
regulator.
& 6“
(continued next page)
41
.—
-.—..—.—.. --
—
 Loading...