9
INSTRUCTION
CONNECTION OPTION
This is the back panel LCD TV
ŶThis is a simplified representation of a back panel.
Here shown may be somewhat different from your TV.
8
INSTRUCTION
CONTROLS
This manual explains the features available on the model of LCD TV.
Ƶ
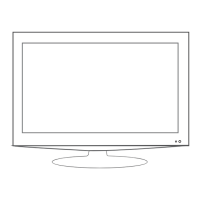
This is a simplified representation of a front panel. Here shown may be somewhat
different from your TV.
(1): (VOL-) Press Volume- to decrease the volume.
(2): (VOL+) Press Volume+ to increase the volume.
(3): (CH-) Press the button to down the channel.
(4): (CH+) Press the button to up the channel.
(5): (SOURCE) Press this button to select AV source or TV source.
(6): (MENU) Press this button to display the OSD menu.
When the OSD menu is on, press this button to exit the menu.
(7): (POWER) Press this button to st
andby mode.
(8): Indicator.
(9): Remote control sensor window.
Right Side Panel Control
Rear Connection Panel
2
1
3
6
4
7
9
8
5
POWER
SOURC
E
ME
NU
CH- CH+
VOL- VOL
+
(07)
(08) USB:InputUSBdeviceinput
(06)
HDMI1 Input: Connect HDMI signal.
HDMI2 Input: Connect HDMI signal.
HDMI3 Input: Connect HDMI signal.
(09)
YPBPR(Y:GREEN, PB:BLUE, PR:RED): Connect the component image output
o
f your AV devices here. Then Connect audio output of your AV devices to R and L.
(05)
(04)
VGA Input: Connect PC VGA signal output.
(03)
RF: Antenna Input (75 ohm).
(02)
PCAUDIO I
AUDIO OUT: Analog Audio out.
nput Connect to PC audio output of the computer .
(01)
2
4
3
1
HDMI2
HDMI3
6
USB
9
10
7
8
HDMI1
5
11
L R
AV IN
AUDIO OUT
L R
L
R
12 13
2
(
1
)
1
(
1
)
3
(
1
)
COAX:Connects to the audio jack on the digital/standard 5.1 audio system.
AC 100-240V
~50/60HZ
0
PC AUDIO
:
L
COAX RF VGA PC-AUDIO
HDMI1 HDMI2
HDMI3
USB
Pb
PrY
R L
R L
AUDIO OUT
VIDEO R L
AV IN
COMPONENT
AACC 110000--224400 VV
~~5500//6600 HHZZ
PPOOWWEERR
OONN//OOFF FF

 Loading...