76
INSTALLATION (continued)
Step 5:
Switch on your music device (TV, HiFi, CD, DVD etc.) to begin
playing your audio program. If you have the transmitter connected
to a portable CD or MP3 player, make sure the volume level on the
player is set to a mid-level setting to assure a strong input signal to
the transmitter.
Step 6:
Listen to the sound coming from the headphone before placing it in
position on your head to make sure the volume is not too loud. Adjust
the volume control by rotating the thumbwheel to the desired level.
Please refer to the previous HEADPHONE SAFETY section for
quidelines on operating safety.
If there is no sound or it is distorted, then tune the headphone by
adjusting the CHANNEL TUNING THUMBWHEEL until the sound
is improved and the LED light turns GREEN.
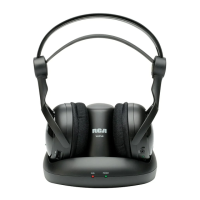
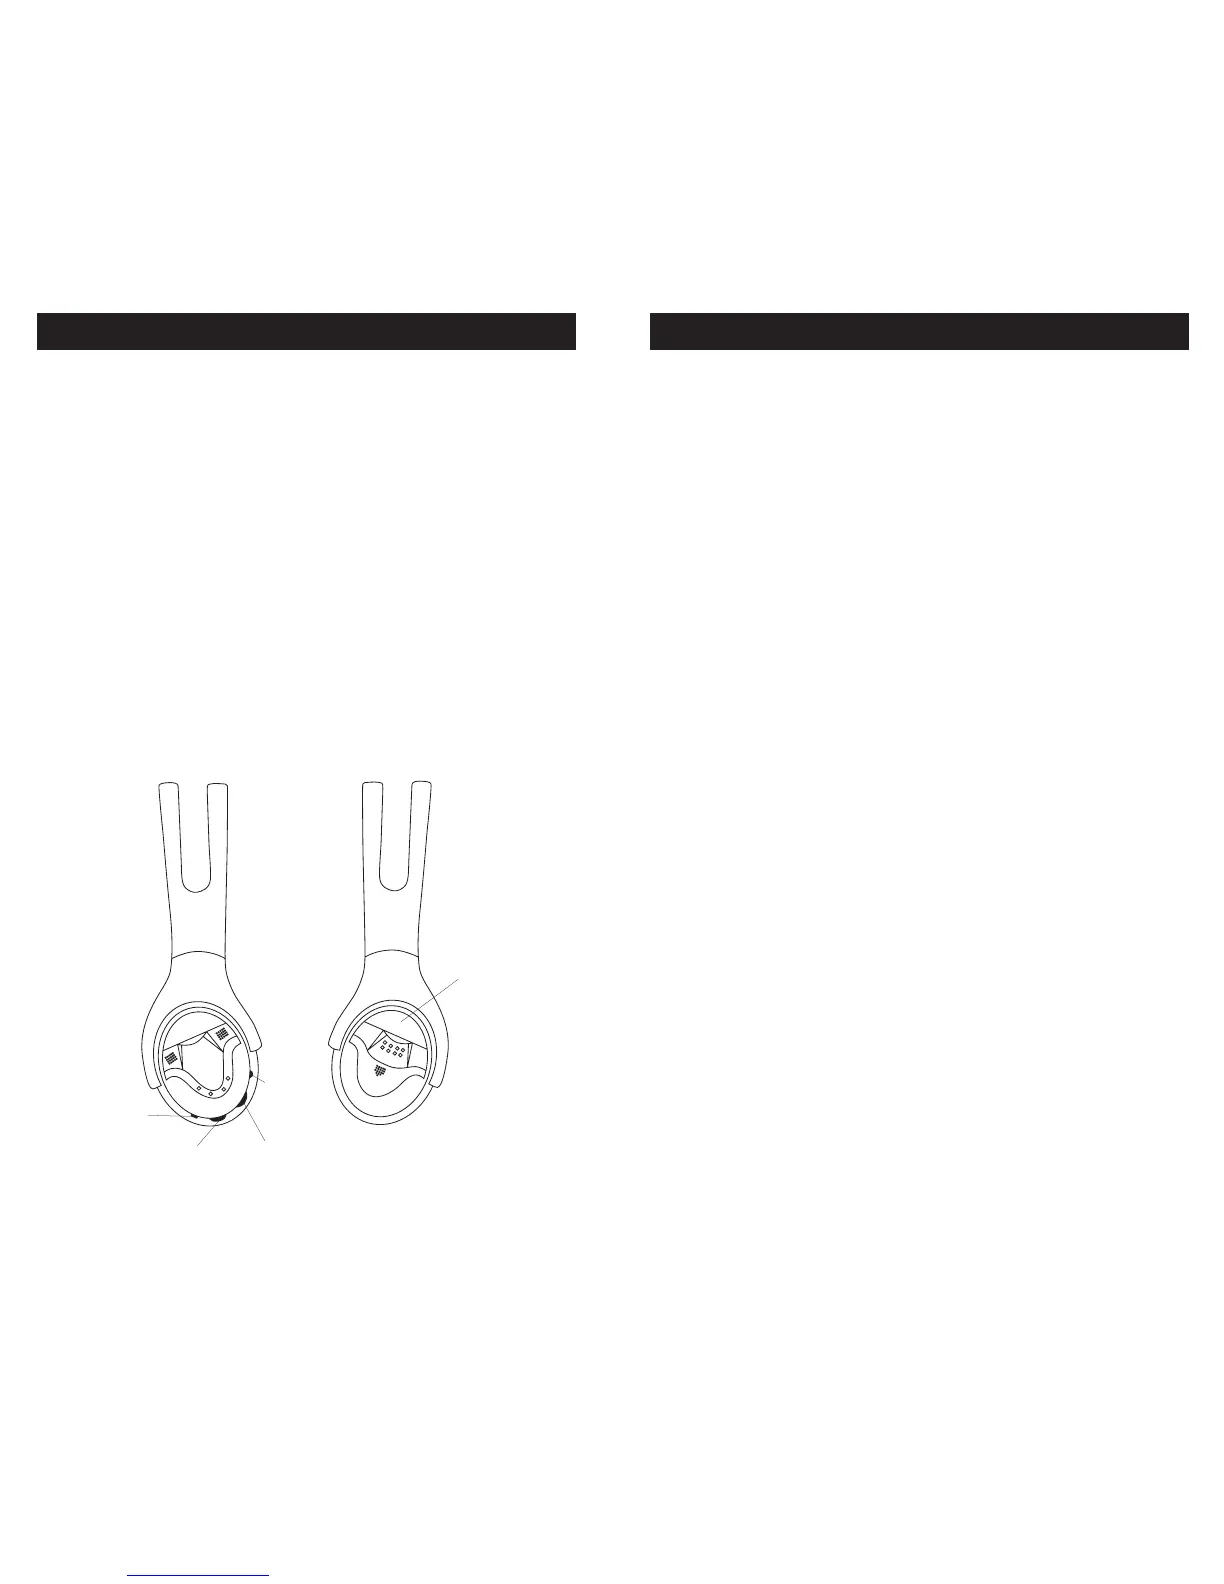
RIGHT SIDE
LEFT SIDE
BATTERY
COMPARTMENT
COVER
DUAL
COLOR LED
INDICATOR
VOLUME
CONTROL
KNOB
POWER
ON/OFF
SWITCH
CHANNEL
TUNING
THUMBWHEEL
INSTALLATION (continued)
Step 4:
Placing your thumb on the Battery Compartment Cover on the left
side of the headphone, gently push up in a sliding motion to remove
the cover. Then insert the 2 “AA” size batteries into the battery
compartment, carefully following the markings inside to assure the
batteries are inserted properly with the + and – ends in the correct
position. Then slide the battery cover into place until the tabs lock
to secure it in the proper position. Then locate the Power ON/OFF
Switch and slide it to ON.
*Note: You may use nickel-cadmium or nickel-metal hydride
rechargeable batteries to operate the headphones. However, they
may not be recharged in the headphones. Use your charging device
with the batteries to recharge them.
 Loading...