CONTROL OF THE FUNCTION BY STEERING WHEEL COMMANDS
MAESTRO can be controlled by the supplied remote control but also by the steering wheel
commands (according to compatibilities).
Obviously, according to the different buttons available on the steering wheel the user can control
MAESTRO in 2 different modes: MODE A and MODE B.
The two modes are described as follow .
MODE A*
Mode with volume and seek
buttons
Volume Buttons
SEEK Buttons
ON/OFF Maestro SEQUENCE
VOL+ / VOL — / VOL+ / VOL —
Volume + VOLUME +
Volume - VOLUME —
MP3 next Track Seek +
MP3 previous Track Seek —
Playlist/next folder Seek + (long)
After the first long press to scroll the other playlist quickly it’s needed to press fast
button SEEK + . After 3 second the system restore the managing of the tracks
Playlist/back folder Seek— (long)
MENU selection Seek — (short)
followed by
Seek + (long)
Menu UP Seek +
Menu DOWN Seek —
MENU confirmation Seek — (short)
followed by
Seek + (short)
MP3 Play/Pause Seek — (short)
followed by
Seek + (short)
After the first long press to scroll the other playlist quickly it’s needed to press fast
button SEEK — . After 3 second the system restore the managing of the tracks
+
—
<
>
Page 10
*Attention on some cars the long pression buttons are not available.
ADAPTERS TO CONNECT MAESTRO
TO ANY CAR RADIO, EITHER BY ISO CONNECTION OR FAKRA CONNECTION
WITH 1 OR 2 ANTENNAS, ARE AVAILABLE
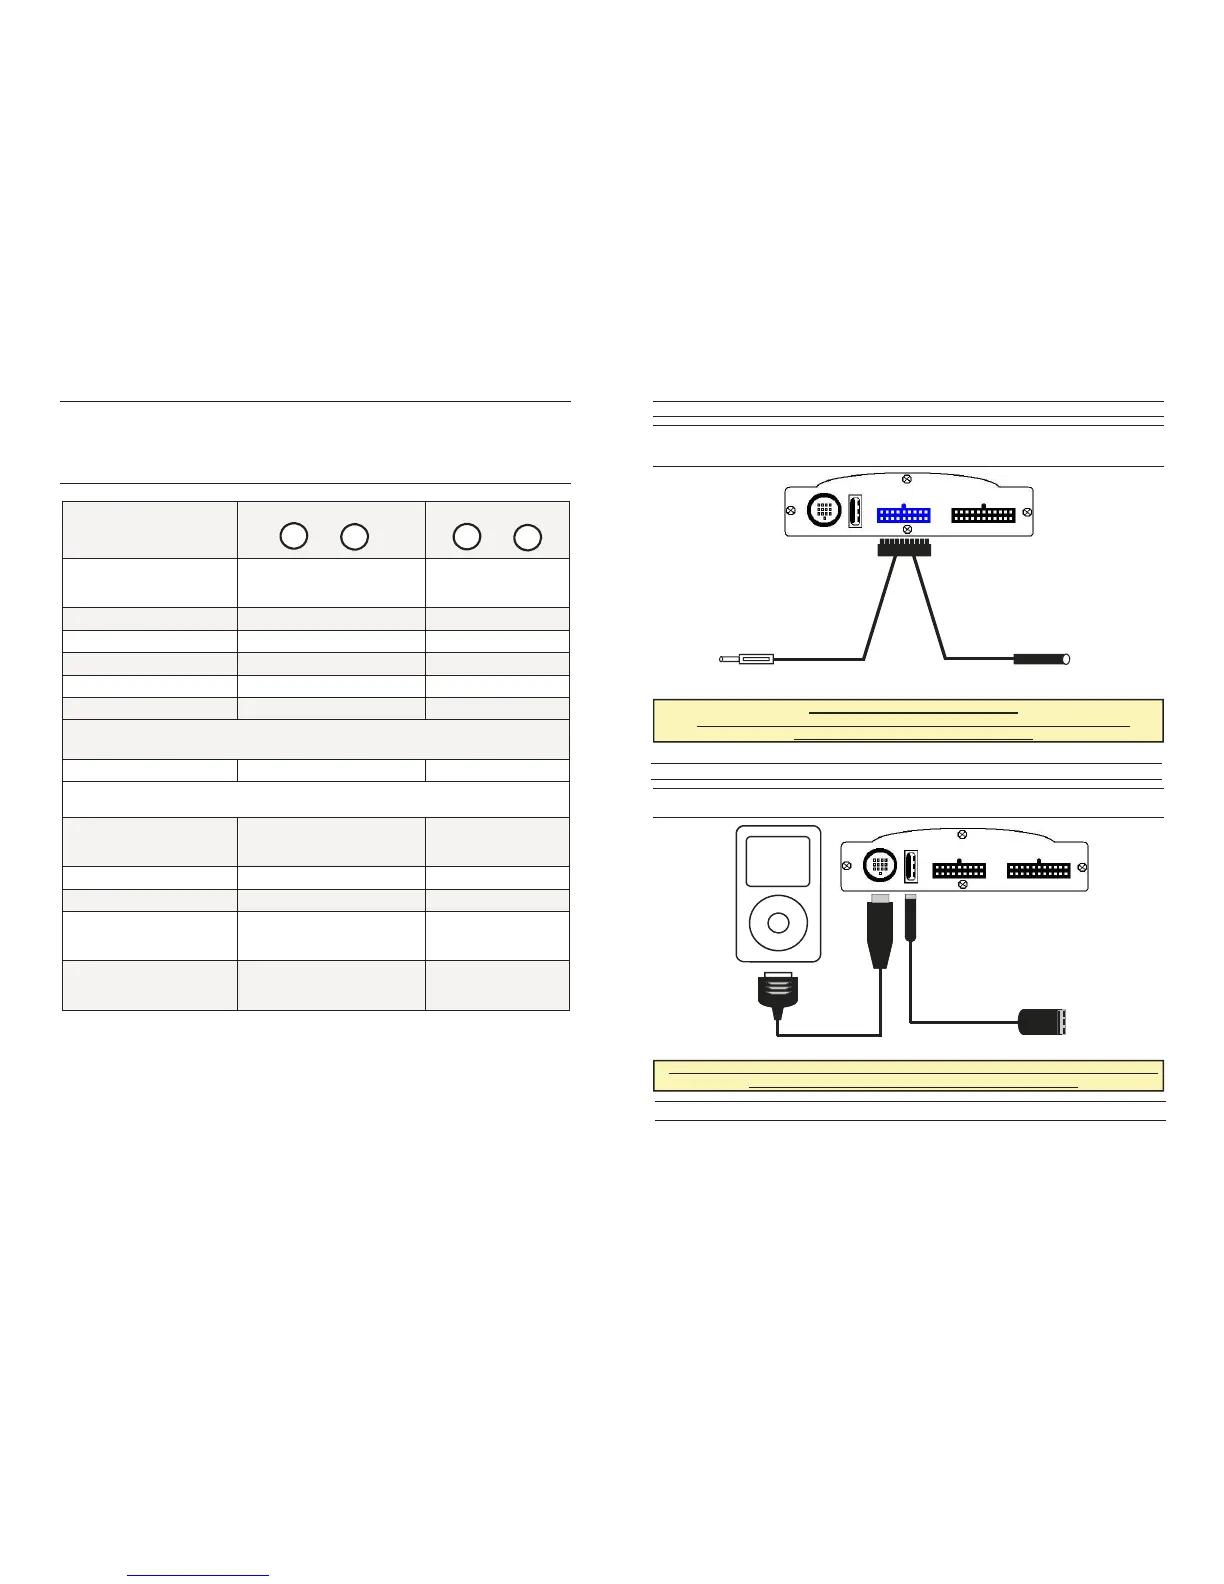
The user must connect MAESTRO in series to the vehicle antennas. Please connect the
antennas DIN-cable inserting it into the connector as below shown. Then, please connect in
series the antennas putting them between the car antenna and the car radio.
ANTENNA CABLES CONNECTION
Once the antennas cable has been connected, it’s necessary to connect USB and IPOD cables
as below described.
E
B
TO THE RADIO
TO THE ANTENNA
WHEN THE USB AND THE IPOD CABLES ARE CONNECTED, PUT THE PLUGS INTO THE
MOST CONVENIENT COMPARTMENT, AS THE GLOVE BOX
The installation is finished.
Page 3
C/D
IPOD / USB CABLES CONNECTION
 Loading...