Congratulations on your choice of a Real Good Toys product. Your kit has been precision made with meticulous
care by our craftspeople using carefully selected materials. This Dollhouse will last for years, even generations,
if heirloom care and attention is given during assembly. Take your time and read the instructions completely.
If you have questions, ask the experts at your local Dollhouse store or at info@realgoodtoys.com
Measure and identify the parts
:
The kit is packed in
groupings that protect the parts, and that is how the Parts
List is organized. As you measure and identify the parts,
label them with sticky notes using the names from the
parts list, and check them off the parts list so you know
you have everything. Taking the time now to identify and
organize the parts also makes them familiar so you will
understand what the instructions intend as you read ahead.
• Plan ahead so you know where you are going
• Read ahead so you know how to get there
•
Paint ahead so the parts will be ready when you need them
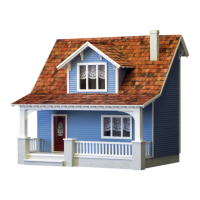
Instructions for
Real Good Toys’
the
Beachside Bungalow
Kit #B 1895
©
01/17
Before you begin - You have already opened the box and
see all the parts organized in boxes and bundles. For the
moment, keep them that way. There are important things
to do before you open your glue bottle.
Choose your color scheme
. Look at houses in your
community, models in your local Dollhouse shop or at our
website: realgoodtoys.com; look at plan books from a paint
store or architectural books at your library (a favorite is:
Painted Ladies by Michael Larsen and Elizabeth Pomada).
You will be painting some of the parts right away so get the
paint now. Choose high-quality interior semi-gloss latex
enamel paints for ease of use and durability.
Prepare your space: This dollhouse
will spread out over a large area while
it is being built. You will need a large
at tabletop for the house, several
boxes to keep parts organized until
they are needed, and several trays
lined with waxed paper for hold-
ing small parts like windows and
railings. A snap-lid box will
keep your tools and supplies
handy between building
sessions.
Tools and Supplies:
Tape measure or ruler, Pencil, Sticky notes
(like PostIts®)
White glue
(like Aleene’s Tacky Glue®)
for all construction
Solvent-based Panel Cement
for shingles
Masking tape, Utility knife or coarse le
Fine tooth saw (razor saw
(like X-Acto®)
or a hacksaw)
Painting Supplies, Sandpaper
(especially 320gr)
Waxed paper
PostIts
®
, Aleene’s
®
, and X-Acto
®
are registered trademarks of their manufacturers
and have no afliation with Real Good Toys
Not suitable for children under 13 years of age
California 93120 compliant for formaldehyde phase 2
Options: www.realgoodtoys.com or your miniature dealer
6888: the “Best 1” Dollhouse Electrical Kit
Stucco Grit: Paint additive for foundation texture
Dye-1: Brown shingle dye
Dye-3: Grey shingle dye
SC: Copper ashing
1015: 6-panel interior doors for Dividers
J-FK Interior nishing materials: Baseboard
and crown moldings & stairway
banisters and landing rails.
This kit will accommodate 1” Scale furniture
Real Good Toys 122 Gallison Hill Rd Montpelier, VT 05602 802 262-6018 www.realgoodtoys.com