13
9. Adjustments & Maintenance
Checking the Belt Tension
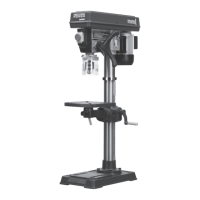
Before attempting to use the machine, check that the correct speed is
selected in relation to the size and type of drill bit and type of material
being machined. It is important to apply the correct level of tension. Over-
tensioning the belt will apply excessive load to the motor and spindle
bearings and may cause damage to the machine. Insufficient tensioning of
the belt will cause the machine to be noisy as there will be excess movement
of the belt as it runs between the pulleys and the spindle may stall when
machining as pressure is applied to the work piece. Periodically check the
belt tension to maintain optimum performance of the machine.
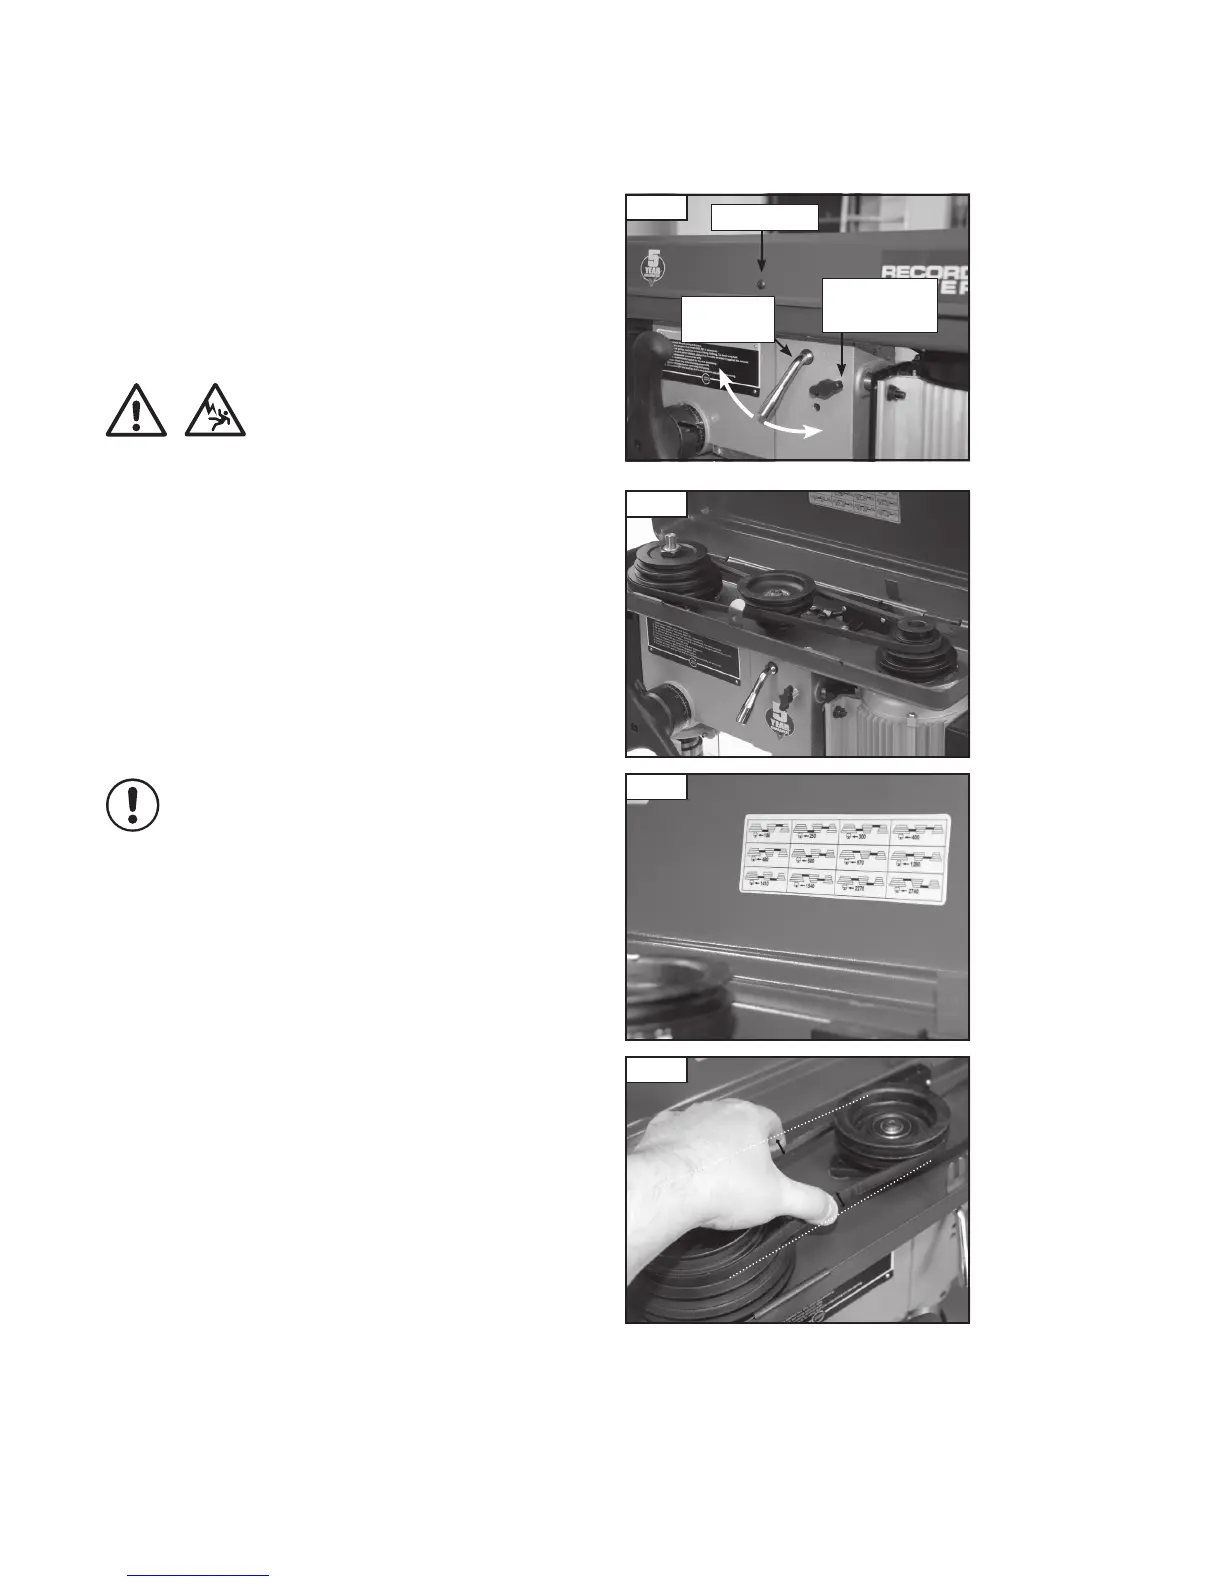
Before attempting any maintenance or adjustment ALWAYS
ensure that the machine is disconnected from the power supply.
Changing the Speed Setting
1. Remove the locking screw from the belt guard, (Fig 9.1).
2. Unscrew the belt tension locking handles (Fig 9.1) located at each side
of the head unit.
3. Use the belt tension cam handle to release tension on the drive belt by
turning it anti-clockwise.
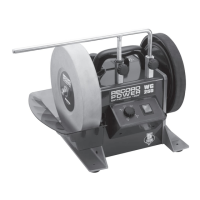
4. Re-position the drive belts (Fig. 9.2) to correspond with the appropriate
speed as shown on the speed chart inside the belt guard (Fig. 9.3).
5. Reapply tension to the drive belt by turning the belt tension cam handle
clockwise. Whilst holding the belt tension cam handle to maintain tension,
tighten the tension locking handles at each side of the head unit.
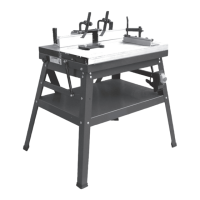
An indication of the correct tension is that when one of the belts is pinched
with reasonable force, each side moves no more than approximately 13 mm
(Fig. 9.4).
Lubrication
This machine uses sealed bearing units which require no maintenance for
the life of the product.
The table elevation mechanism and the splines (grooves) in the spindle
pulley system may need to lubricated periodically.
Fig. 9.2
Fig. 9.4
13 mm
maximum
13 mm
maximum
Fig. 9.3
Fig. 9.1