LEFT
RIGHT
FITTINGS INSTALLATION
Attach the bumper frame as shown in the
above picture.
Attach the propeller as shown in the above
picture and fasten with screws.
WARNING: Only use the charger and battery provided
with this product. The use of other chargers and
batteries may cause accidents or damage to the
product.
Insert the rechargable battery underneath the
fuselage as shown in the picture above.
Plug in the charger provided and charge the
battery.
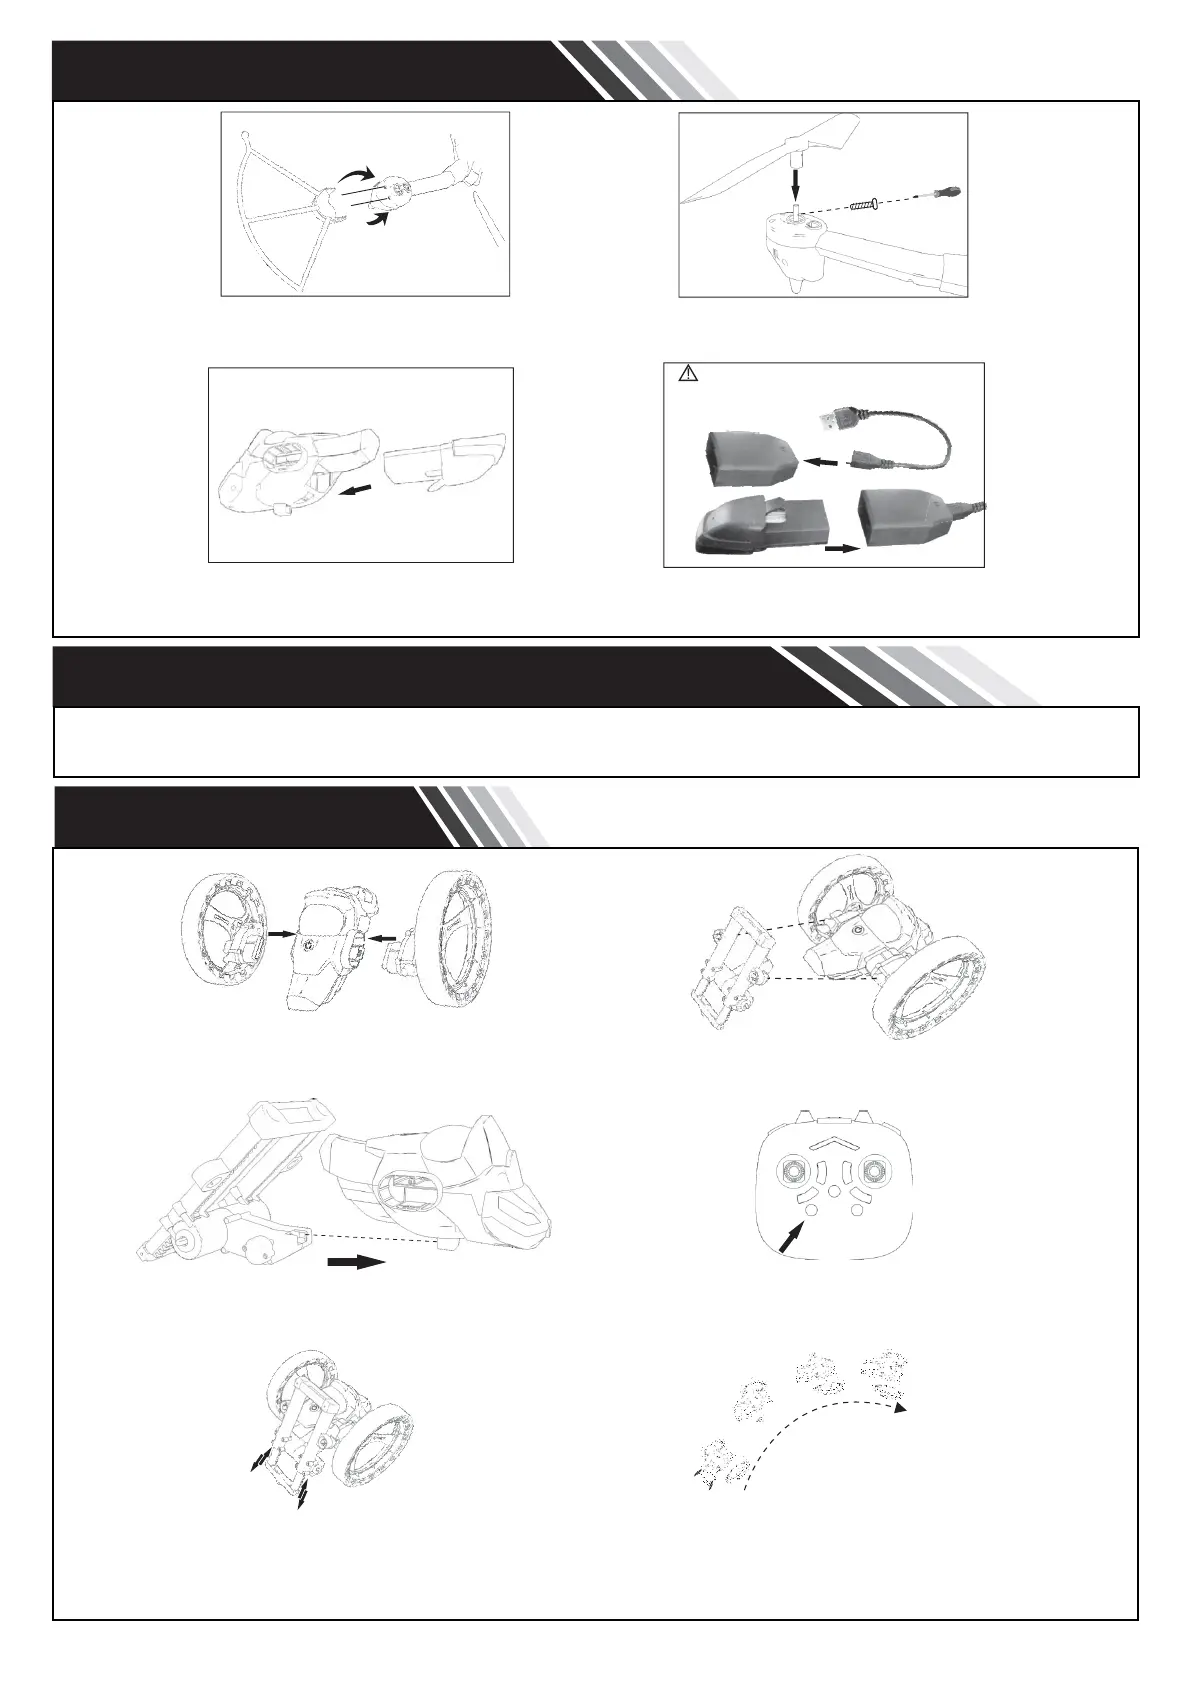
JUMPING BIKE
Attach the wheels on each side of the
fuselage.
Attach the jumping frame by clipping it to
the points either side of the fuselage.
Attach the third clip to the underneath of
the fuselage.
Press the jumping button on the controller.
The spring on the jumping frame will
compress.
The spring will release and launch the
jumping bike into the air.
Note: Please do not press the one-key take-o button when the vehicle is not being used as a drone.
-2-
Remove the battery covers and install 4x AA batteries according to the correct polarity and replace battery cover.
CONTROLLER BATTERY INSTALLATION