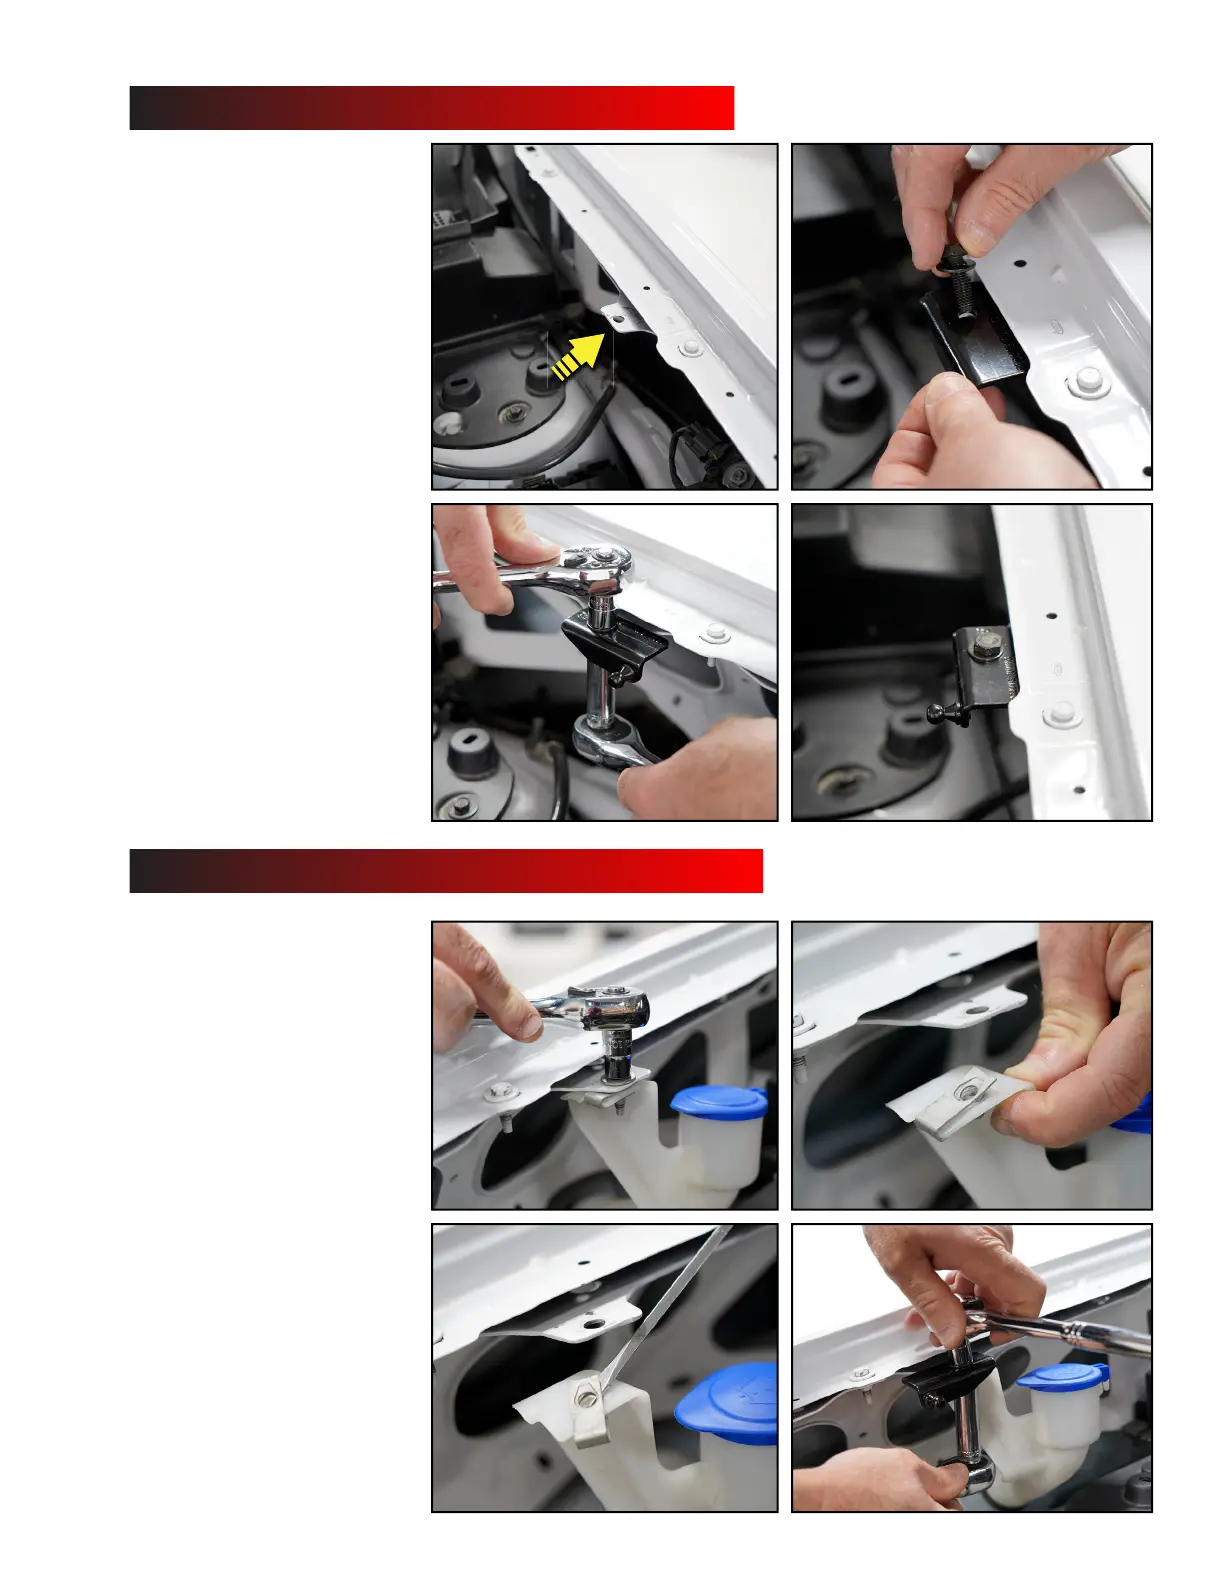
Step 4 - Install LH (driver’s side) lower bracket
A. Locate tab under fender
lip shown in Figure 1.
B. Place LH fender bracket
on top of fender tab shown.
Attach bracket using
bolt/washer/nut as shown.
13mm socket wrenches on
upper lower needed to
tighten assembly.
C. Be sure bracket rotates
counter clockwise and rests
tightly up against lip
(lower-side). Bracket will sit
parallel to fender.
A. Remove 10mm bolt that
attaches washer bottle.
B. Pry o the metal nut that
is attached to the top of the
washer bottle. This will not
be needed, we are replacing
with a new bolt assembly.
C. Place RH fender bracket
on top of fender tab shown
in Figure 4. Attach bracket
using bolt and washer
through the top of bracket
with nut on lower side.
13mm socket wrenches on
upper lower needed to
tighten assembly.
D. Be sure bracket rotates
clockwise and rests tightly
up against lip (lower-side).
Step 5 - Install RH (passenger side) lower bracket
averic
Quic
LIFT Insta
ation Gui
e
12
34
12
34