A signal will be heard when the appliance reaches the desired temperature.
Follow the recipe directions and stir ingredients occasionally to prevent them from burning or sticking. Let the appliance cool down
thoroughly, before restarting the “FRY” programme. Fry meals with an open lid to create crispy crust.
-
dients take no more than a half of the useful volume of the bowl. The “Keep Warm” function is not applicable for the programme.
-
ally adjusted between 10 minutes and 6 hours in 5 minute increments. The maximum operating time of the “Keep Warm” function
is limited to three hours. “Time Delay” function is not recommended for this programme, as it can affect the quality of baking.
before use for oxygenation and removal of impurities. Use instant bread-mixes to save the time and facilitate cooking.
Ensure that the ingredients take no more than half of the useful volume of the bowl.
If time is set to less than 1 hour the baking process will begin after pressing “Start” button.
ATTENTION! Use kitchen gloves to remove the bread from the appliance.
The programme is recommended for cooking canned meat, fore shank and baked milk. Default cooking time of the programme
boiling. Manual adjustment, the “Time Delay” and “Keep Warm” functions are not applicable for this programme. Press the “Start”
button to start cooking in the standby mode. Cooking mode indicators and the “Start” button will light up solid.
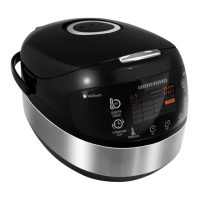
III. ADDITIONAL FEATURES
•
• Making fondue
• Deep frying
• Making cheese, cottage cheese
• Making baby food
•
•
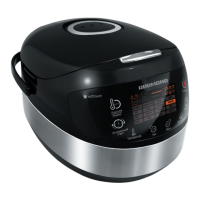
IV. CLEANING AND MAINTENANCE
•
programme.
•
Do not leave the cooking bowl with meals or liquids inside a closed multicooker for over 24 hours. Store cooked meals
• If not in use for long time, unplug the appliance. The cooking chamber, heating disc, cooking bowl, inner lid, steam valve,
safety valve, and condensation collector must be dry and clean.
• Before you start cleaning the appliance, make sure that it is unplugged and has completely cooled down. Use soft cloth and
mild soap to clean.
other agents that are not recommended for cleaning items that contact food.
DO NOT immerse the appliance in water or wash under running water!
•
• Clean the housing when necessary. The cooking bowl, inner lid, removable steam valve, and safety valve need to be cleaned
after each use. Condensate, accumulating during cooking, needs to be removed after each use. Clean the interior of the
cooking chamber when necessary.
Use soft damp cloth or sponge to clean the housing. If necessary, use a mild soap solution and wipe the surface dry to remove soap
residue and water spots.
•
•
• Wipe the outer surface of the bowl dry before positioning it back inside the appliance.
When the appliance is used on a regular basis, inner non-stick coating of the bowl may partially or completely change color, which
does not indicate a defect.
1. Open the main lid. Press 2 plastic holders located in the lower part of its inner side.
2. Remove inner lid and pull the sealing ring out of the rim.
3. Wipe the surfaces of both lids with a damp cloth or sponge. If necessary, wash inner lid and sealing ring with mild soap and rinse
under running water. It is not recommended to use dishwashing machine. Wipe both lids dry.
4. Place sealing ring back into its original position. Ensure that the ring is securely in place.
5. Loose or incorrectly positioned sealing ring may cause appliance malfunction or damage.
6. Position inner lid into lower slots, align with the main lid, and slightly press until it clicks into place.
Steam valve is located on the main lid of the appliance and consists of inner and outer casings.
1. Carefully pull the outer casing holding it by the ledge, to remove.
2. Press plastic holder on the inner casing to separate the two casings from each other.
3. Remove the silicone sealing insert, if necessary. Rinse all parts of the steam valve.
4.
inner casing with corresponding slots on the outer casing, and press until they click into place. Screw the cap back onto the
steam valve, cover with the outer casing, and press until it clicks into place.
CAUTION! Do not twist or stretch sealing insert to avoid its deformation.
Condensate accumulates in the special cavity on the housing around the bowl. Wipe off any condensate remaining around the bowl
with a dry cloth or tissue after each use.
chamber. However, if the inside of the chamber gets dirty, clean it to prevent improper operation or malfunction of the unit.
Before cleaning cooking chamber ensure, that the appliance is unplugged and has completely cooled down!
Walls of the cooking chamber, surface of the heating disc, and the casing of central thermal sensor (located in the middle of the
unwanted odours during cooking.
casing of the sensor. Clean heating disc with a damp medium-hard sponge or synthetic brush, if necessary.
When the appliance is used on a regular basis, heating disc may partially or completely change color, which does not indicate a defect
and does not affect proper operation of the unit.
V. COOKING TIPS
appliance.
 Loading...