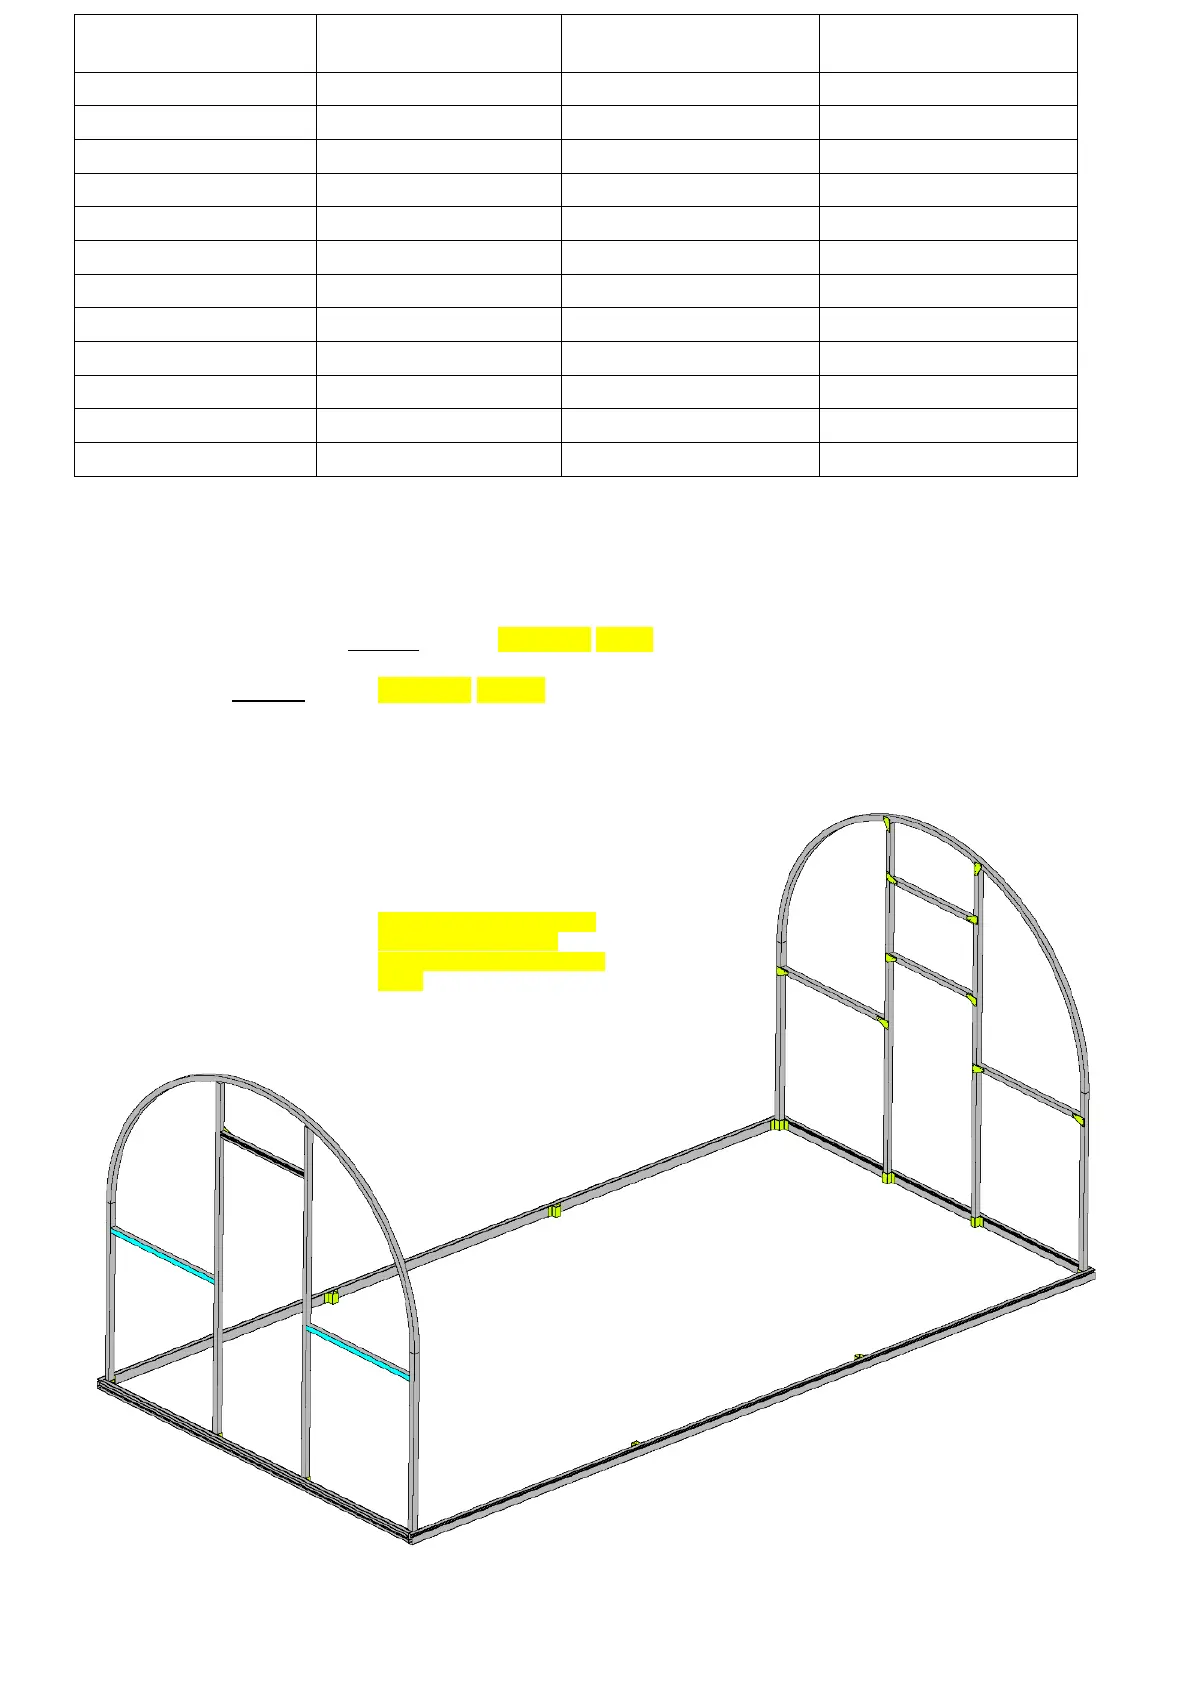
Stage 1: Assemble the side base rails and stand up the door end and the louvre end walls.
* On longer tunnels – Join the various length of side base rail sections so that they are both of equal length. Use two 16mm self-
drilling screws on the inside face to connect each joint/sleeve.
* The groove in the side base rail will face to the outside.
* The groove in the base rail at the door end base rail faces to the inside, This is so that the sliding door has clearance from the end
wall cladding when the door slides open.
* The groove for the rear wall base rail faces to the outside.
* Stand the pre-assembled end walls vertical with the brackets facing to the inside. The endwall base rails finish flush with the ends
of the side rails. (See Pic BR1 page 4)
* Stand up the pre-made end frames and attach them to the side base rails using three screws. (See Pic BR2 and BR1 page 4).
Note, the door end base rail
has the Duralock cover
clipping groove facing to the
inside
The door slider guide is to the
outside