21
Cowl Install
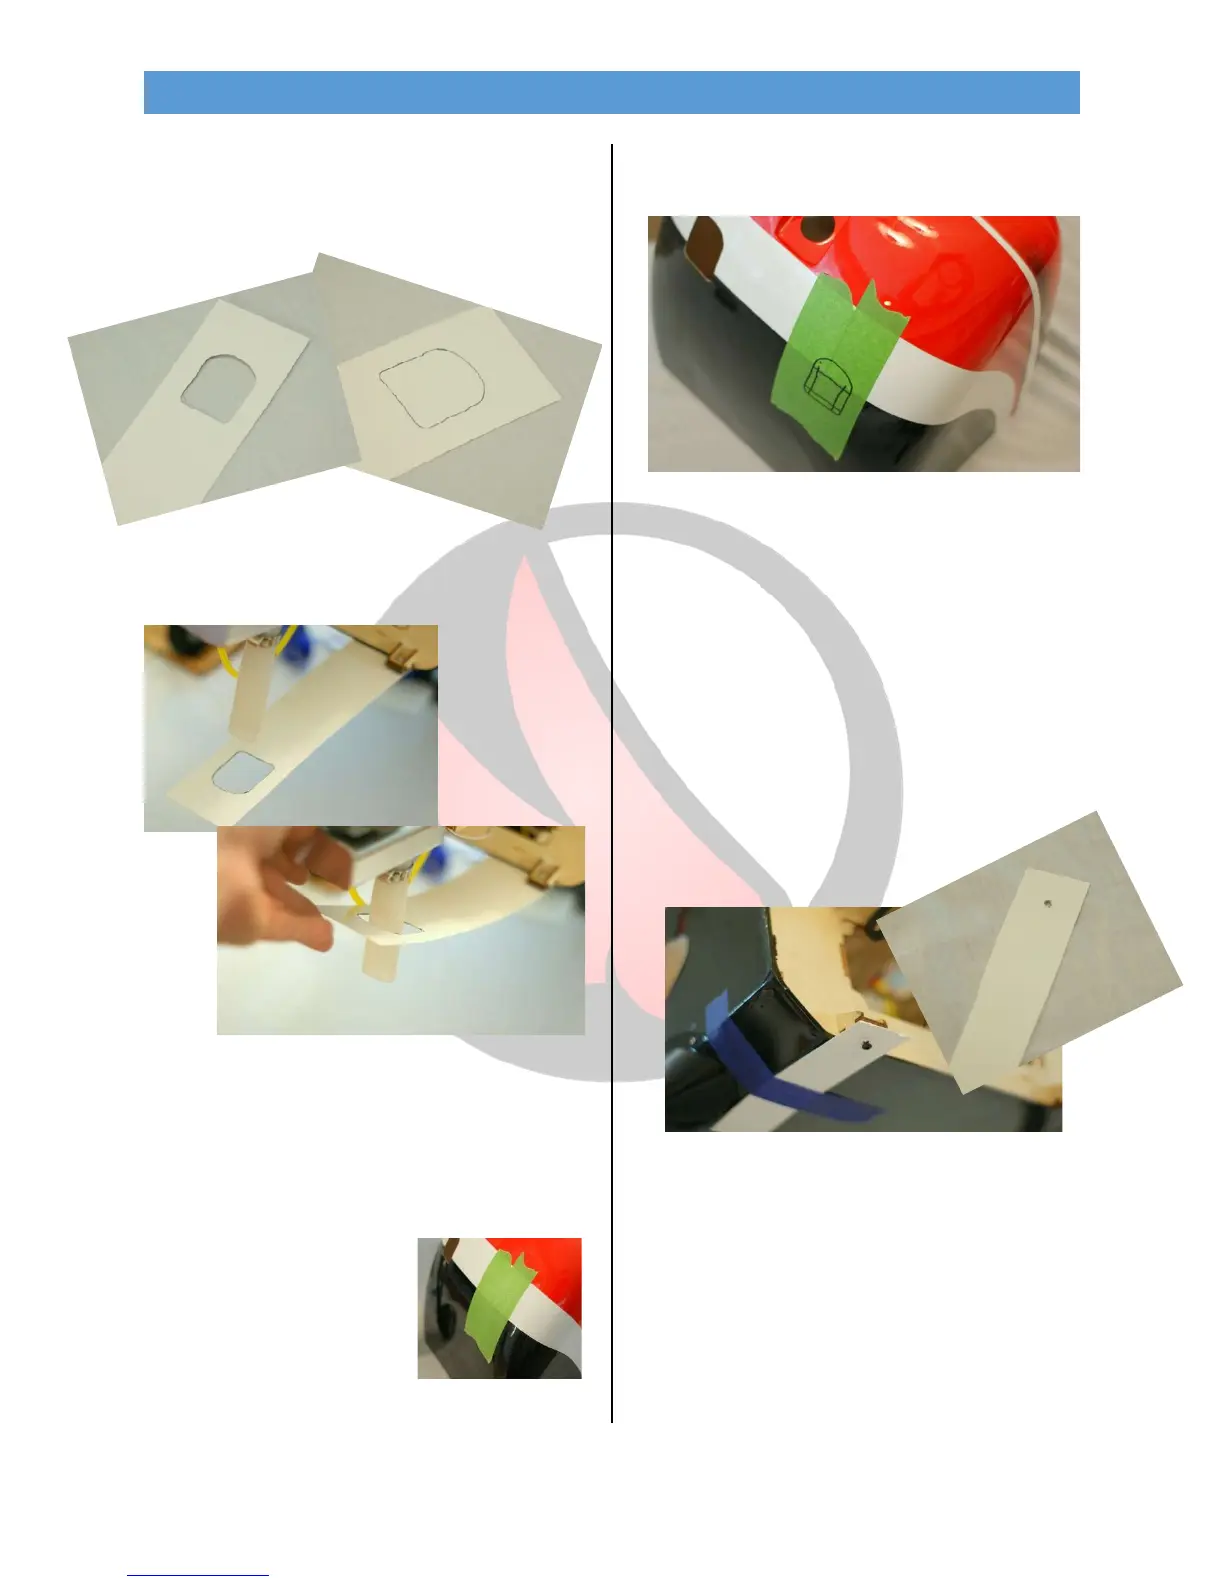
•First make templates for each cut-out of the
cowl – muffler tube template shown
•Once you have templates made for
each of the cutouts, tape them in place on the
fuse to properly locate the cowl cutout.
•Next, remove all items that require a cutout
and install the cowl. – this may mean removing
the engine or muffler(s) again.
NOTE: The cowl ring should be fully seated on
the fuselage and will properly align the cowl.
From the Pro: Use masking
tape on all areas to be marked
on the cowl. This allows you to
easily see the lines making for
a cleaner cutout.
•Mark all the cutouts on the cowl. Then,
remove the cowl and trim using a rotary tool.
•After the initial cutouts are complete test fit
and adjust as needed until the cowl fits without
any rubbing and a minimum 1/8” clearance .
From the Pro: Make only small adjustments at a time
as you can quickly remove too much material.
•With the cutouts finished, make a template for
the lower cowl screws. Align with the screw
hole using one of the mounting screws before
taping in place.
•Install the cowl, mark the mounting locations,
and remove to drill. Drill a 1/8” hole in each
location.
•Install the cowl for the final time using thread
lock compound and bonded washers on all the
screws .