EasyManua.ls Logo

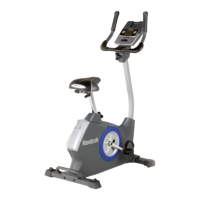
Reebok Trainer Rx 2.0 Gw Bike User Manual

Reebok Trainer Rx 2.0 Gw Bike
24 pages
To Next Page IconTo Next Page
Page #1 background imageLoading...
Page #1 background image
CAUTION
Read all precautions and instruc-
tions in this manual before using
this equipment. Keep this manual
for future reference.
Serial Number
Decal (under frame)
Model No. RBEX13010.1
Serial No.
Write the serial number in the
space above for reference.
USER'S MANUAL
QUESTIONS?
If you have questions, or if parts are
damaged or missing, DO NOT
CONTACT THE STORE; please
contact Customer Care.
IMPORTANT: Please register this
product (see the limited warranty
on the back cover of this manual)
before contacting Customer Care.
CALL TOLL-FREE:
1-877-994-4999
Mon.–Fri. 6 a.m.–6 p.m. MT
Sat. 8 a.m.–4 p.m. MT
ON THE WEB:
www.reebokservice.com
www.reebokfitness.com
Question and Answer IconNeed help?

Do you have a question about the Reebok Trainer Rx 2.0 Gw Bike and is the answer not in the manual?

Reebok Trainer Rx 2.0 Gw Bike Specifications

General IconGeneral
BrandReebok
ModelTrainer Rx 2.0 Gw Bike
CategoryExercise Bike
LanguageEnglish

Summary

Product Information and Support

Customer Support and Questions

Provides contact information for customer care and troubleshooting assistance.

Important Precautions

Health and Usage Guidelines

Recommends consulting a doctor, proper use, environment, and user safety.

Assembly Instructions

Assembly Requirements and Tools

States assembly requires two people and specific tools like screwdrivers.

Step 1: Attach Rear Stabilizer

Details the first step of attaching the rear stabilizer to the frame using specific screws.

Assembly - Step 2-4

Step 2: Attach Front Stabilizer

Details attaching the front stabilizer to the frame using specific screws.

Step 3: Adjust Seat Post

Explains how to position and secure the seat post using an adjustment knob.

Step 4: Attach Seat and Carriage

Guides on attaching the seat and seat carriage using hardware.

Assembly - Step 5-6

Step 5: Attach Handlebar

Instructs on connecting wires and attaching the handlebar to the upright.

Assembly - Step 7-8

Assembly - Step 9-11

How to Use the Exercise Bike

Using the Manual Mode

Console Operations

Using Preset Workouts

Playing the Fat Blocker Game

Playing the Calorie Destroyer Game

iFit and Sound System

Using iFit Workouts

Guides on inserting iFit cards, selecting workouts, and following trainer guidance.

Maintenance and Troubleshooting

Adjusting the Reed Switch

Detailed steps for adjusting the reed switch for accurate console feedback.

Adjusting the Drive Belt

Drive Belt Adjustment Procedure

Step-by-step guide for adjusting the drive belt tension.

Exercise Guidelines

Intensity and Workout Structure

Explains heart rate zones, warm-up, training, and cool-down phases.
Limited Warranty

Related product manuals