4
Pantone 534 Blue
Pantone 123 Yellow
Pantone 485 Red
Pantone 123 Yellow
Pantone 534 Blue
Black
Rich Black -
20/20/20/100
Blue - 100/80/30/5
Yellow - 0/27/100/0
Red - 10/100/100/5
Yellow - 0/27/100/0
Blue - 100/80/30/5
Only if you REALLY need them:
Pantone 534 Blue - 100/80/30/5
Pantone 485 Red - 10/100/100/5
Pantone 123 Yellow - 0/27/100/
INSTRUMENTS
INSTRUMENTS
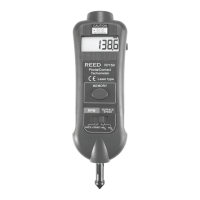
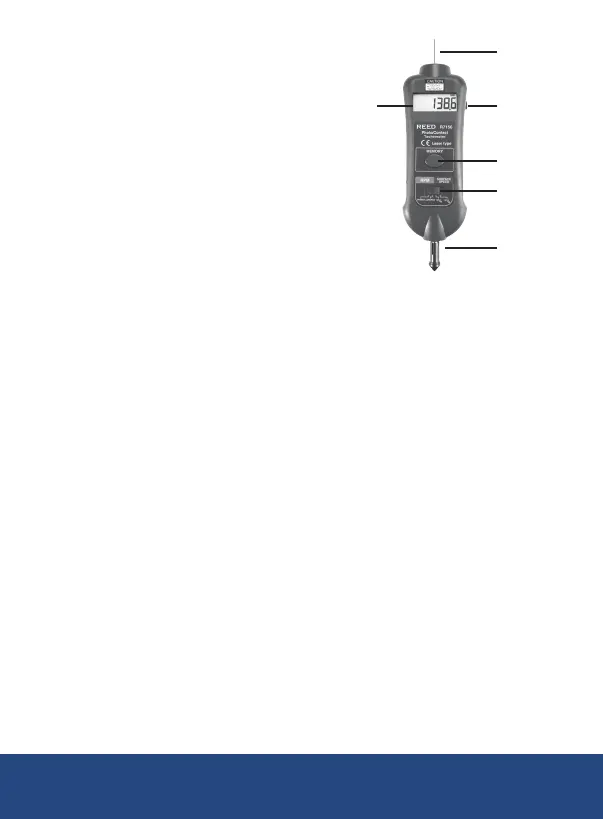
Instrument Description
1. Laser Beam
2. RPM Adapter
3. Display
4. Measure Button
5. Memory Call Button
6. Function Switch
Operating Procedures
Photo laser tachometer measuring procedure
1. Move the Function Switch to the Photo RPM position.
2. Apply reective tape to the object being measured. Press the
Measure Button and align the Laser Beam with the applied
target. Verify that the Monitor Indicator provides a reading when
the target passes through the eld of view. Release the Measure
Button when the reading stabilizes.
Note: If the measured RPM value is very low ( ie: 50 RPM ), we recommend
attaching more Reflective tape.
Contact tachometer measuring procedure
RPM measurement
1. Move the Function Switch to the Contact RPM position.
2. Press the Measure Button and lightly pressing the RPM Adapter
against the rotating axis. Release the Measure Button when the
reading stabilizes.
1
43
5
6
2
REED Instruments
1-877-849-2127 | info@reedinstruments.com | www.reedinstruments.com