- 11 -
Montage
Safety instructions for wall installation:
• The changing table heater must be mounted on the wall in a stationary and level position. It must not be
mounted on the ceiling!
•
The changing table he
ater must not be mounted on wood, plastic or other flammable materials or under plug
sockets.
•
IMPOR
TANT! Minimum distances: The minimum distance between the heater and the changing table is 100
cm. A minimum distance of 35 cm between the heater and the ceiling must be observed at all times. The
heater must be placed at least 65 cm away from furniture and flammable materials. Fire hazard in case of
non-compliance!
•
F
or installation in bathrooms or shower rooms, the regulations of the local utility company must be observed. The
heater must be positioned in such a manner that the pull switch cannot be reached from the bath or shower.
•
Ne
ver install the unit above a bath tub!
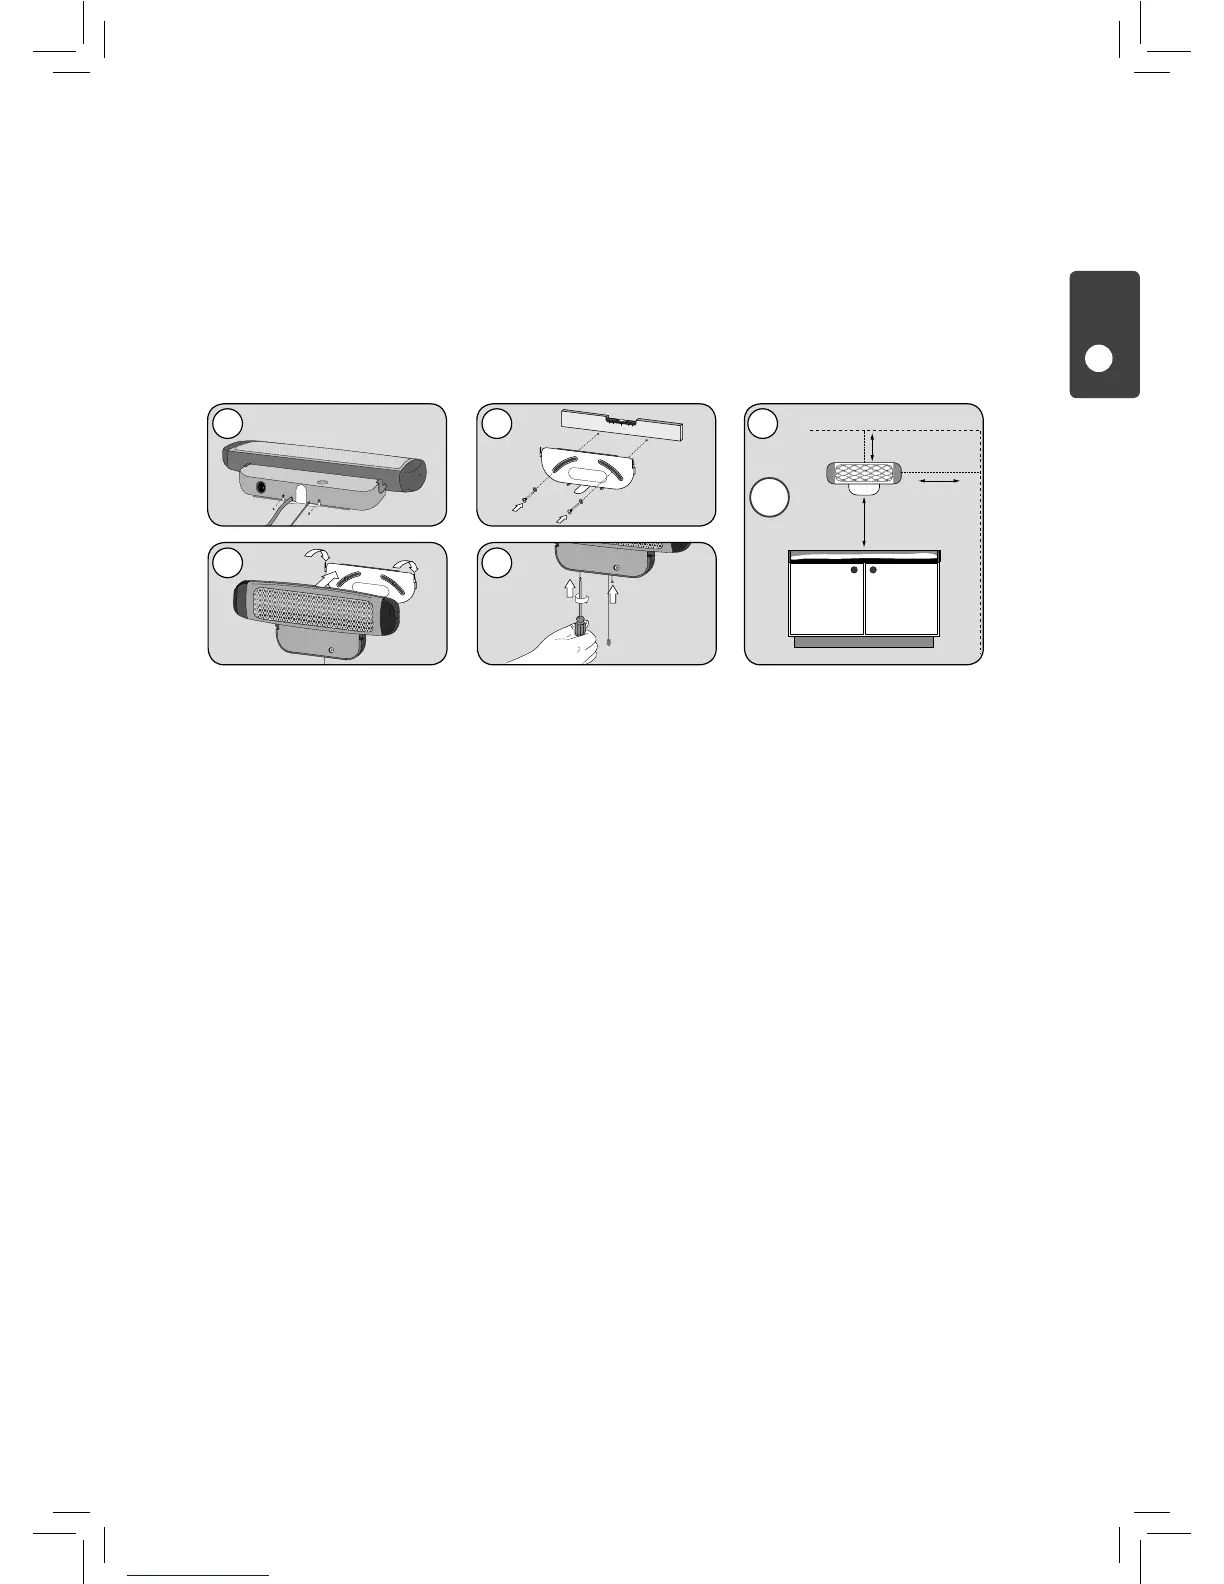
1.
R
emove the assembly plate from the unit as shown in fig. 1.
2.
Hold the w
all bracket on the wall taking into account the minimum distances (fig. 5) and mark the drill holes with a
pencil. Use a spirit level to ensure the bracket is level.
3.
Bolt the w
all bracket to the wall (fig. 3) using the supplied screws and wall plugs.
4.
Slide the changing table he
ater into the relevant grooves on the wall bracket (fig. 3).
5.
Screw the changing table heater to the wall bracket (fig. 4) using the screws removed in fig. 1.
 Loading...