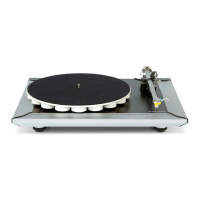
quick start guide
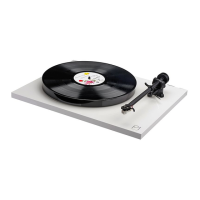
Carefully unpack the turntable. Always keeping it upright.
Connect the power supply to the rear of the turntable (6).
Connect the phono output (7) to an appropriate phono stage.
Carefully remove the stylus guard from the cartridge.
Bias is automatically set on the RB110, no setting is required.
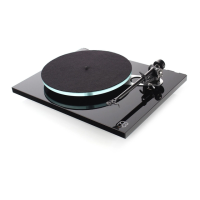
Remove the packing card from beneath the sub platter and
fit the platter and mat.
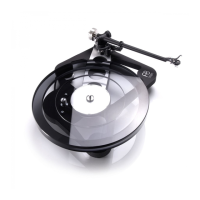
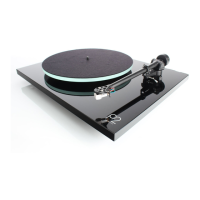
Push the balance weight (4) onto the rear of the tonearm
until it reaches the stop point (fig 1).
Turn on the Planar 1 via the on/off switch located on the
underside of the plinth (8).
Change the speed by moving the drive belt from the 33⅓
and 45 steps of the pulley (fig 2).
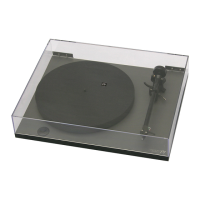
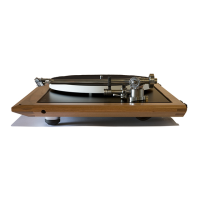
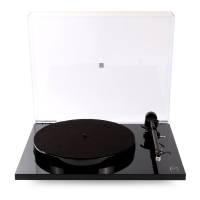
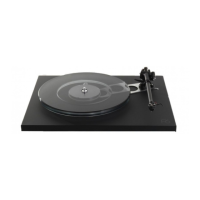
Setting up the Planar 1
Platter &mat
2
Cartridge
3
Tonearm
5
Plinth
6
Power input
7
Phono output
8
On/Off switch
(underneath plinth)
4
Balance weight
8
3
5
6
4
2
7
Fig 1. Fig 2.
Déballez soigneusement la platine en la
maintenant toujours à plat.
Branchez l'alimentation sur la prise à l'arrière de
la platine (6).
Branchez le bras de lecture (7) sur une entrée
phono appropriée.
Enlevez soigneusement le protège-pointe de la
cellule.
L'anti-skating est automatique sur le bras RB110.
Aucun réglage n'est nécessaire.
Enlevez le carton protecteur du sous plateau
puis montez le plateau et le tapis.
Installez le contrepoids (4) à l'arrière du bras et
poussez-le jusqu'au butoir (fig1).
Allumez la Planar 1 à l'aide de l'interrupteur
marche/arrêt situé sous le socle (8).
Changez la vitesse en déplaçant la courroie de
la gorge 33⅓ tours à la gorge 45 tours de la
poulie (fig 2).
Sie können die Geschwindigkeit von 33⅓ auf 45 Umin
durch Umlegen des Riemens auf dem Antriebs-Pulley
verändern. (Bild 2).
Cambiar la velocidad moviendo la correa de
la 33
⅓ y 45 pasos de la correa (figura 2).
Bitte entnehmen sie den Planar1 vorsichtig der
Verpackung. Halten sie ihn dabei gerade.
Verbinden sie die beiliegende Stromversorgung mit der
Buchse an der Rückseite des Gerätes(6).
Schließen Sie den Plattenspieler (7) an den
Phonoeingang eines Verstärkers an.
Entfernen Sie vorsichtig den Nadelschutz vom
Tonabnehmer-System.
Die Antiskating-Einstellung erfolgt beim neuen Rega
RB110- Tonarm automatisch, eine Justage ist nicht
erforderlich.
Entfernen Sie die Transportsicherung(Pappe) unterhalb
des Innentellers und legen den Plattenteller und die
Matte auf.
Schieben Sie das Gegengewicht (4) vorsichtig auf den
Tonarm, bis es den Anschlag-Punkt (Bild1 ) erreicht.
Schalten Sie den Planar1 über den Ein/Aus-Schalter an
der Unterseite des Plattenspielers ein (8).
Abrir con cuidado el plato giratorio. Siempre
plano.
Conectar la fuente de alimentación en la parte
trasera del giradiscos (6).
Conecte el cable del brazo (7) a una entrada
de fono apropiada.
Retirar con cuidado el protector de aguja de la
cápsula.
La desviación se establece automáticamente
en el RB110, no se requiere ningún ajuste.
Retire la tarjeta del embalaje de debajo de la
sub plato y montar el plato.
Empuje el contrapeso (4) en la parte trasera del
brazo hasta que llega al punto (fig 1).
Encienda el planar 1 a través del interruptor
on/off situado en la parte inferior de la base (8).
Français Deutsch Español
Side A