8
BLADE ATTACHMENT
BLADE ATTACHMENT:
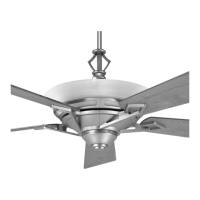
Fig. 2
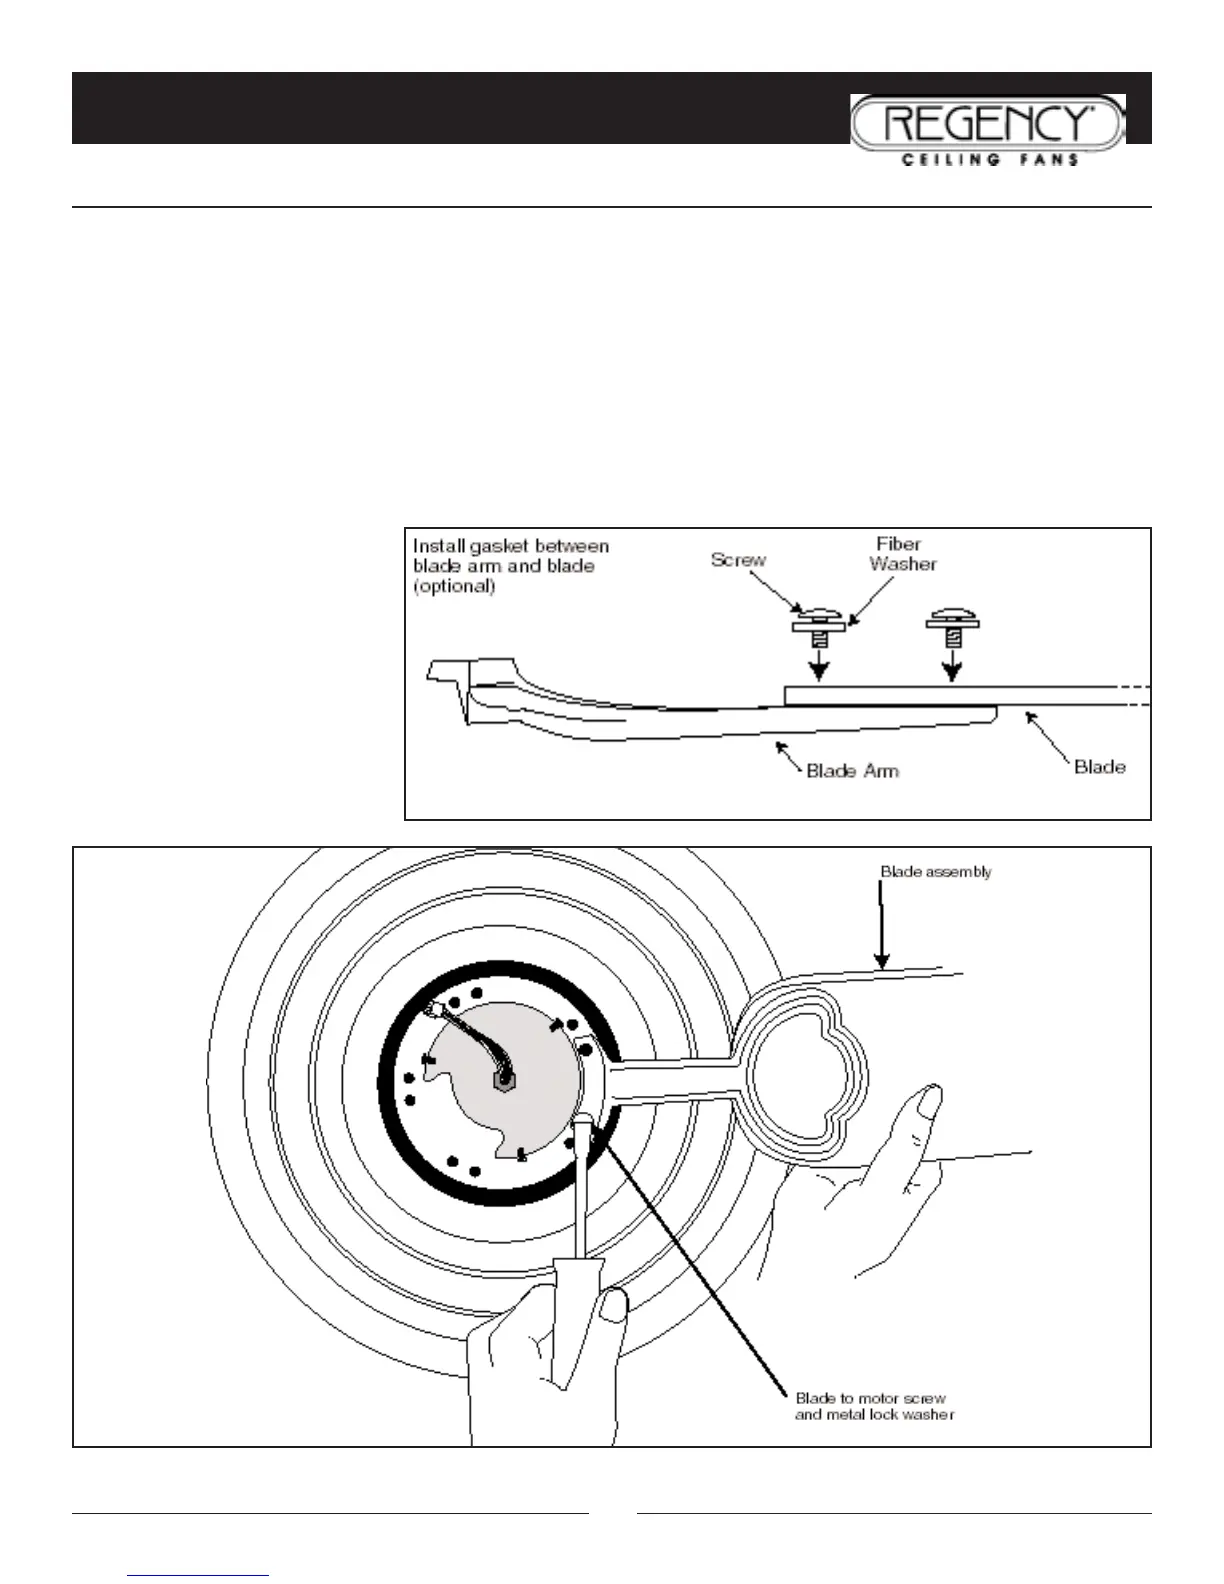
1. Place fiber washer on screw. Insert this assembly through the blade and start the screw into the blade arm. Repeat
this procedure without tightening the screw until all 3 screws have been started into the blade arm (Fig. 1).
NOTE: Fans that have painted finishes may be packed with gaskets that can be used between the blade arm and blade to
help prevent a clicking noise that may develop if blade screws loosen over time.
2. Tighten each screw starting with center screw.
3 Fasten blade assembly to motor with provided screws and metal lockwashers (Fig. 2). Repeat procedure for remain-
ing blades. Make sure screws are TIGHT! Loose motor screws can contribute to unnecessary hum and wobble dur-
ing operation.
NOTE: Cordless power screw-
drivers are NOT recommended, as
they tend to strip the heads of the
screws and usually will not fully
compress the spring washers on the
motor screws. Use a large flat blade
screwdriver for final tightening to
fully compress the spring washers.
This will help ensure proper align-
ment of the blades and noise-free,
wobble-free running.
Fig. 1