Conversion from NG to LPG using SIT 829 NOVA Gas Valve
THIS CONVERSION MUST BE DONE BY A QUALIFIED GAS FITTER
IF IN DOUBT DO NOT DO THIS CONVERSION !!
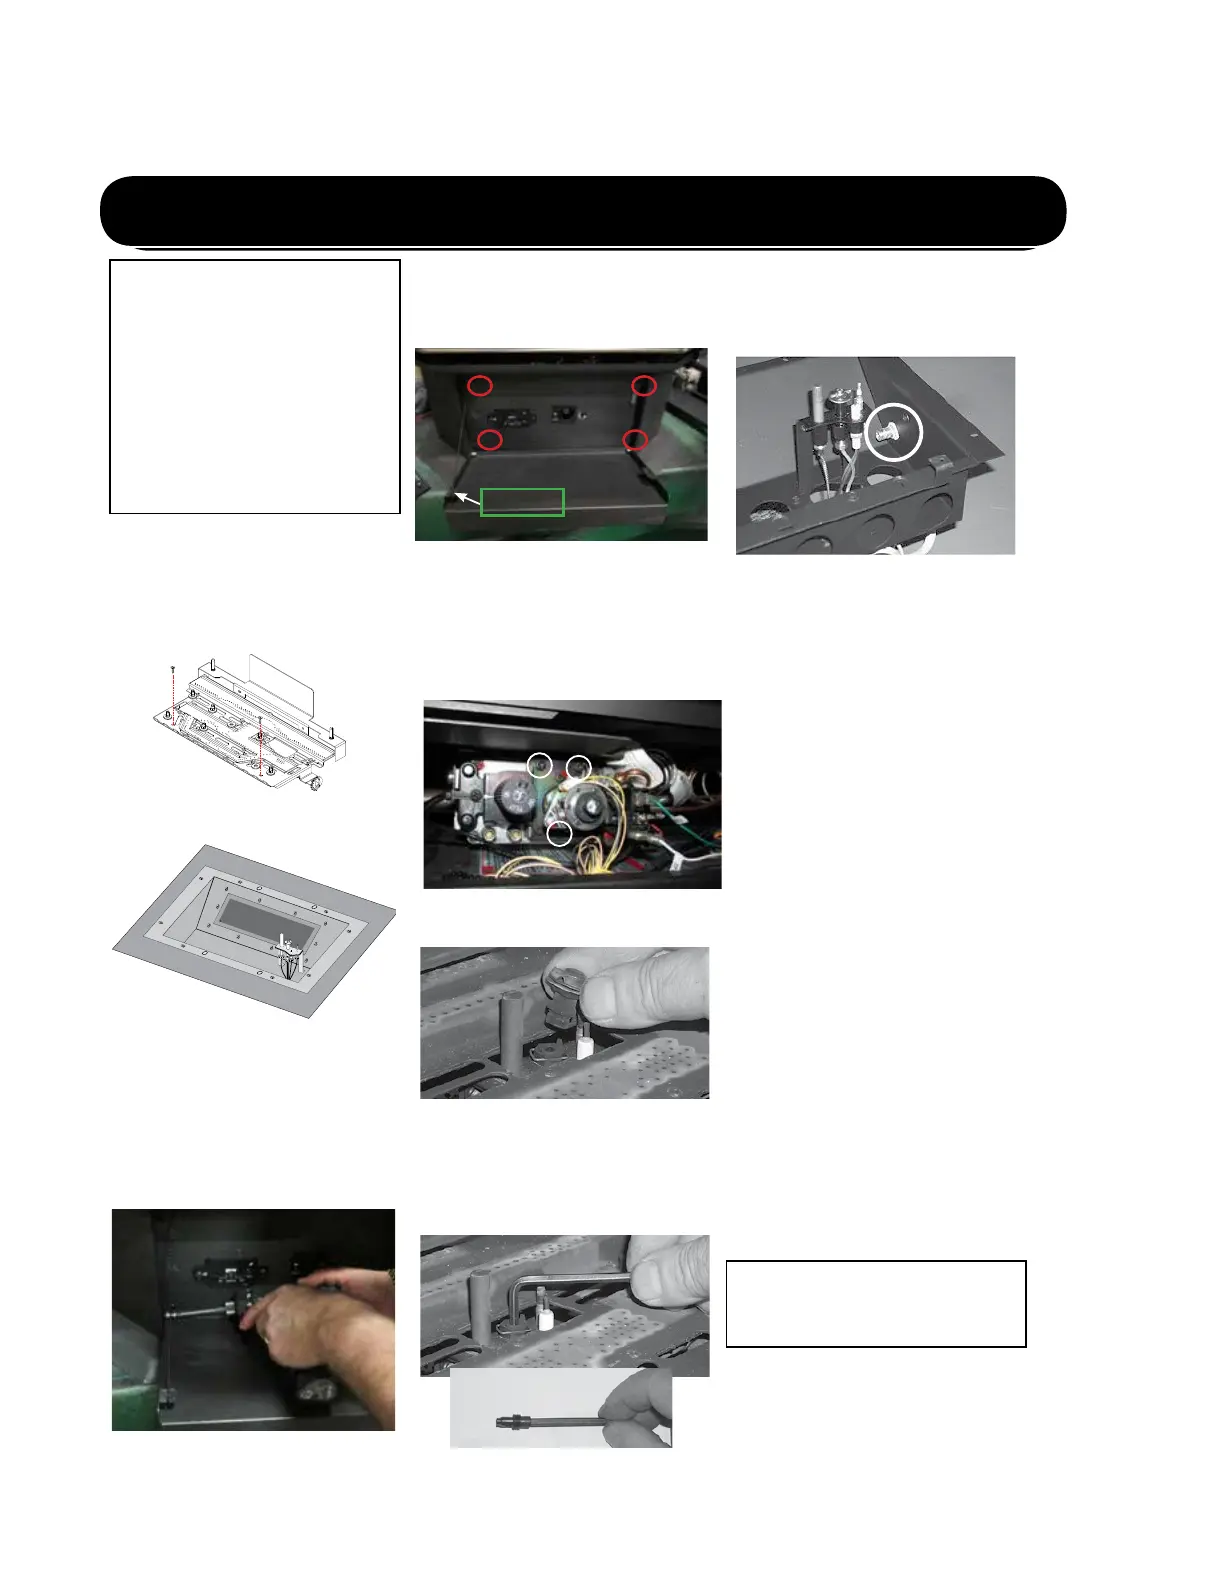
1. Shutothegasandelectricalsupply.
2. Removethesafetyscreen,openthe
frontdoorandcarefullyremovethelogs
andlavarock.
Pilot assembly is now accessible .
Each Kit contains one LPG
Conversion Kit #733-987
LPG Conversion Kit Contains:
Qty. Part # Description
1 904-529 5/32"AllenKey
1 904-645 BurnerOrice#51
1 918-590 Label"Convertedto
LPG"
1 908-528 Red"LPG"label
1 910-037 LPGInjector
(PilotOrice)
1 910-582 Steppermotor
1 919-916 InstructionSheet
Note: Use a magnetic type screwdriver
if possible.
4. Openpedestaldoorandremovethe
chainfromdoorwhichwillallowdoorto
fall.
3. Removeburner.Seediagrambelow.
7. Turncontrolknobtothe“OFF”position.
8. RemoveNGsteppermotorbyremoving3
screwsinlocationsshownbelow–replace
withLPsteppermotor,secureinplace
with3screws.
9. Pullothepilotcaptoexposethepilot
orice.
10.Unscrewthepilotoricewiththeallen
keyandreplacewiththeLPGpilot
oriceinthekit.
11.ReinstallnewburneroriceLPG
stamped#51andtighten.
13.Checkforgasleakswithapropersoapy
solutionorleakdetector.
14.Checkforpropersparkbetweenthe
ignitorandpilotcap.Referto"Lighting
Procedure"sectionofthemanualfor
lightingsequence.
15.Checkpilotames.Correctamepat-
ternhas3strongblueames.Adjust-
mentcanbemadebyturningtheslotted
screwatthetoprightcornerofthe
valve.Referto"MaintenanceInstruc-
tions"sectionofthemanualforcorrect
amepatterns.
16. ReverseSteps9-1.
17.Attachthelabel"Thisunithasbeen
convertedtoLPG"nearorontopofthe
Serial#decal.
18.Replaceyellow"NG"labelwithred
"LPG"label.
19.Checkoperationofamecontrol.
20.Theburneraerationshouldbesetto
1/2"openforL P.
Seeaerationadjustmentdetailsinthe
manual.
21.Checkforproperameappearanceand
glowonlogs.
Burner Orice
12.Removeburneroricewitha1/2"
wrenchwhileusinga9/16"wrenchto
holdontotheelbowbehindtheorice,
thendiscardtheorice.
Installer Notice:
These instructions must be left
with the appliance.
6.Removefourscrewstoremovetheac-
cesspanel(inlocationsshownbelow)
andthechainattachedtothefrontdoor
andtheunit.
Removechain
here
5.Remove2screwsthatsecurethefront
doortotheunit.Onescrewisontheleft
handsideandtheotherontherighthand
side.(Leftsideshown).



 To Next Page