16
• During very cold weather, the incoming water will also be
colder and it will require a longer time to become heated.
• The hot water usage may exceed the capacity of the water
heater. If so, wait for water heater to recover after abnormal
demand. Also examine pipes and faucets for possible water
leaks.
• If you can not determine the problem, then call a local
serviceman.
WATER IS TOO HOT
Adjust the thermostat to a lower setting. See the “Temperature-
Regulation” section.
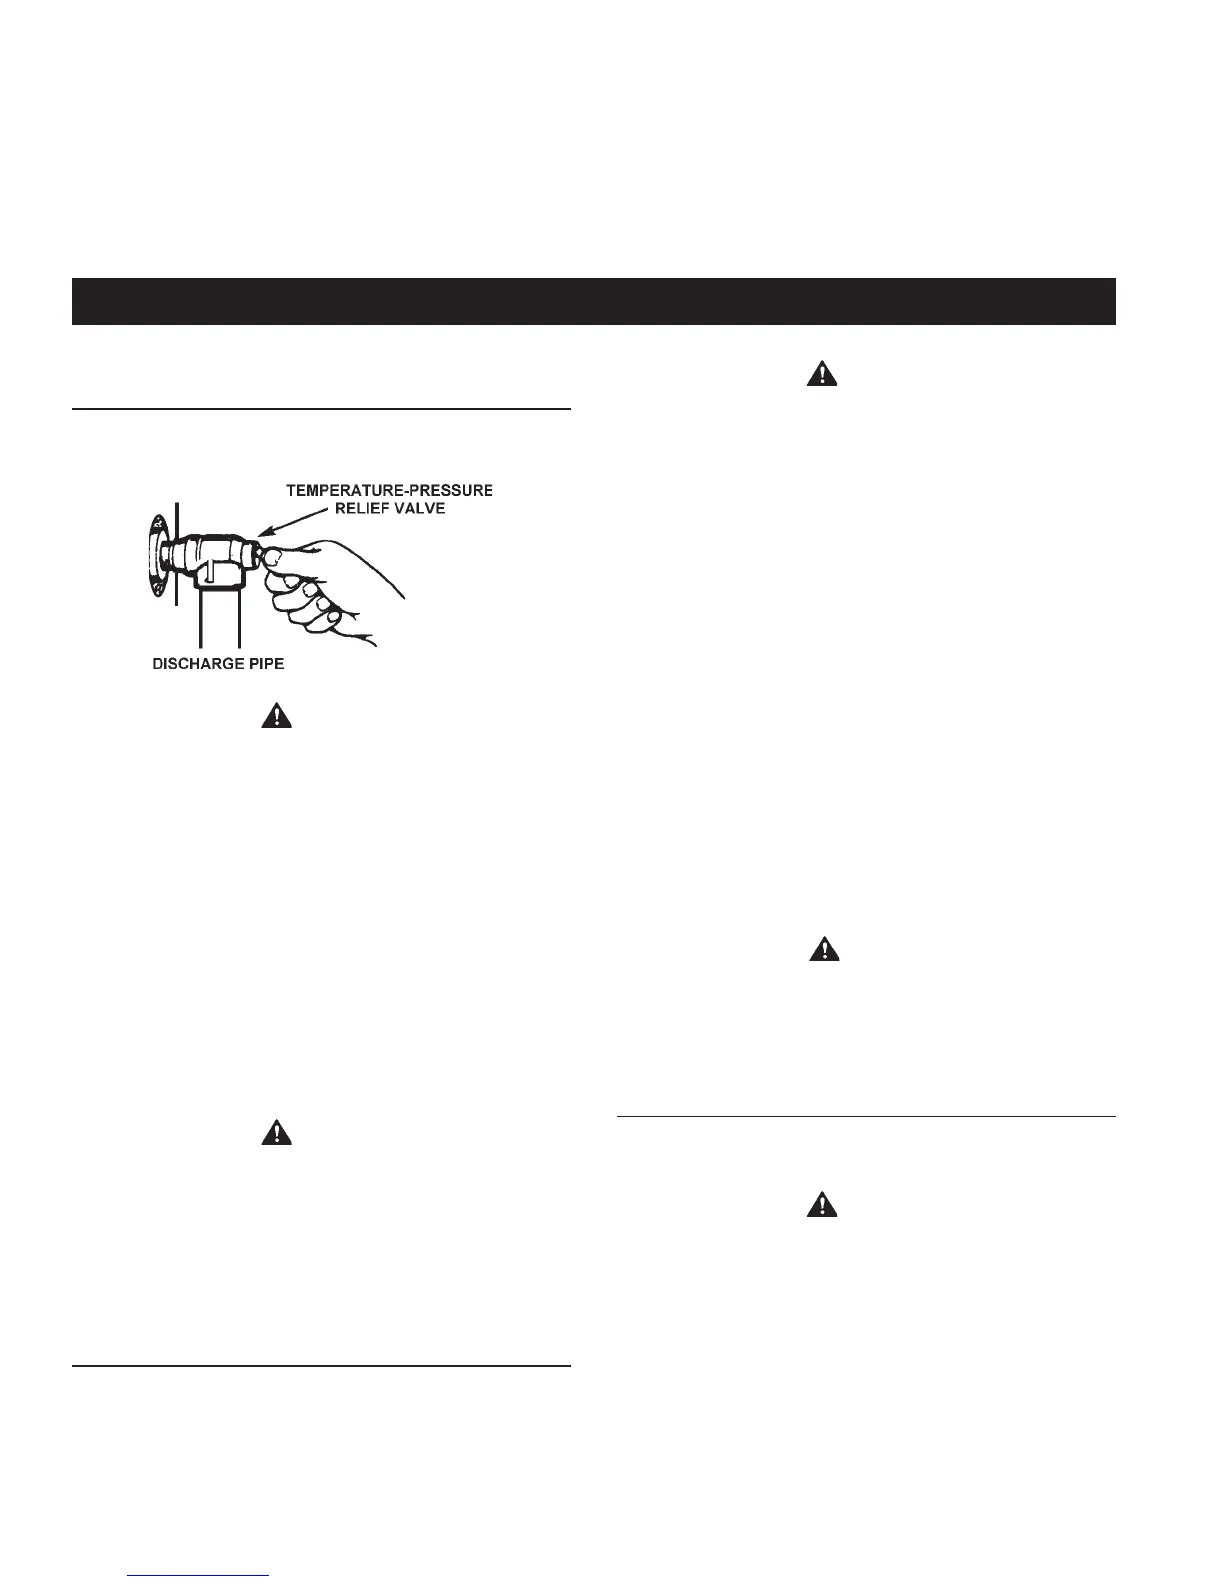
Temperature-Pressure
Relief Valve Operation
The temperature-pressure relief valve must be manually
operated at least once a year.
WARNING
The temperature-pressure relief valve must be manually
operated at least once a year. Caution should be taken to ensure
that (1) no one is in front of or around the outlet of the
temperature-pressure relief valve discharge line, and (2) the
water manually discharged will not cause any property damage
or bodily injury. The water may be extremely hot.
If after manually operating the valve, it fails to completely reset
and continues to release water, immediately close the cold
water inlet to the water heater, follow the draining instructions,
and replace the temperature-pressure relief valve with a new
one.
Failure to install and maintain a new properly listed temperature-
pressure relief valve will release the manufacturer from any
claim which might result from excessive temperature or
pressure.
WARNING
If the temperature-pressure relief valve on the appliance weeps
or discharges periodically, this may be due to thermal
expansion. Your water heater may have a check valve installed
in the water line or a water meter with a check valve. Consult a
local plumbing contractor and/or the local water utility for
further information. Do not plug the temperature-pressure relief
valve.
Draining
The water heater should be drained if being shut down during
freezing temperatures. Also, periodic draining and cleaning of
sediment from the tank may be necessary.
1. Before beginning turn “OFF” the electric power supply to the
water heater.
PERIODIC MAINTENANCEPERIODIC MAINTENANCE
PERIODIC MAINTENANCEPERIODIC MAINTENANCE
PERIODIC MAINTENANCE
WARNING
HAZARD OF ELECTRICAL SHOCK! Before removing any
access panels or servicing the water heater, make sure the
electrical supply to the water heater is turned “OFF”. Failure to
do this could result in DEATH, SERIOUS BODILY INJURY, OR
PROPERTY DAMAGE.
2. CLOSE the cold water inlet valve to the water heater.
3. OPEN a nearby hot water faucet and leave open to allow for
draining.
4. Connect a hose to the drain valve and terminate to an
adequate drain or outdoors.
5. OPEN the water heater drain valve to allow for tank draining.
NOTE: If the water heater is going to be shut down and
drained for an extended period, the drain valve should be
left open with hose connected allowing water to terminate
to an adequate drain.
6. Close the drain valve.
7. Follow “Filling the Water Heater” instructions in the
“Installing the New Water Heater” section.
8. Turn “ON” power to the water heater.
CAUTION
Never use this water heater unless it is completely full of water.
To prevent damage to the tank and heating element, the tank
must be filled with water. Water must flow from the hot water
faucet before turning “ON” power.
Thermostat Removal
1. Turn “OFF” the electrical power to the water heater at the
junction box.
WARNING
HAZARD OF ELECTRICAL SHOCK! Before removing any
access panels or servicing the water heater, make sure the
electrical supply to the water heater is turned “OFF”. Failure to
do this could result in DEATH, SERIOUS BODILY INJURY, OR
PROPERTY DAMAGE.
2. Remove the access panel, insulation block and pad in
the order they are installed.
3. A. Models with lower thermostat without high limit: Lift
out the tab as shown below to unclip the terminal
cover from the thermostat. The terminal cover can now
be removed from the thermostat.