EasyManua.ls Logo

Reliant RSC Series - User Manual

Reliant RSC Series
10 pages
Print Icon
To Next Page IconTo Next Page
Loading...
RSC Series -Cartridge Filter
Owner’s Manual
ATTENTION INSTALLER: THIS MANUAL CONTAINS IMPORTANT INFORMATION ON THE
OPERATION, AND SAFE USE OF THIS EQUIPMENT.
THIS MANUAL IS INTENDED FOR THE END USER OF THIS PRODUCT
TOP MANIFOLD CARTRIDGE FILTERS
MODEL
EFFECTIVE FILTRATION RATE
DESIGN FLOWRATE
Residential Commercial
Net.Weight
FT
2
M
2
GPM LPM
C3425 425 39.5 150 568 30
C3525 525 48.8 150 568 35
MAXIMUM WORKING PRESSURE FOR ALL MODELS 50 PSI (3.45 BAR)
201605 Version
Question and Answer IconNeed help?

Do you have a question about the Reliant RSC Series and is the answer not in the manual?

Overview

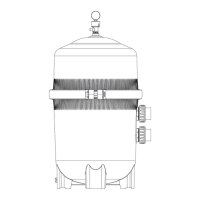
The RELIANT RSC Series Cartridge Filter is a pool and spa water filtration system designed for continuous or intermittent operation, suitable for installation above or below the water line, and compatible with both fresh and salt water swimming pools or spas. It utilizes multiple reusable, reinforced polyester filter cartridge elements to achieve a high degree of water clarity and extended filter cycles with minimal maintenance.

Function Description:

The filter operates by passing pool or spa water through cartridge elements that trap dirt and debris. As dirt accumulates, the pressure within the filter rises, indicating the need for cleaning or replacement of the cartridge elements. The system is designed to provide superior water filtration with ease of operation and corrosion-resistant construction.

Important Technical Specifications:

  • Models:
    • C3425: Effective Filtration Rate of 425 FT² (39.5 M²), Net Weight 30 lbs.
    • C3525: Effective Filtration Rate of 525 FT² (48.8 M²), Net Weight 35 lbs.
  • Design Flowrate (Residential/Commercial for both models): 150 GPM (568 LPM).
  • Maximum Working Pressure: 50 PSI (3.45 BAR) for all models.
  • Filtration Ratings: Up to 9000 gallons (34,000 liters) per hour.
  • Required Clearances:
    • Model C3425:
      • "A" (Overall Width): 37 IN (94 CM)
      • "B" Side Clearance: 18 IN (46 CM)
      • "C" Above Clearance: 16 IN (48 CM)
    • Model C3525:
      • "A" (Overall Width): 44.3 IN (112.5 CM)
      • "B" Side Clearance: 18 IN (46 CM)
      • "C" Above Clearance: 22 IN (56 CM)
  • Suggested Pool Chemistry Levels:
    • pH: 7.2 to 7.8
    • Total Alkalinity: 80 to 120 ppm
    • Calcium Hardness: 200 to 400 ppm
    • Combined Chlorine: .2 ppm Maximum
    • Chlorine (Stabilized): 1.0 to 3.0 ppm
    • Chlorine Stabilizer (Cyanuric Acid): 60 to 80 ppm

Usage Features:

  • Installation: The filter system should be installed on a level concrete slab or rigid base in a well-drained and vented area. It should be positioned to allow gravity drainage and to ensure piping connections and the winter drain are accessible. If practical, placing the pump and filter in the shade is recommended. The pump discharge connects to the filter INLET, and the filter OUTLET connects to the pool return plumbing lines. All electrical wiring must conform to local codes and the National Electrical Code (NEC).
  • Starting the Pump and Filter System: Before starting, ensure only original components are used and properly secured. The filter manual air relief body must be in the LOCK position, and no filter components should be missing or damaged. The filter drain must be closed (with an o-ring seal). All system valves should be open to allow water flow. The manual air relief valve should be placed in the OPEN position. When starting the pump, do not stand over or near the filter. The manual air relief valve should be closed only when a steady stream of water (not air or air and water mix) is discharged.
  • Filtering: Filtration begins once flow is steady. The pressure gauge indicates when cleaning is needed; when the pressure rises between 7 and 10 psi (.49 - .69 bar) above the starting pressure, or when flow decreases, the cartridges should be cleaned or replaced. A green arrow on the pressure gauge can be aligned with the current reading to monitor this.
  • Vacuuming: The pool can be vacuumed directly into the filter. Cartridges should be cleaned after vacuuming if necessary.

Maintenance Features:

  • Filter Disassembly:
    1. Turn off all system circulation pumps and electrical power.
    2. Set all system valves to prevent water flow to the filter.
    3. Place the manual air relief valve in the OPEN position.
    4. Remove the filter drain plug and drain water.
    5. Loosen and remove the clamp nut and bolt using ¾" wrenches or hex sockets.
    6. Carefully spread and remove the filter clamp, lifting it over the upper filter body. Avoid dropping or striking the clamp.
    7. Lift off the upper filter body (do not use the pressure gauge for lifting).
  • Removing Cartridges:
    1. Remove the top Manifold.
    2. Remove the filter cartridge elements using a slight rocking motion and lifting up.
    3. Clean filter cartridge elements.
  • Cleaning Cartridges: Cartridge elements can be cleaned by washing inside and outside with a garden hose. For best results, brush the pleated surface to remove fine particles. Do not pressure wash, as it can damage the element.
  • Filter Re-assembly:
    1. Flush and drain any dirt or debris from both the lower and upper filter bodies and around the manual air relief area.
    2. Carefully replace the cartridges over the hubs on the bottom seal plate.
    3. Place the top manifold securely on top of cartridges, aligning the return pipe with the port.
    4. Clean the filter tank seal and seal surface with a clean cloth. Do not use solvents or lubricate the seal.
    5. Place the metal reinforced seal on the lower filter body, then place the upper filter body on the seal, ensuring labels are visible and the upper body is centered. Press down firmly and evenly.
    6. Replace the filter clamp around the upper and lower filter bodies, positioning the clamp ends adjacent to the safety and operation labels.
    7. Insert the clamp bolt through the clamp ends and thread the clamp nut onto the bolt with the rounded end of the nut towards the clamp ends.
    8. Torque the clamp nut to clamp bolt to 150 inch-lbs using a ¾" socket on a torque wrench. Do not rely on hand tightening.
    9. Follow the "Starting the Pump and Filter System" instructions.
  • Manual Air Relief Valve (MAR) Service: For qualified pool professionals only.
    1. Turn off all system circulation pumps and electrical power.
    2. Set all system valves to prevent water flow to the filter.
    3. Place the MAR in the OPEN position.
    4. Wait until all water leakage has stopped.
    5. Remove the air relief valve by screwing it counter-clockwise.
    6. Re-installation: Check o-ring seals, wipe the upper filter body and o-ring groove clean. Align the notch in the MAR flange with the notch on the upper filter body. Press the MAR straight down, then turn clockwise until the indicator is aligned with the "LOCK" position. Verify MAR discharge points away from electrical connections.
  • Winterizing: In areas with subfreezing temperatures, the filter should be drained to prevent damage. Disassemble the filter, clean or replace cartridges, and reassemble. Leave the drain plug unattached during winter to avoid cracking the filter body.
  • Problem Solving: The manual includes a list of common problems (low water flow, short filter cycles, pool water won't clear up) and their remedies, such as checking skimmer/pump baskets, intake/discharge line restrictions, air leaks, algae, and chlorine/pH levels.
  • Component Life: Suction outlet covers and grates have a finite life and should be inspected frequently and replaced as specified.

Reliant RSC Series Specifications

General IconGeneral
BrandReliant
ModelRSC Series
CategoryWater Filtration Systems
LanguageEnglish