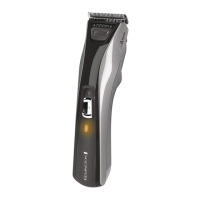
6
, STEP 1 – Nape of the neck
• Set the comb to 3mm or 6mm.
• Hold the clipper with the blade teeth pointing upwards. Begin starting at
the centre of the head at the base of the neck.
• Slowly lift the clipper, working upwards and outwards through the hair,
trimming just a little at a time.
, STEP 2 – Back of the head
• With the comb set at 12mm or 18mm, cut the hair at the back of the head.
, STEP 3 – Side of the head
• With the comb set at 3mm or 6mm, trim sideburns. Then change to the
longer 9mm guide comb and continue to cut the top of the head.
, STEP 4 – Top of the head
• Use the longer length comb attachment and set it to 24mm or 27mm then
cut hair on top of the head against the direction in which the hair normally
grows.
• For longer hair on top, use the longer length comb attachment (24 – 42mm)
to achieve the desired style.
• Always work from the back of the head.
, STEP 5 – The nishing touches
• Use the clipper without an attachment comb for close trimming around the
base and sides of the neck.
• To produce a clean straight line at the sideburns, reverse the hair clipper.
• Place the reversed clipper at right angles to the head, tips of the blades
lightly touching the skin and then work downwards.
, SHORT TAPERED STYLES – “FLAT TOPS” & SHORT CUTS
• Startingwiththelongestguidecombattached(24-42mm),cutfromthe
back of the neck to the crown. Hold the guide comb at against the head
and slowly move the clipper through the hair.
• Usethesameprocedurefromthelowersidetotheuppersideofthehead.
Then cut the hair against the direction in which it grows and level with the
sides.
• Togivea“attop”look,thehairontopoftheheadmustbecutoverthetop
of a at comb.
• Useacloserguidecombtotaperthehairdowntothenecklineasdesired.
 Loading...